eWeLink Community Knowledge Base
Link 2 scenes to schortcuts in eWeLink Keyboard
eWeLink Keyboard was released on June 11th, 2021 and can be downloaded at https://keyboard.ewelink.cn. It allows users to press on a keyboard shortcut to easily perform a range of actions on eWeLink supported devices. The application is available to Windows PC’s and a Mac OS version is in the works (status of June 14th, 2021).
This tutorial explains how to link 2 scenes to shortcuts to create an alternating effect on 4 lights connected to a 4-gang switch such as a Sonoff 4CHPROR3.
WARNING!
Index
We start with:
Then we explain our goal:
Then we make the required scenes:
Then we configure the eWeLink Keyboard application:
Then we need to create a link between the scenes and the shortcuts:
And then we explain how to use the eWeLink Keyboard application to operate the scenes:
And at the end:
Preparations
We asume you know how to use the eWeLink app and pair the 4-gang switch to it.
Then you will need to have an eWeLink VIP subscription to unlock the full potential of eWeLink Keyboard. With a subscription you can have 6 active shortcuts. With the free version of eWeLink you can only have 1 active shortcut. You can view the other benefits of an eWeLink VIP subscription here: What are the benefits of the eWeLink subscriptions plans? And how to subscribe can be found here: How can I subscribe for a subscription plan?
At last you need to download the eWeLink Keyboard application from https://keyboard.ewelink.cn. You may want to install it in advanced to the steps of the tutorial below. Configuring will be explained below in this tutorial.
Situation example
We want to be able to alternate the light with the shortcuts on the computer. You can see it in schematic below:
Odd connections on
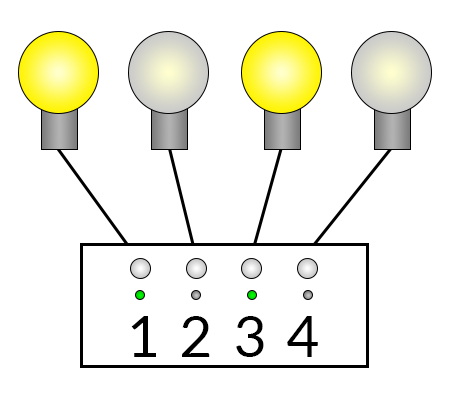
We will use the button combination CTRL + SHIFT + 1 to turn the odd connections (1 and 3) on and the even connections (2 and 4) off.
Even connections on
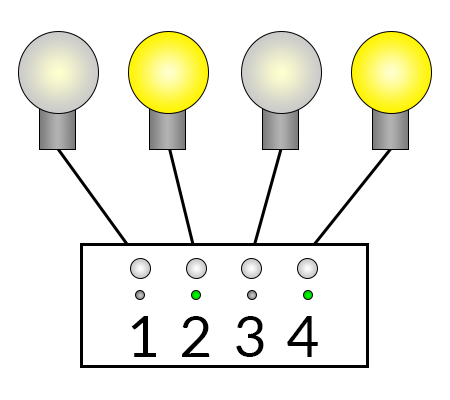
With the button combination CTRL + SHIFT + 2 we want to turn the odd connections (1 and 3) off and the even connections (2 and 4) on.
Setup scene for odd gangs
Let’s begin with the odd gangs to turn them on with a scene. The even ones will go off in this scene.
Step 1
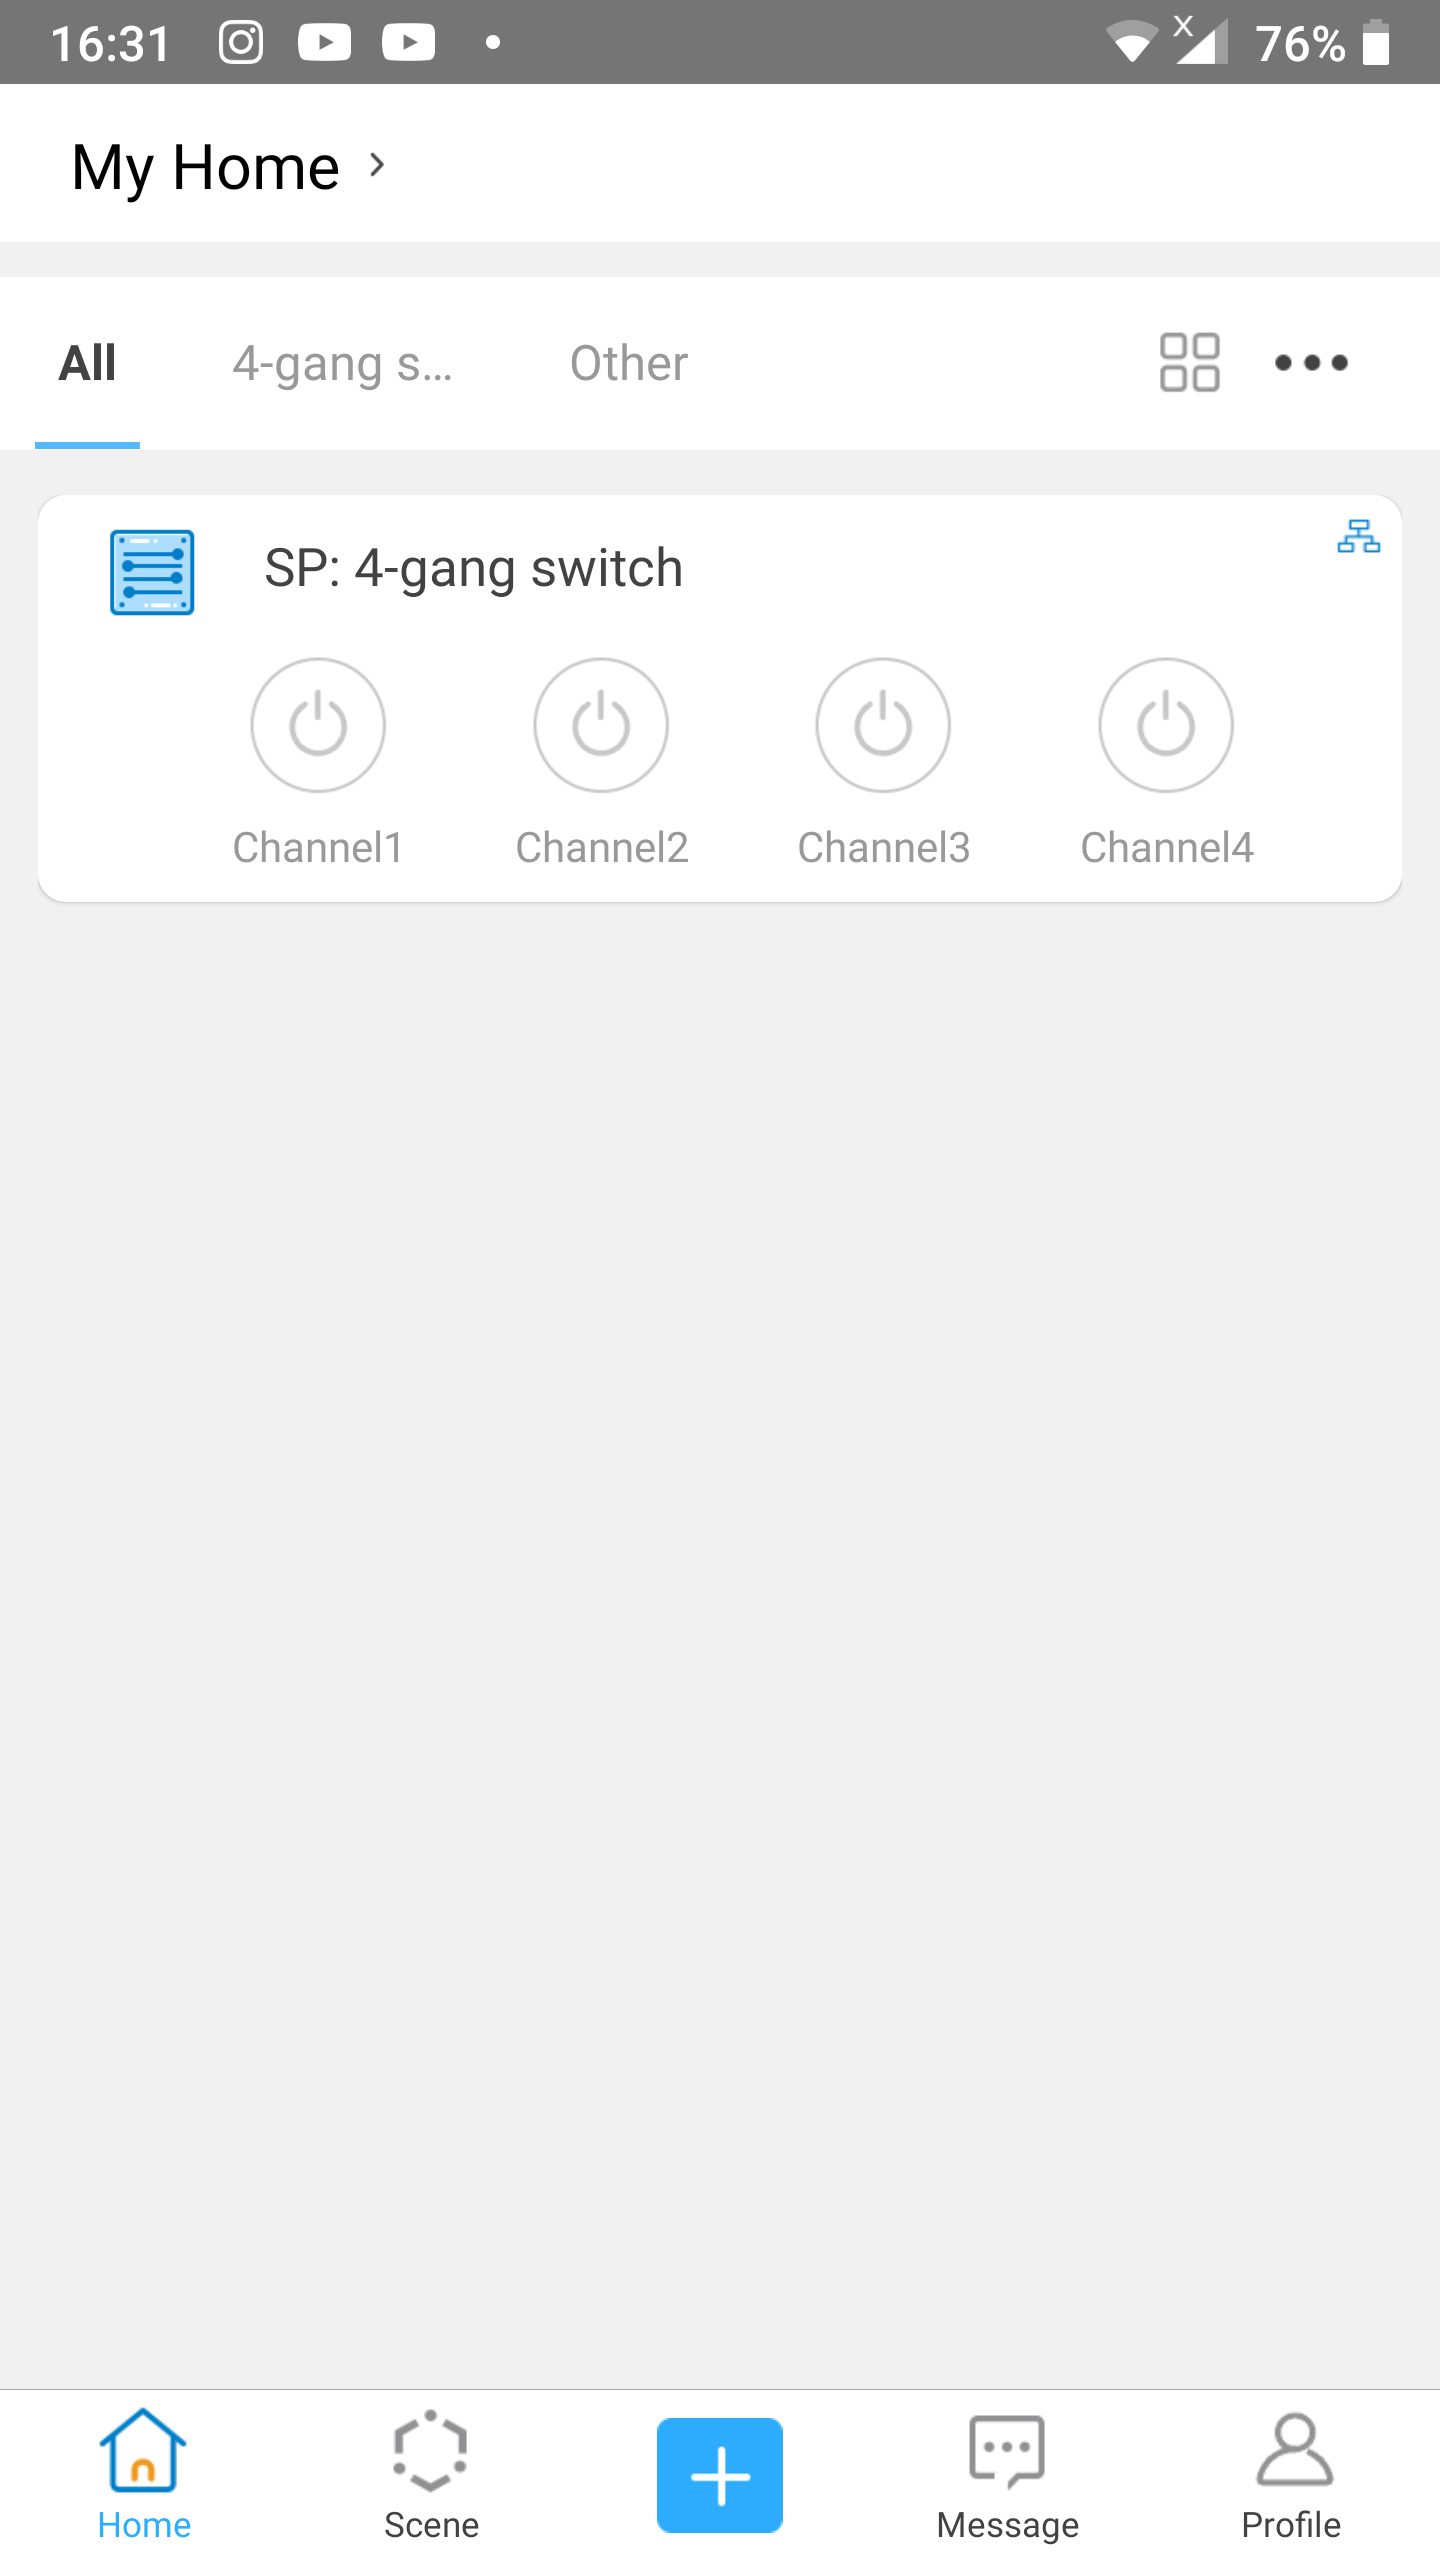
- On the start screen of the eWeLink app tap
Sceneat the bottom bar.
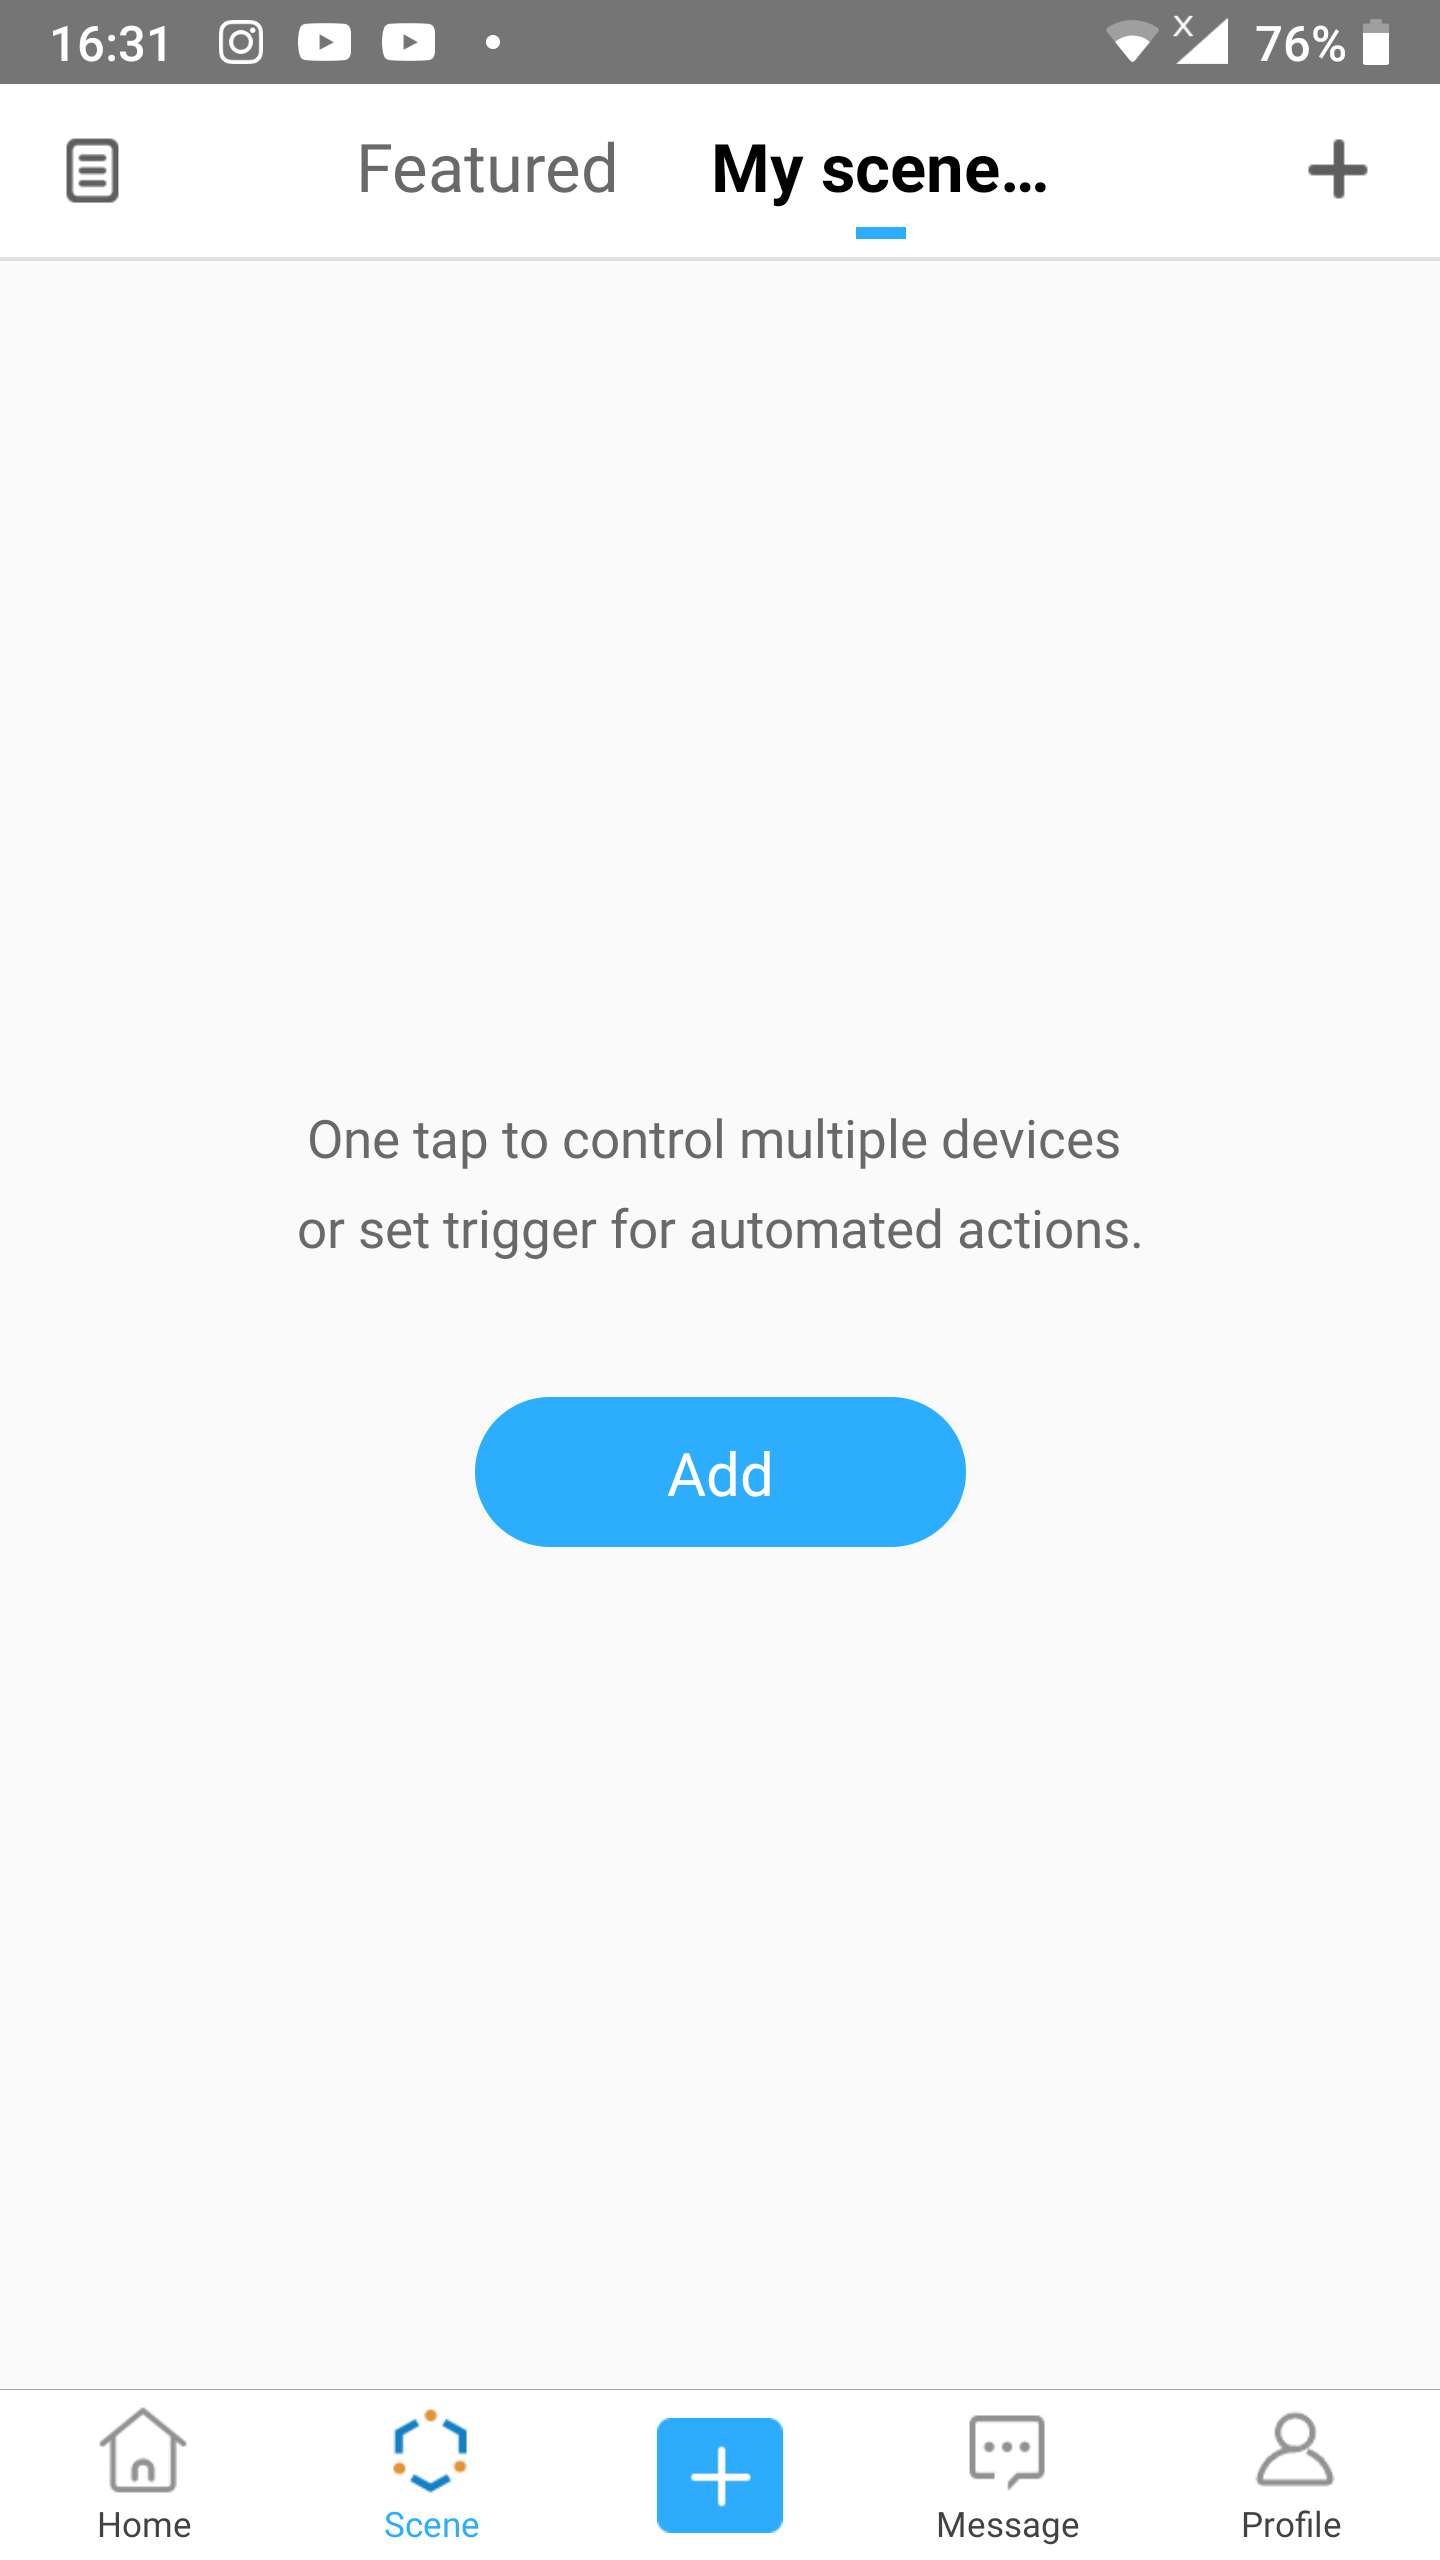
Step 2
- On the Scene screen tap the plus-sign at the upper right corner to add a new scene.
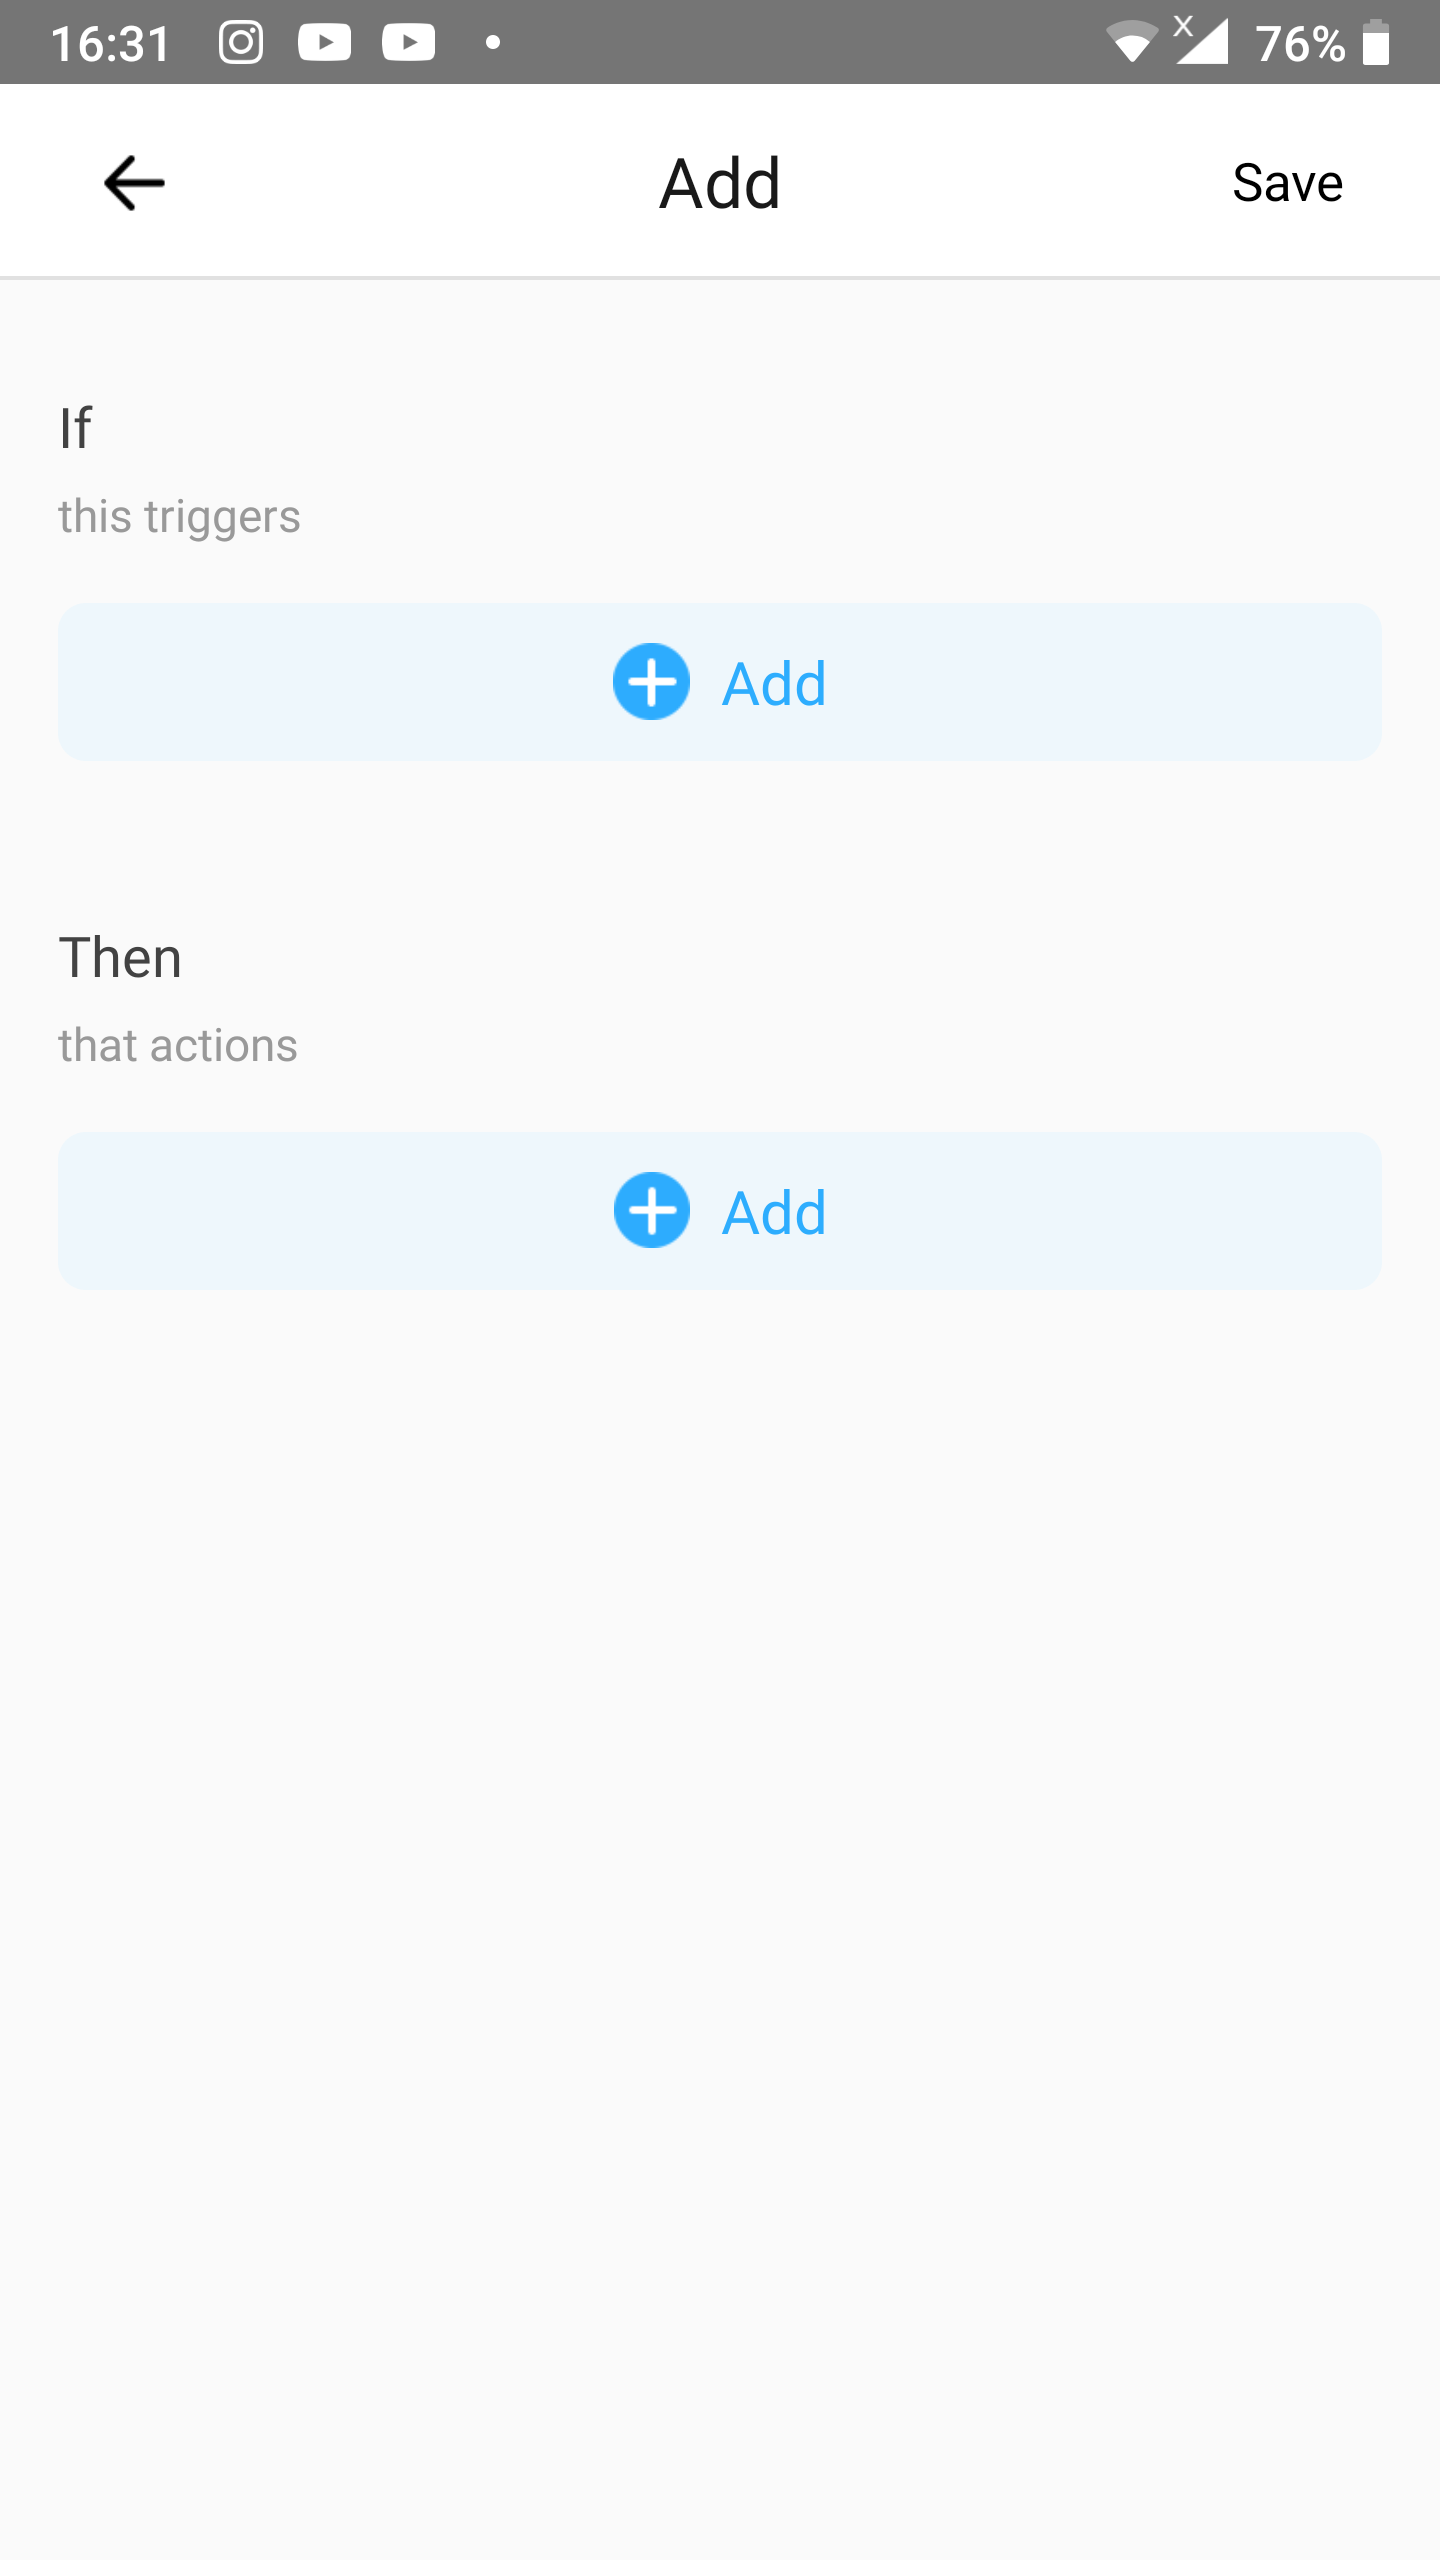
Step 3
- Tap
AddbelowIf.
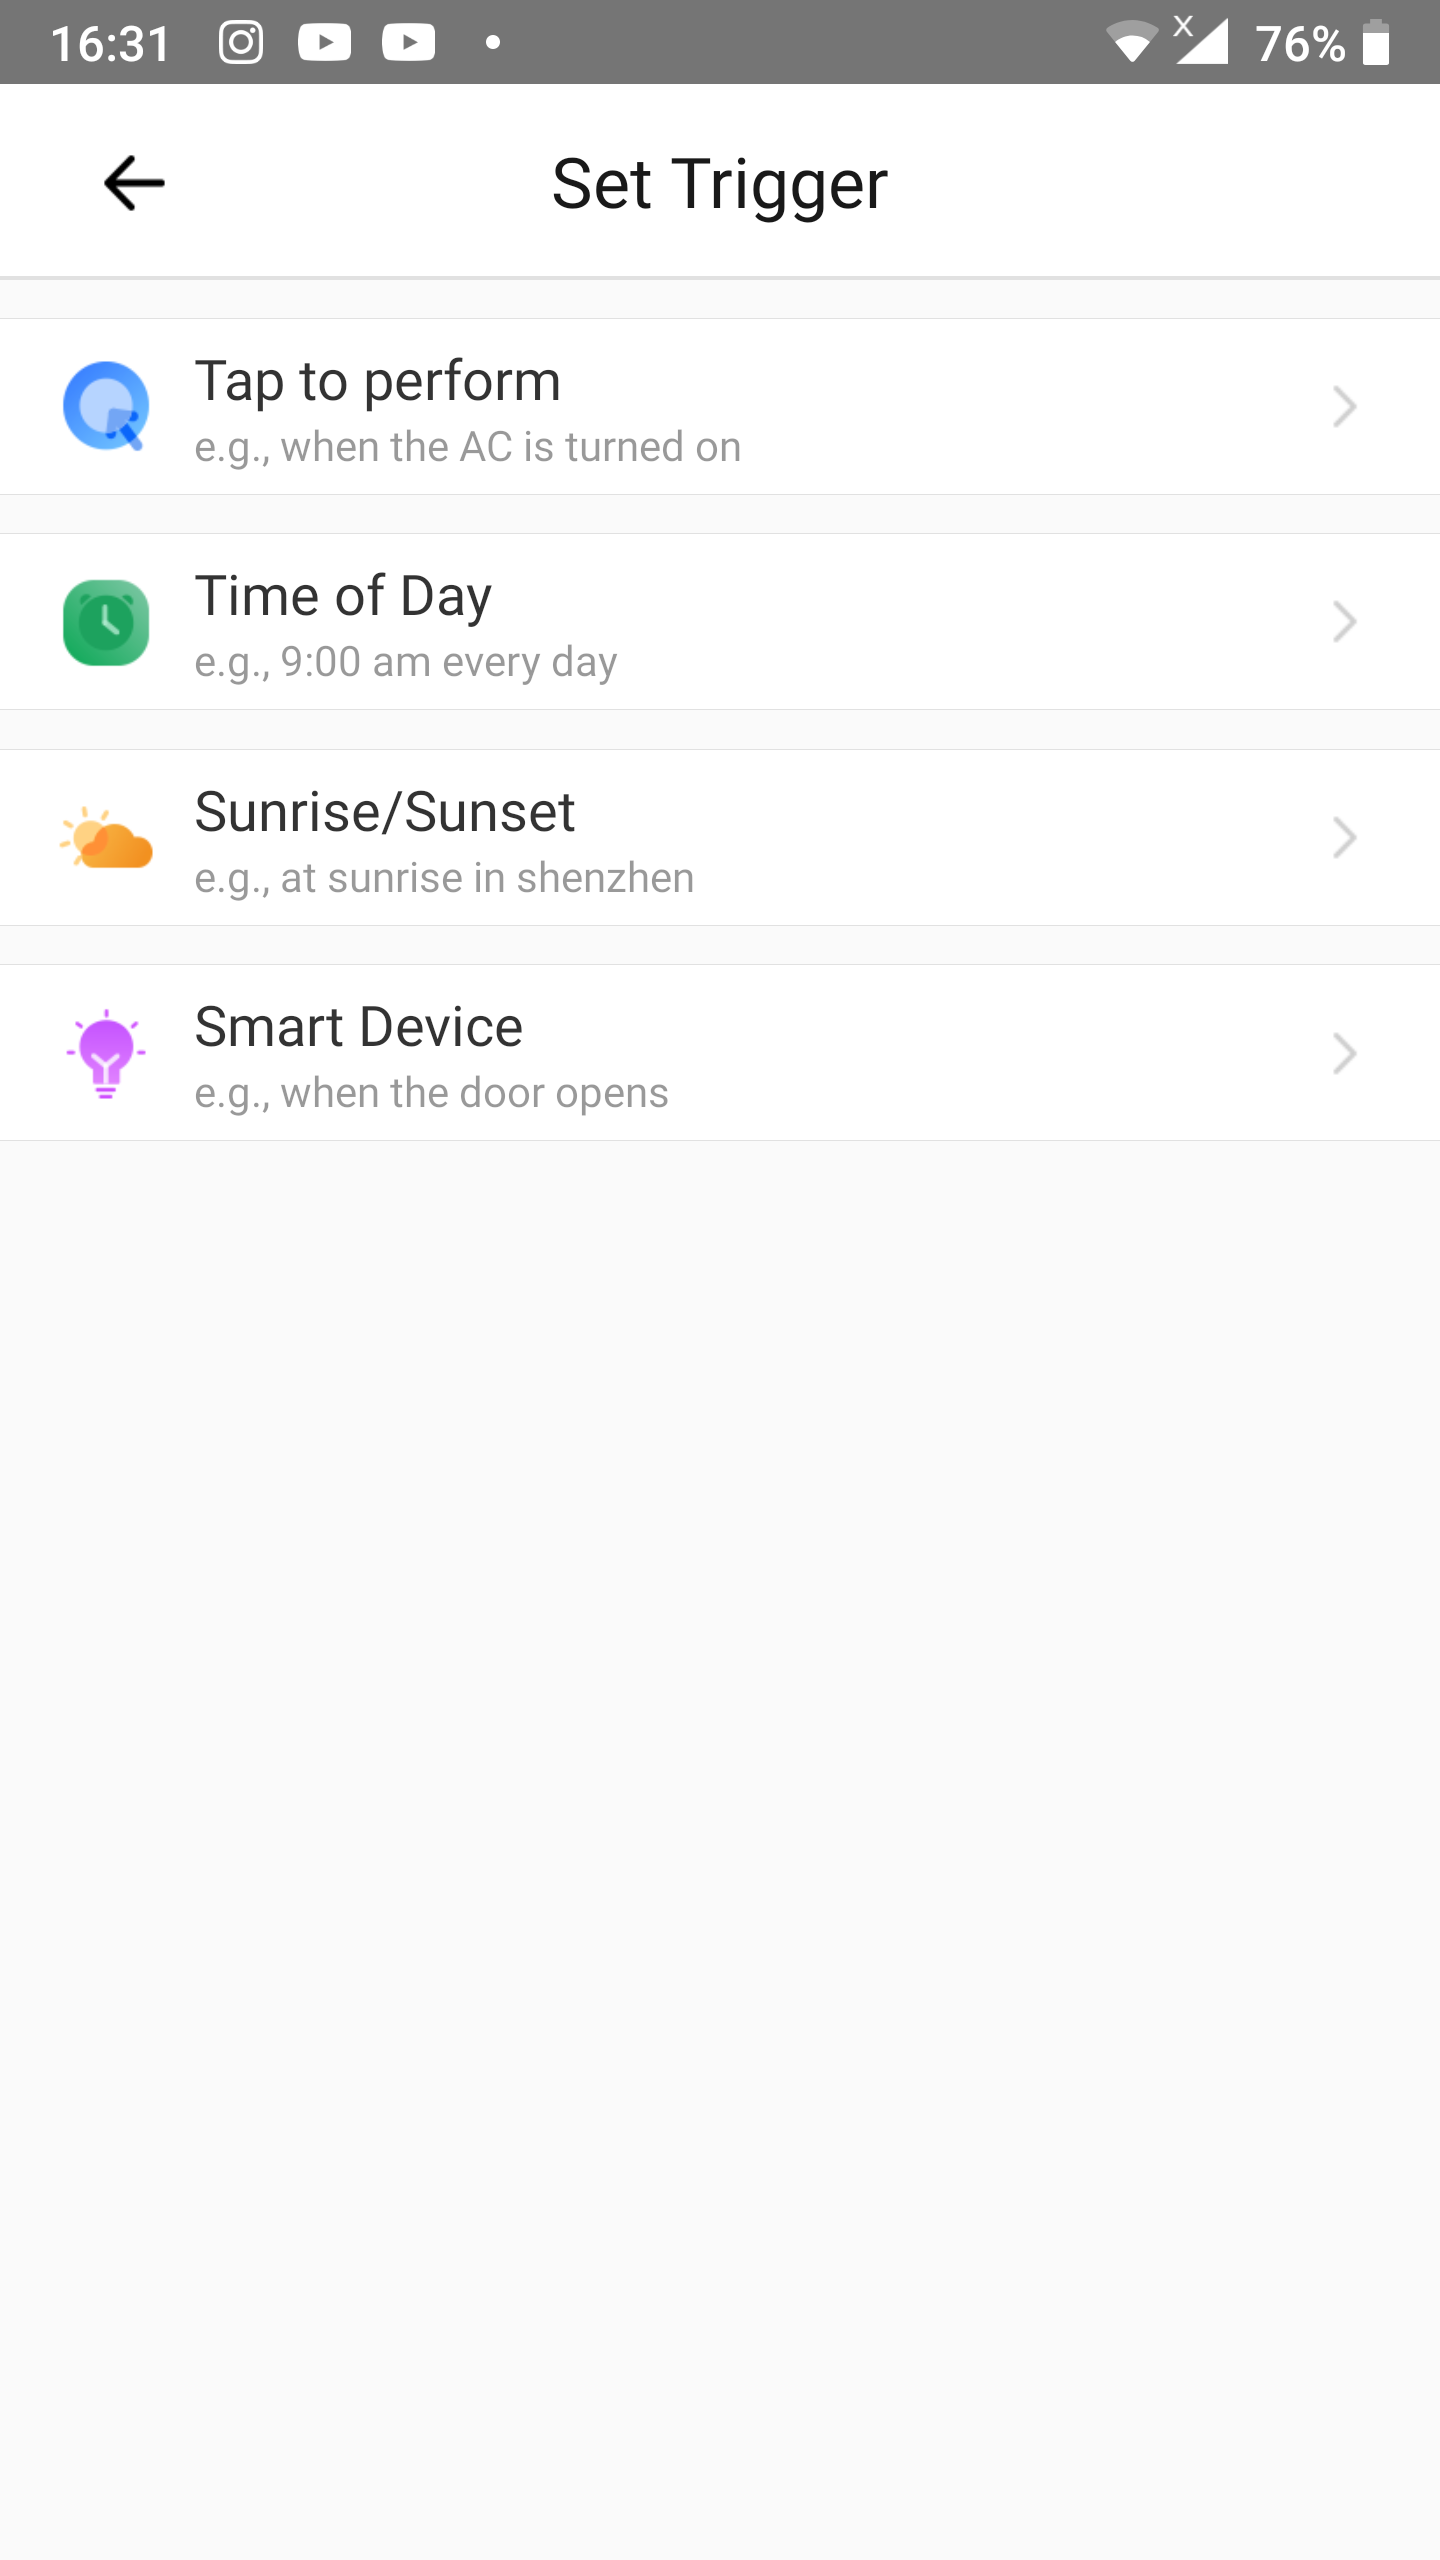
Step 4
- Tap
Tap to perform.- This will create a manual scene.
Step 5
- Once you are back on the scene
Addscreen you need to tap onAddbelowThen.
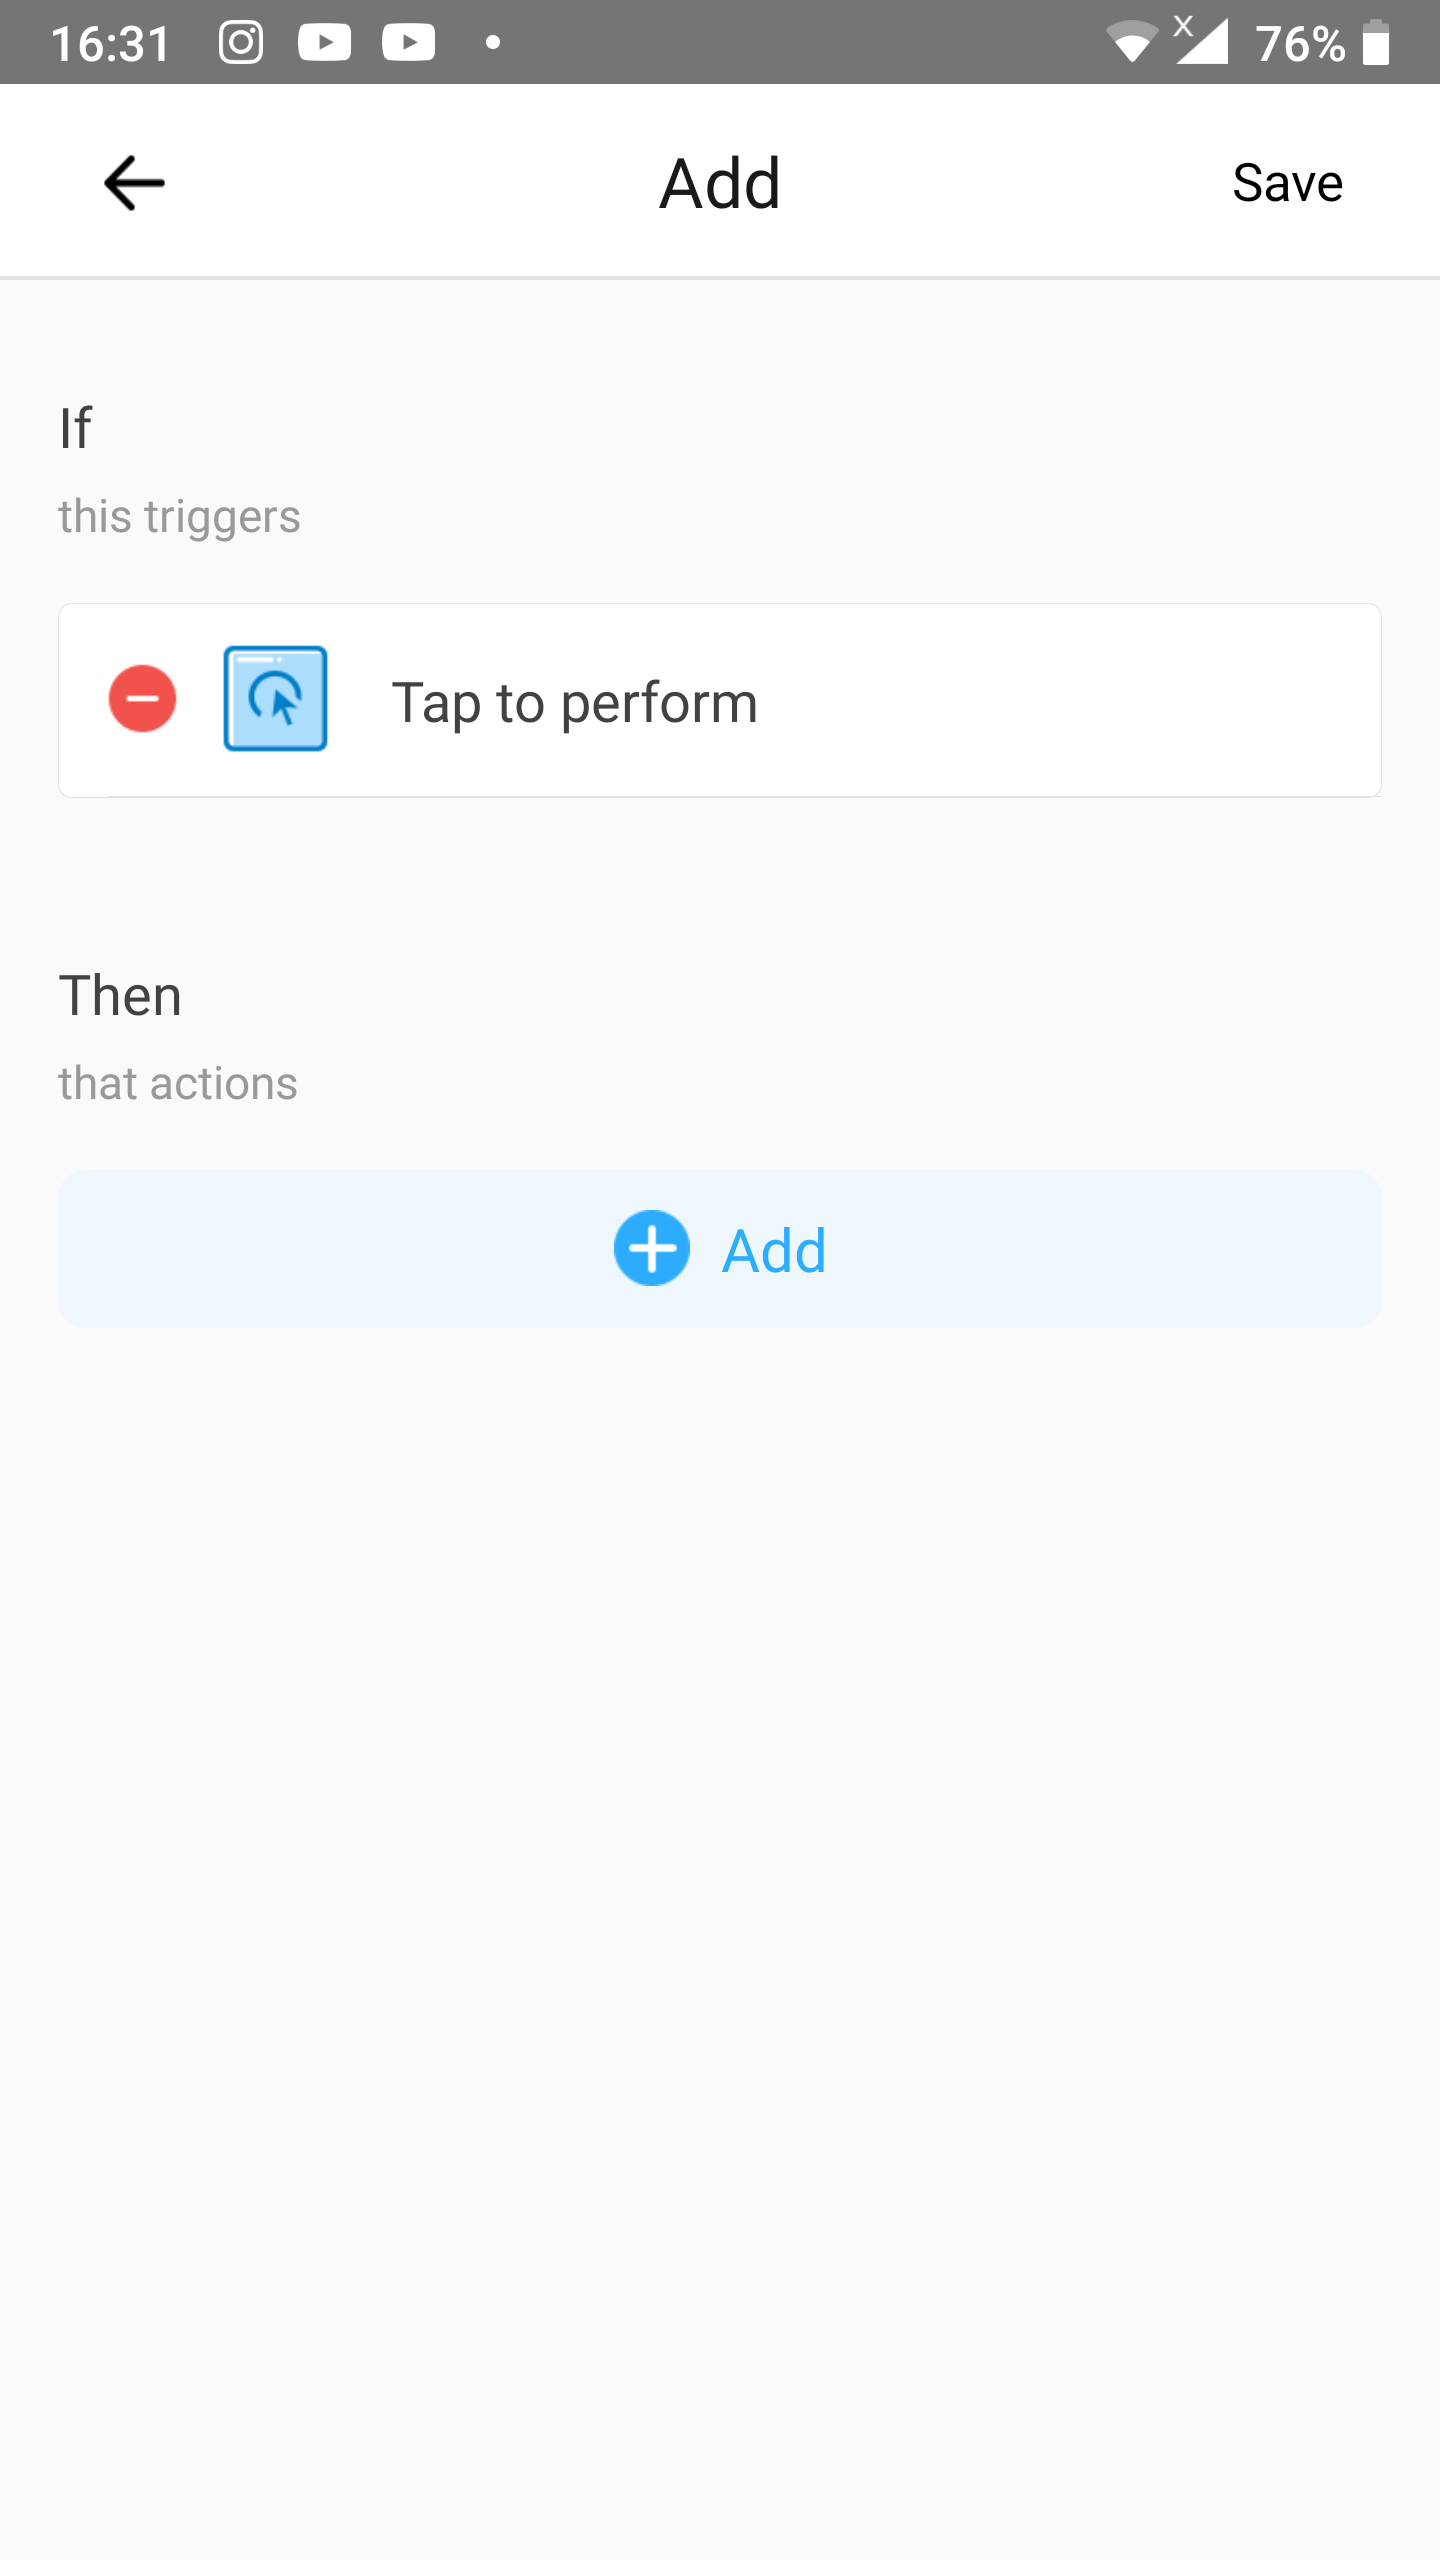
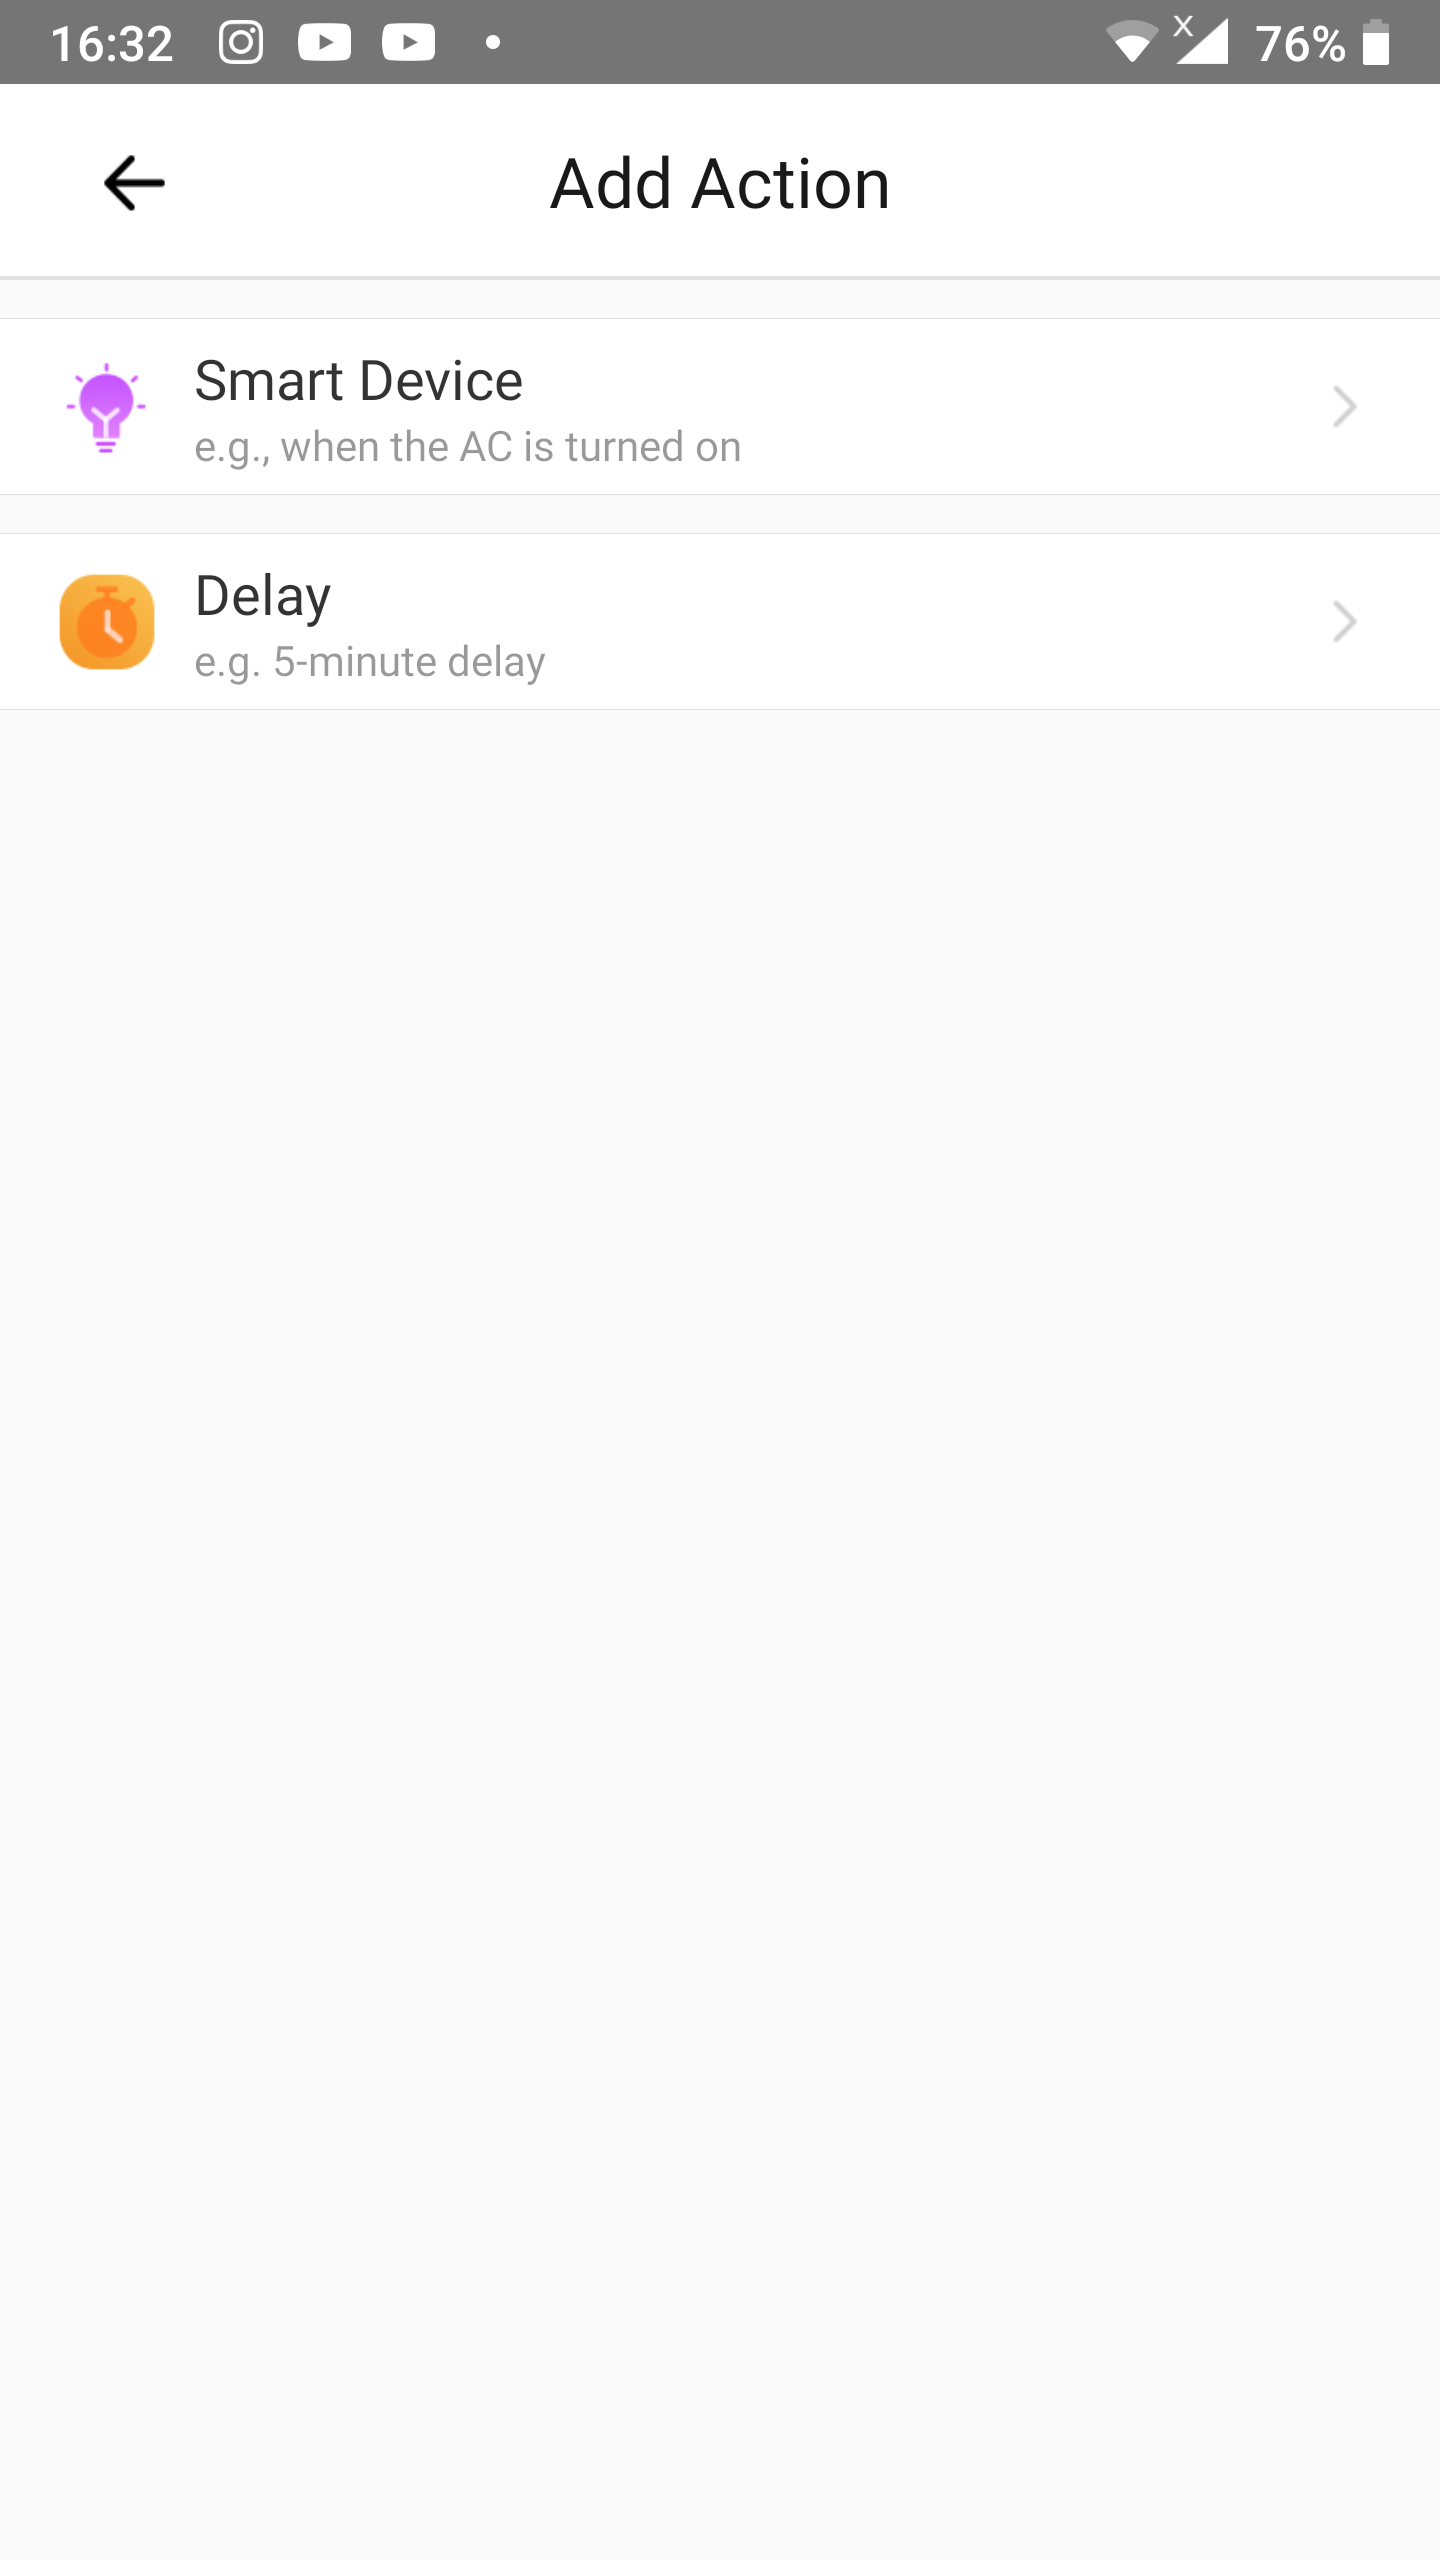
Step 6
- Tap
Smart Device.
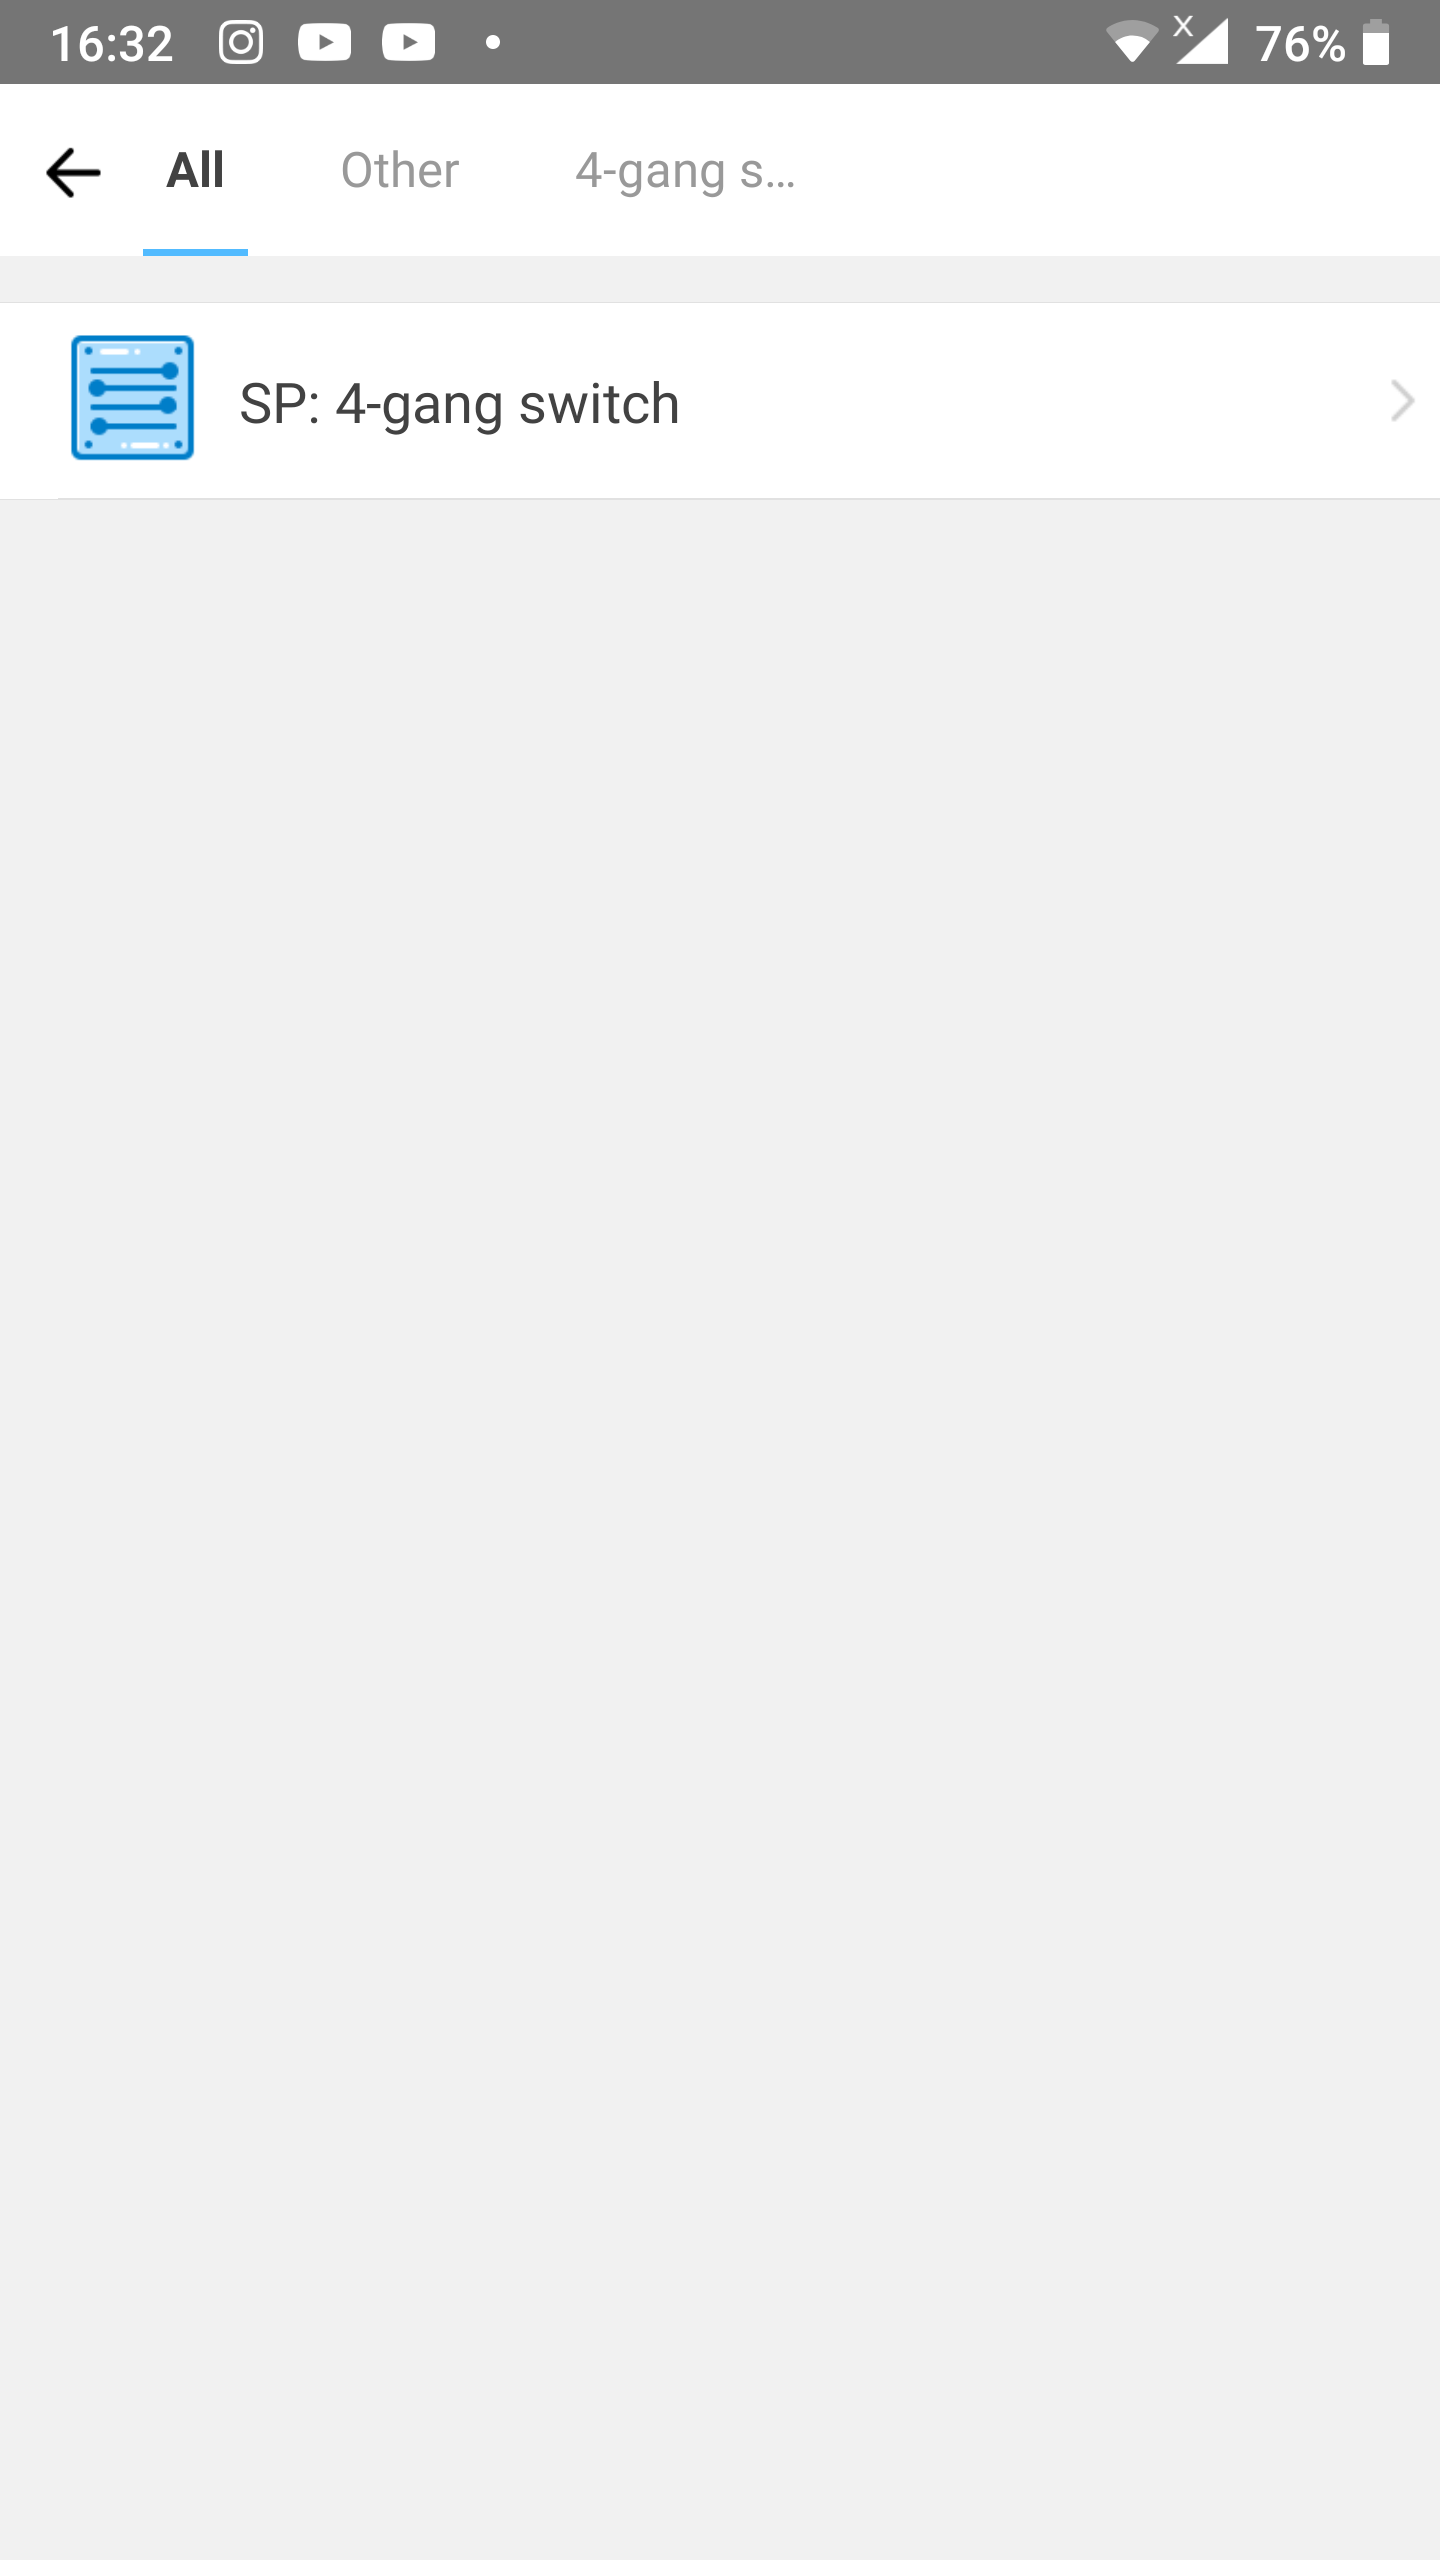
Step 7
- Select a device for the action.
- In our example we use
SP: 4-gang switch.
- In our example we use
Step 8
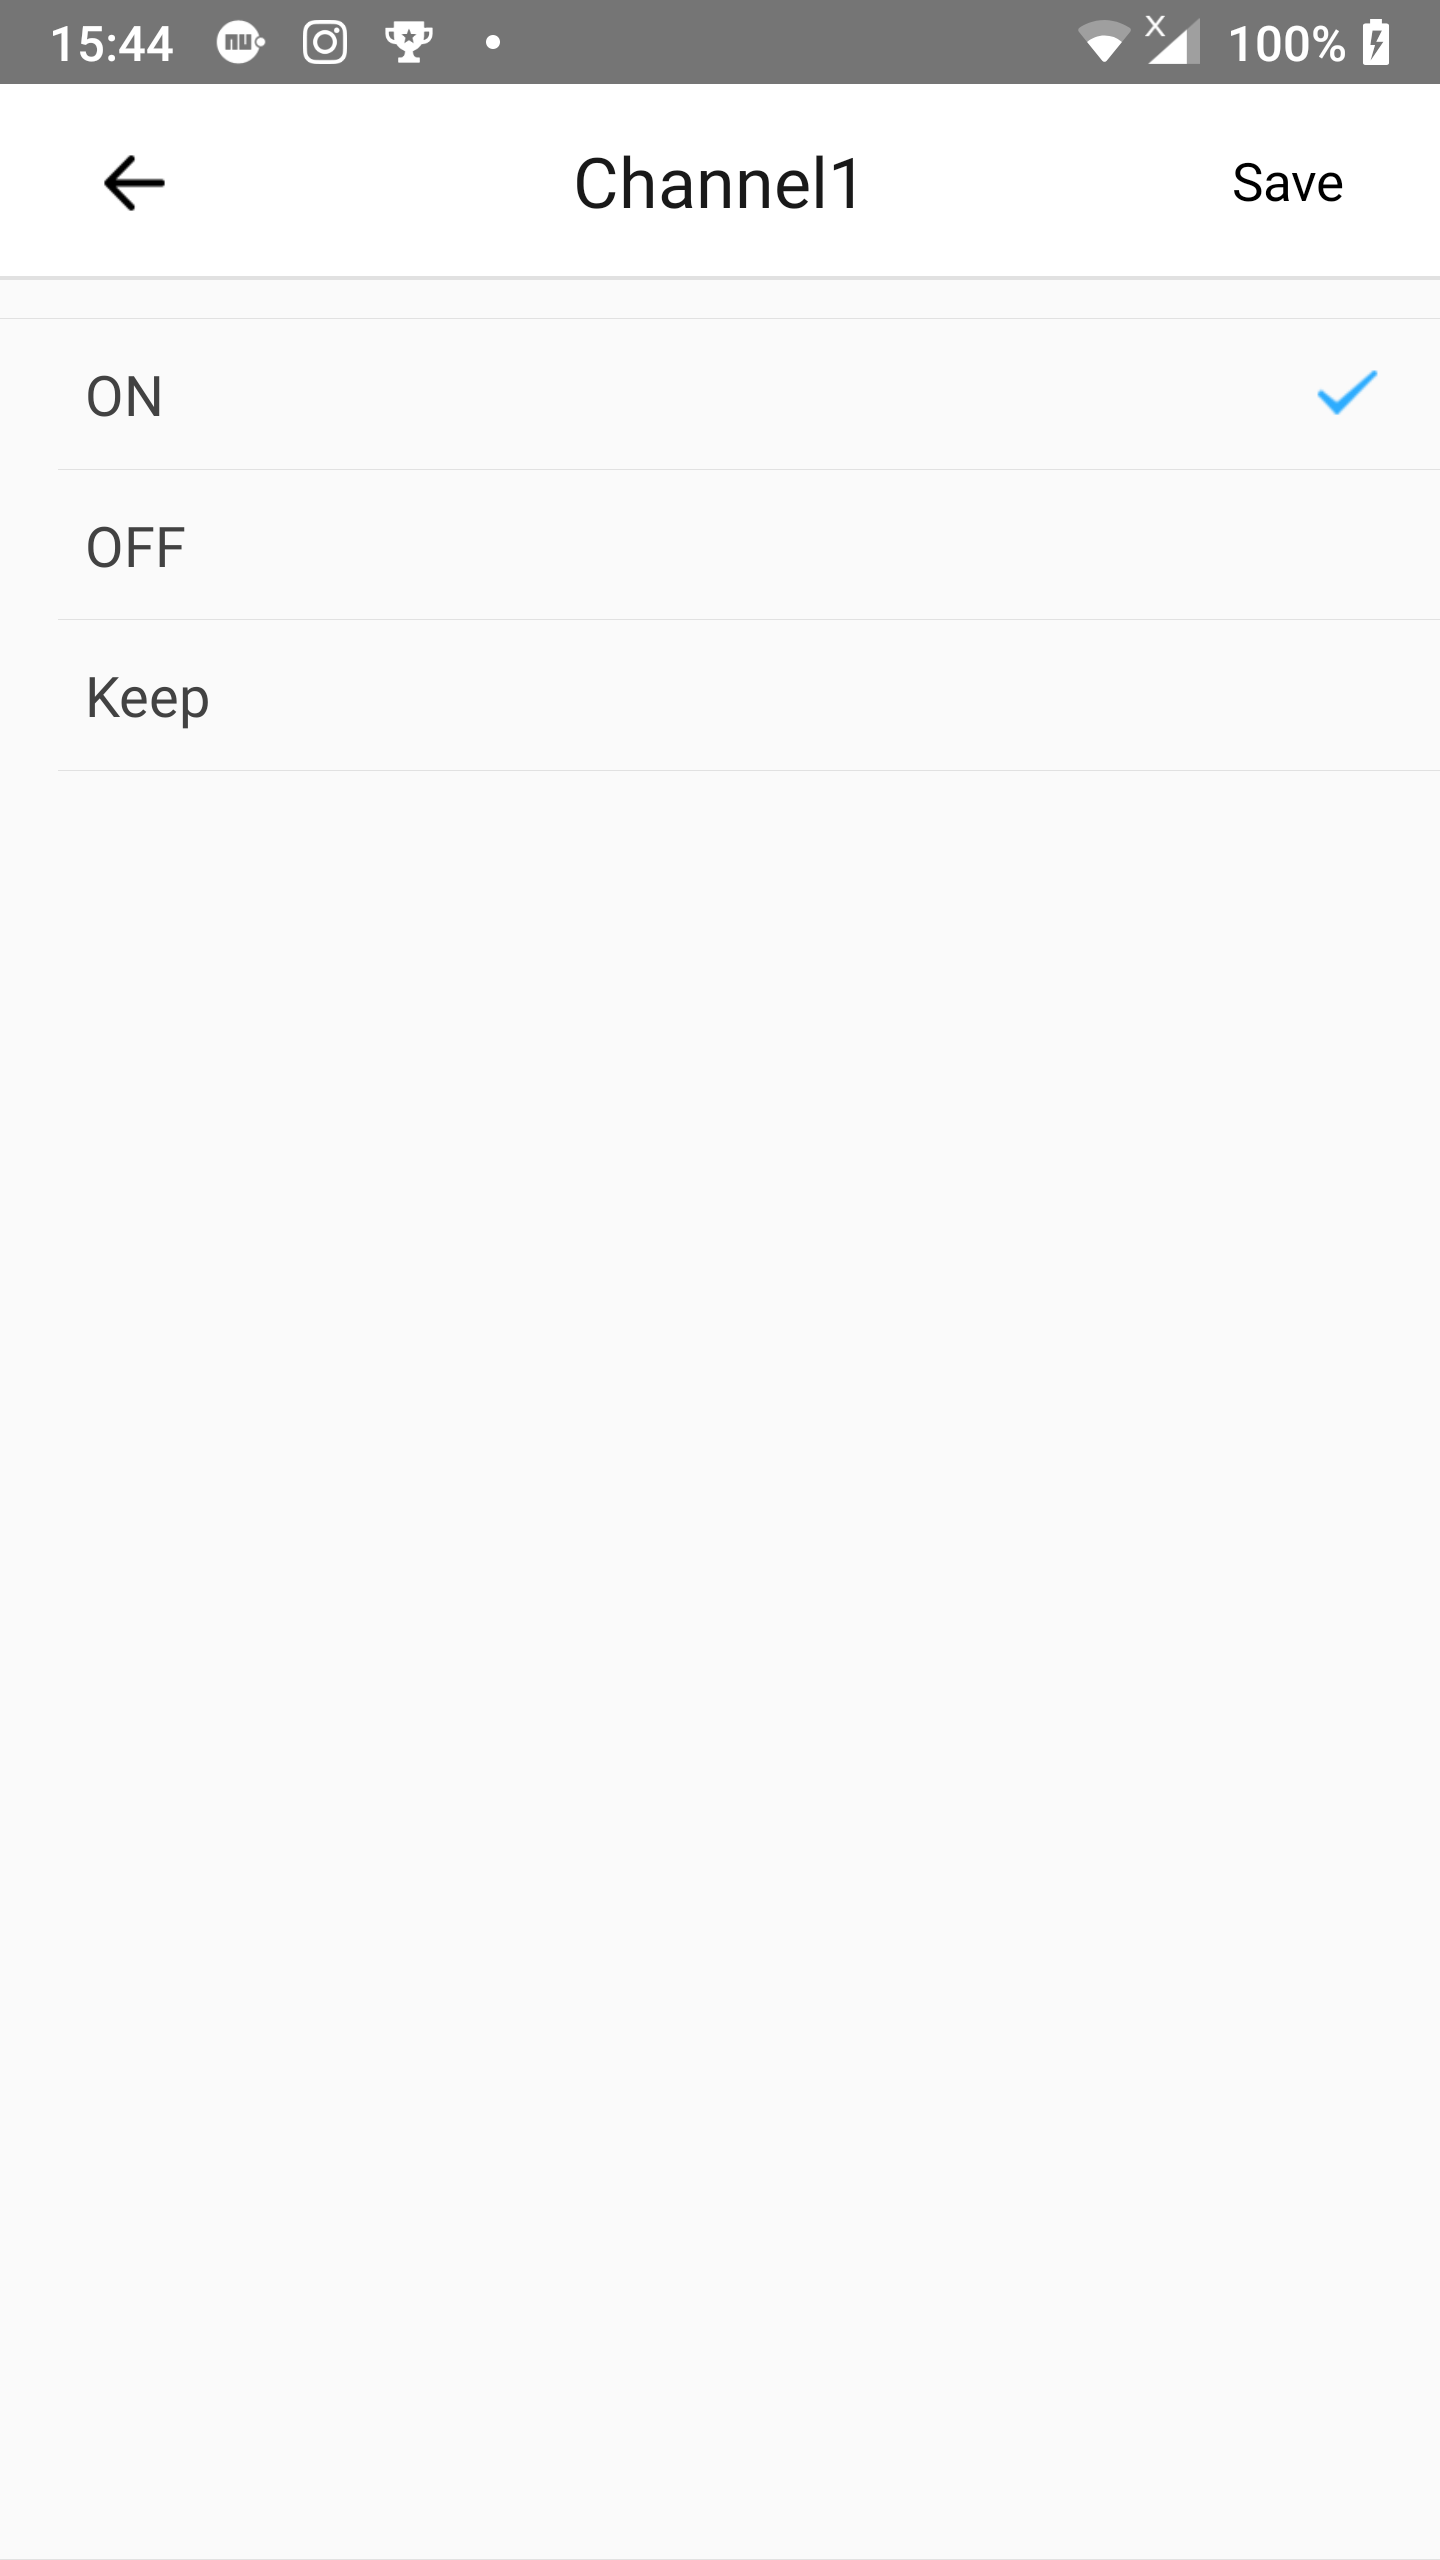
- Choose the correct action of your device.
- In our example we need to choose the desired changes for each channel. Tap
Channel1orKeepafter that name.
- In our example we need to choose the desired changes for each channel. Tap

Step 9
- Choose the action
ON. A checkmark will be shown at the end of the line. - Then press
Save.
Step 10
- Repeat step 8 and 9 for
Channel3. - Then proceed to step 11.
Step 11
- Repeat step 8 and 9 for
Channel2andChannel4, but now chooseOFFas action. - Then proceed to step 12.
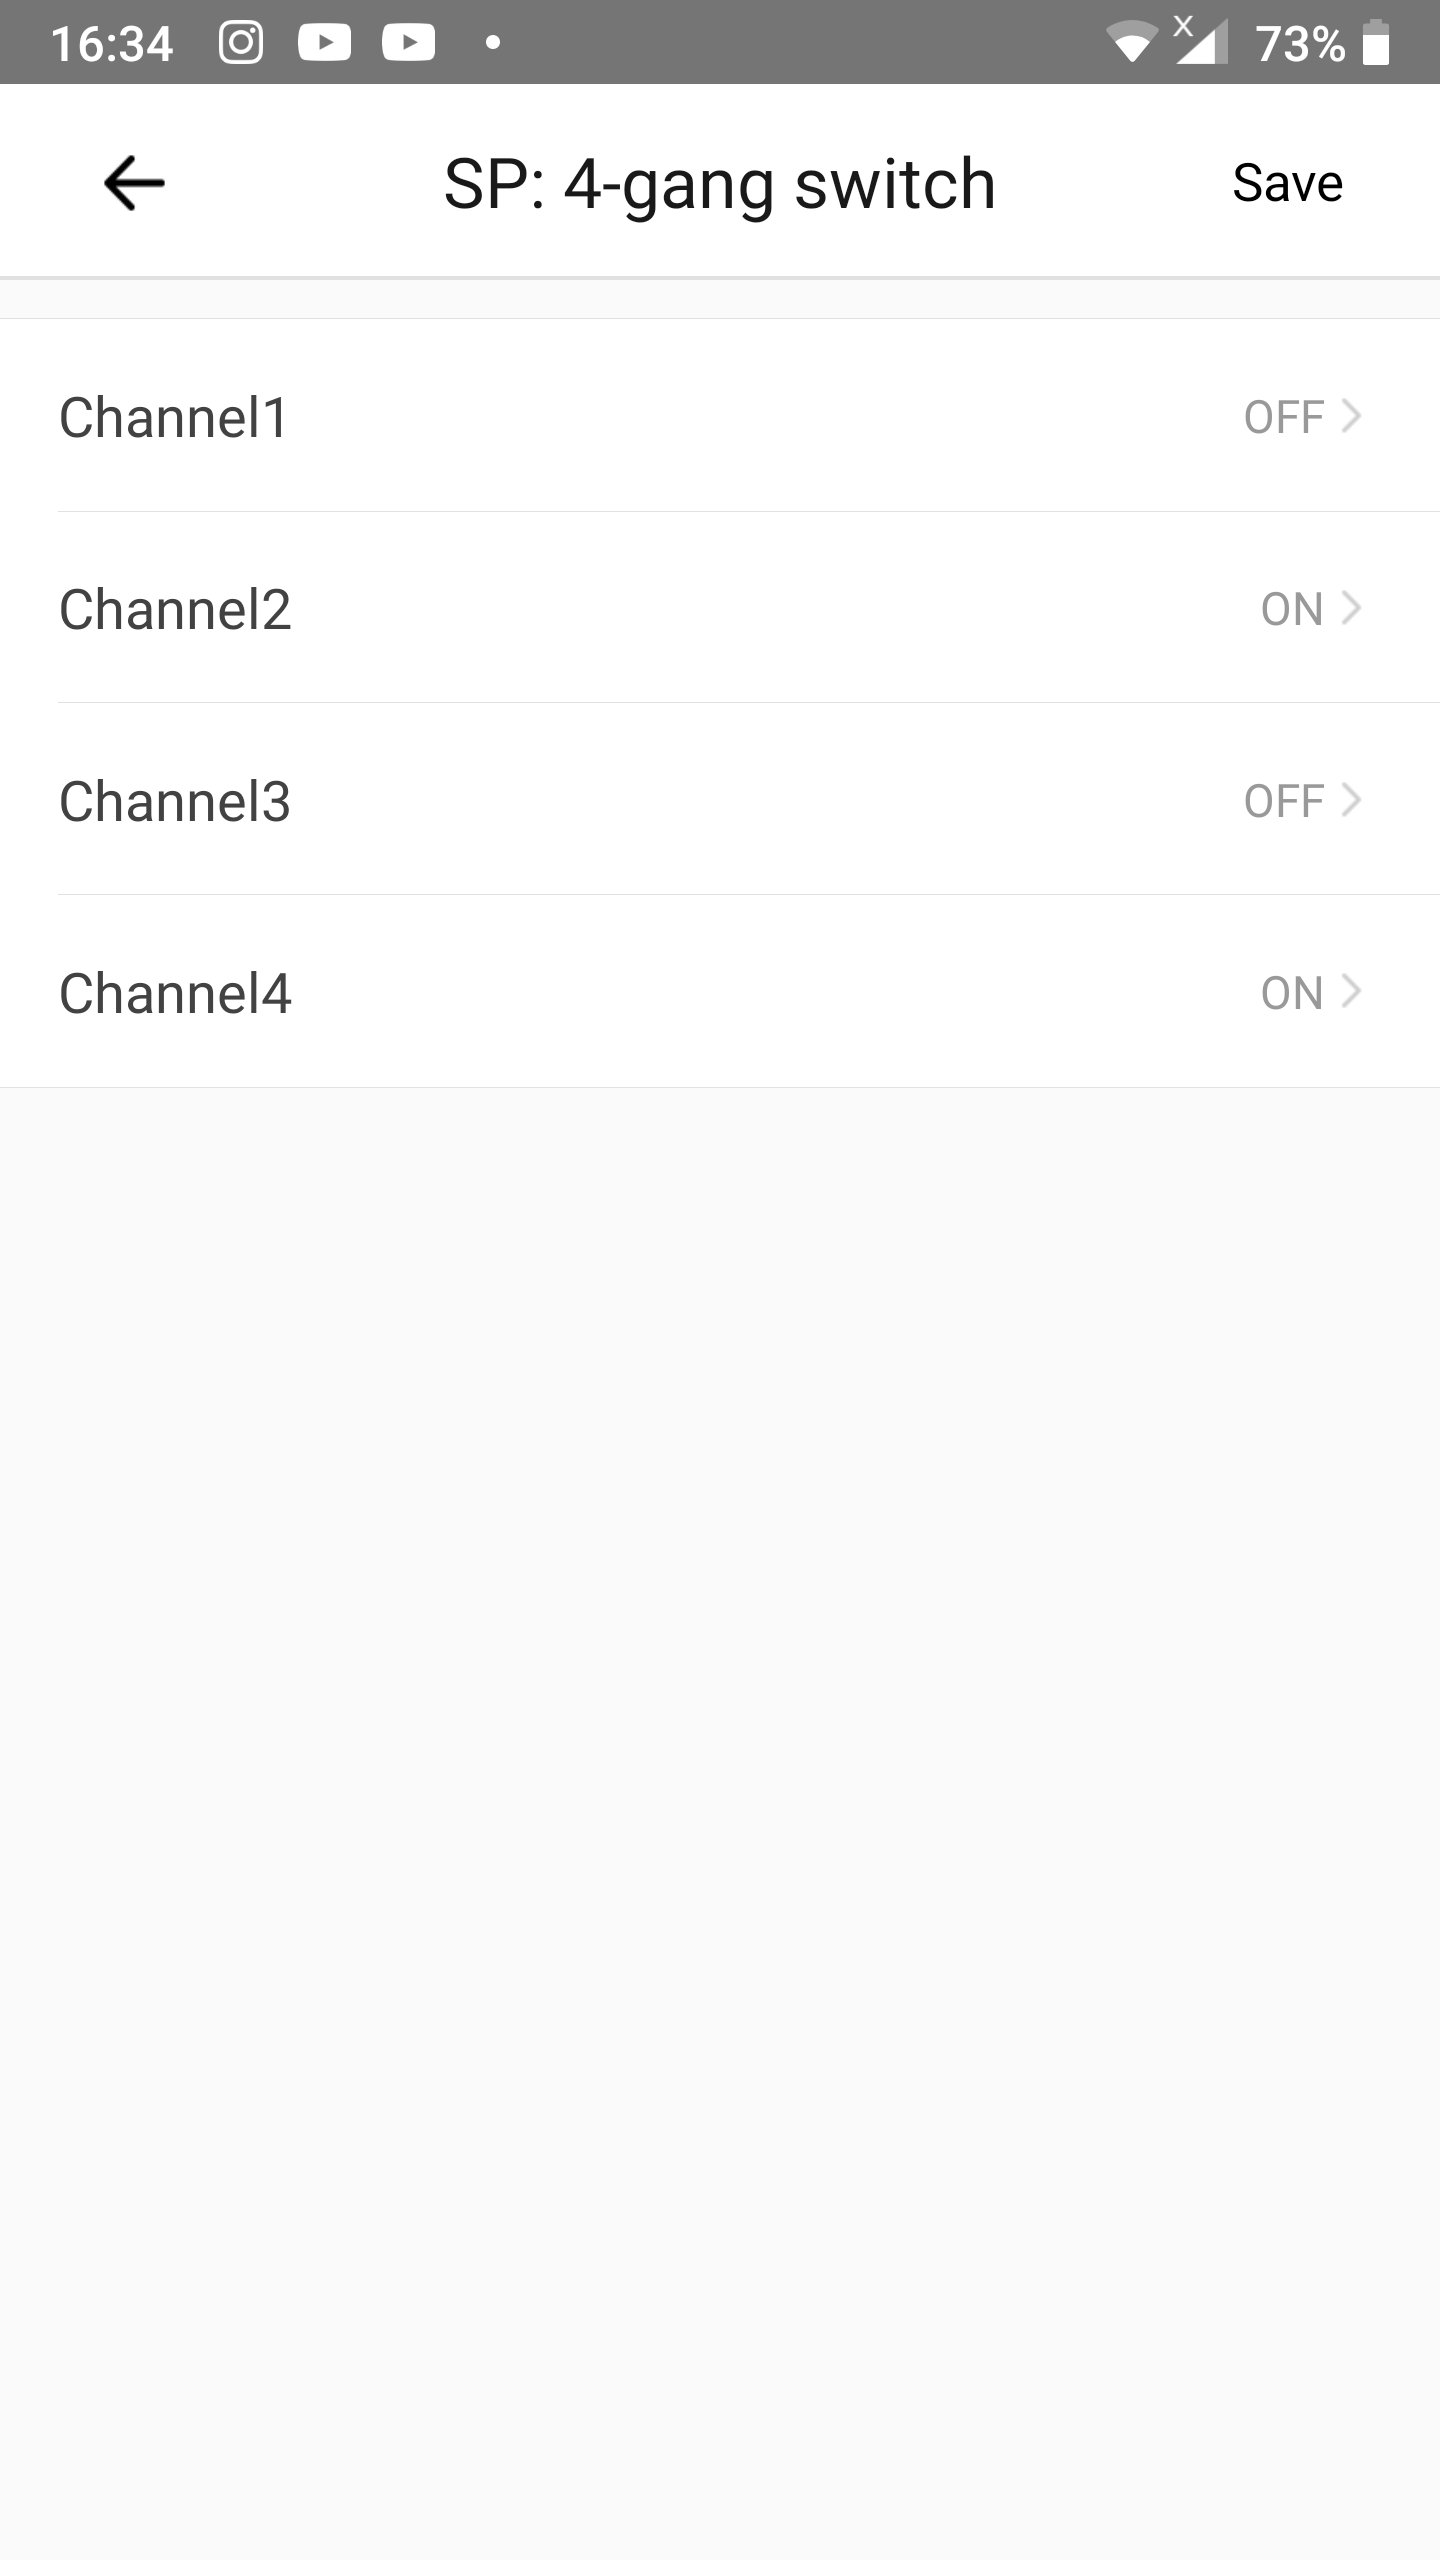
Step 12
- Your 4-gang switch action overview should now look like our screenshot shown on the right (desktop) or below (mobile). You see the actions are alternating:
ON,OFF,ON,OFF. - Tap
Save.

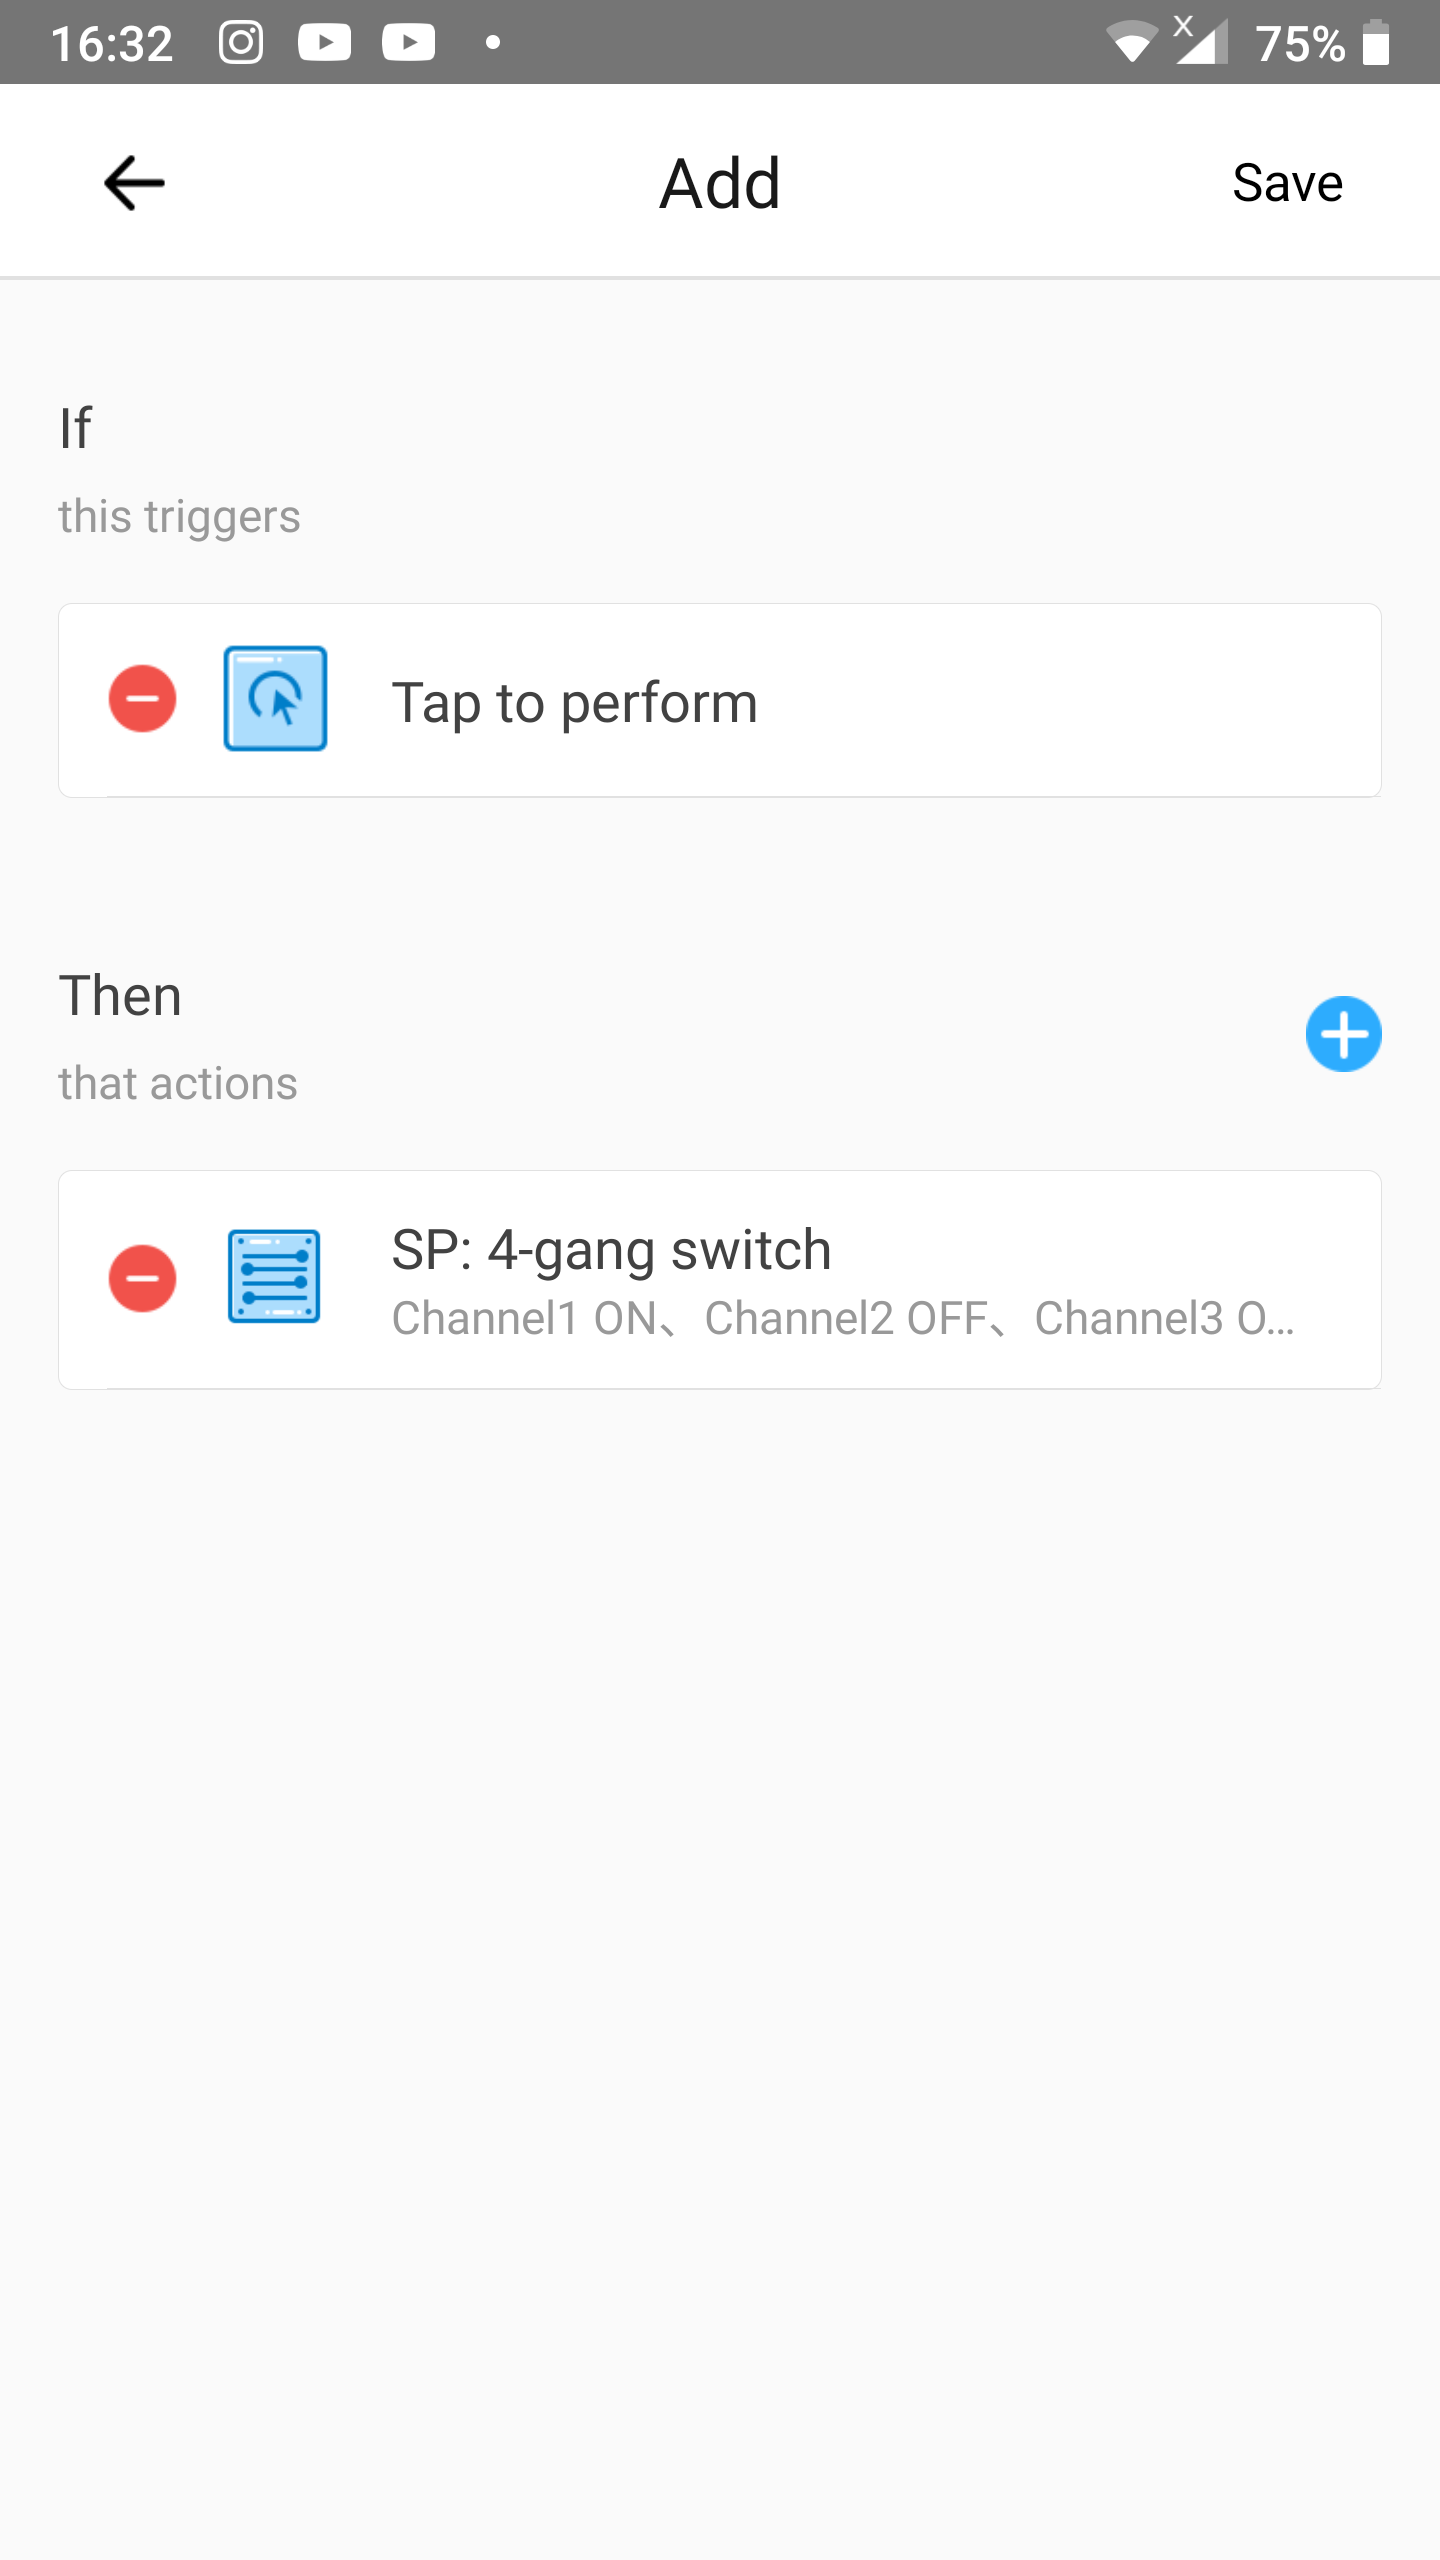
Step 13
- Your scene
Addscreen should now look like our screenshot on the right (desktop) or below (mobile). - Tap
Save.
Step 14
- Fill in a name for the scene after
Name.- We named it
4-gang oddin our example.
- We named it
- Tap
Save.

Setting up the scene for odd gangs is now complete.
Setup scene for even gangs
Now we create a sceneto turn the even gangs on and the the odd ones off.
Step 1
- On the start screen of the eWeLink app tap
Sceneat the bottom bar.
Step 2
- On the Scene screen tap the plus-sign at the upper right corner to add a new scene.
Step 3
- Tap
AddbelowIf.
Step 4
- Tap
Tap to perform.- This will create a manual scene.
Step 5
- Once you are back on the scene
Addscreen you need to tap onAddbelowThen.
Step 6
- Tap
Smart Device.
Step 7
- Select a device for the action.
- In our example we use
SP: 4-gang switch.
- In our example we use
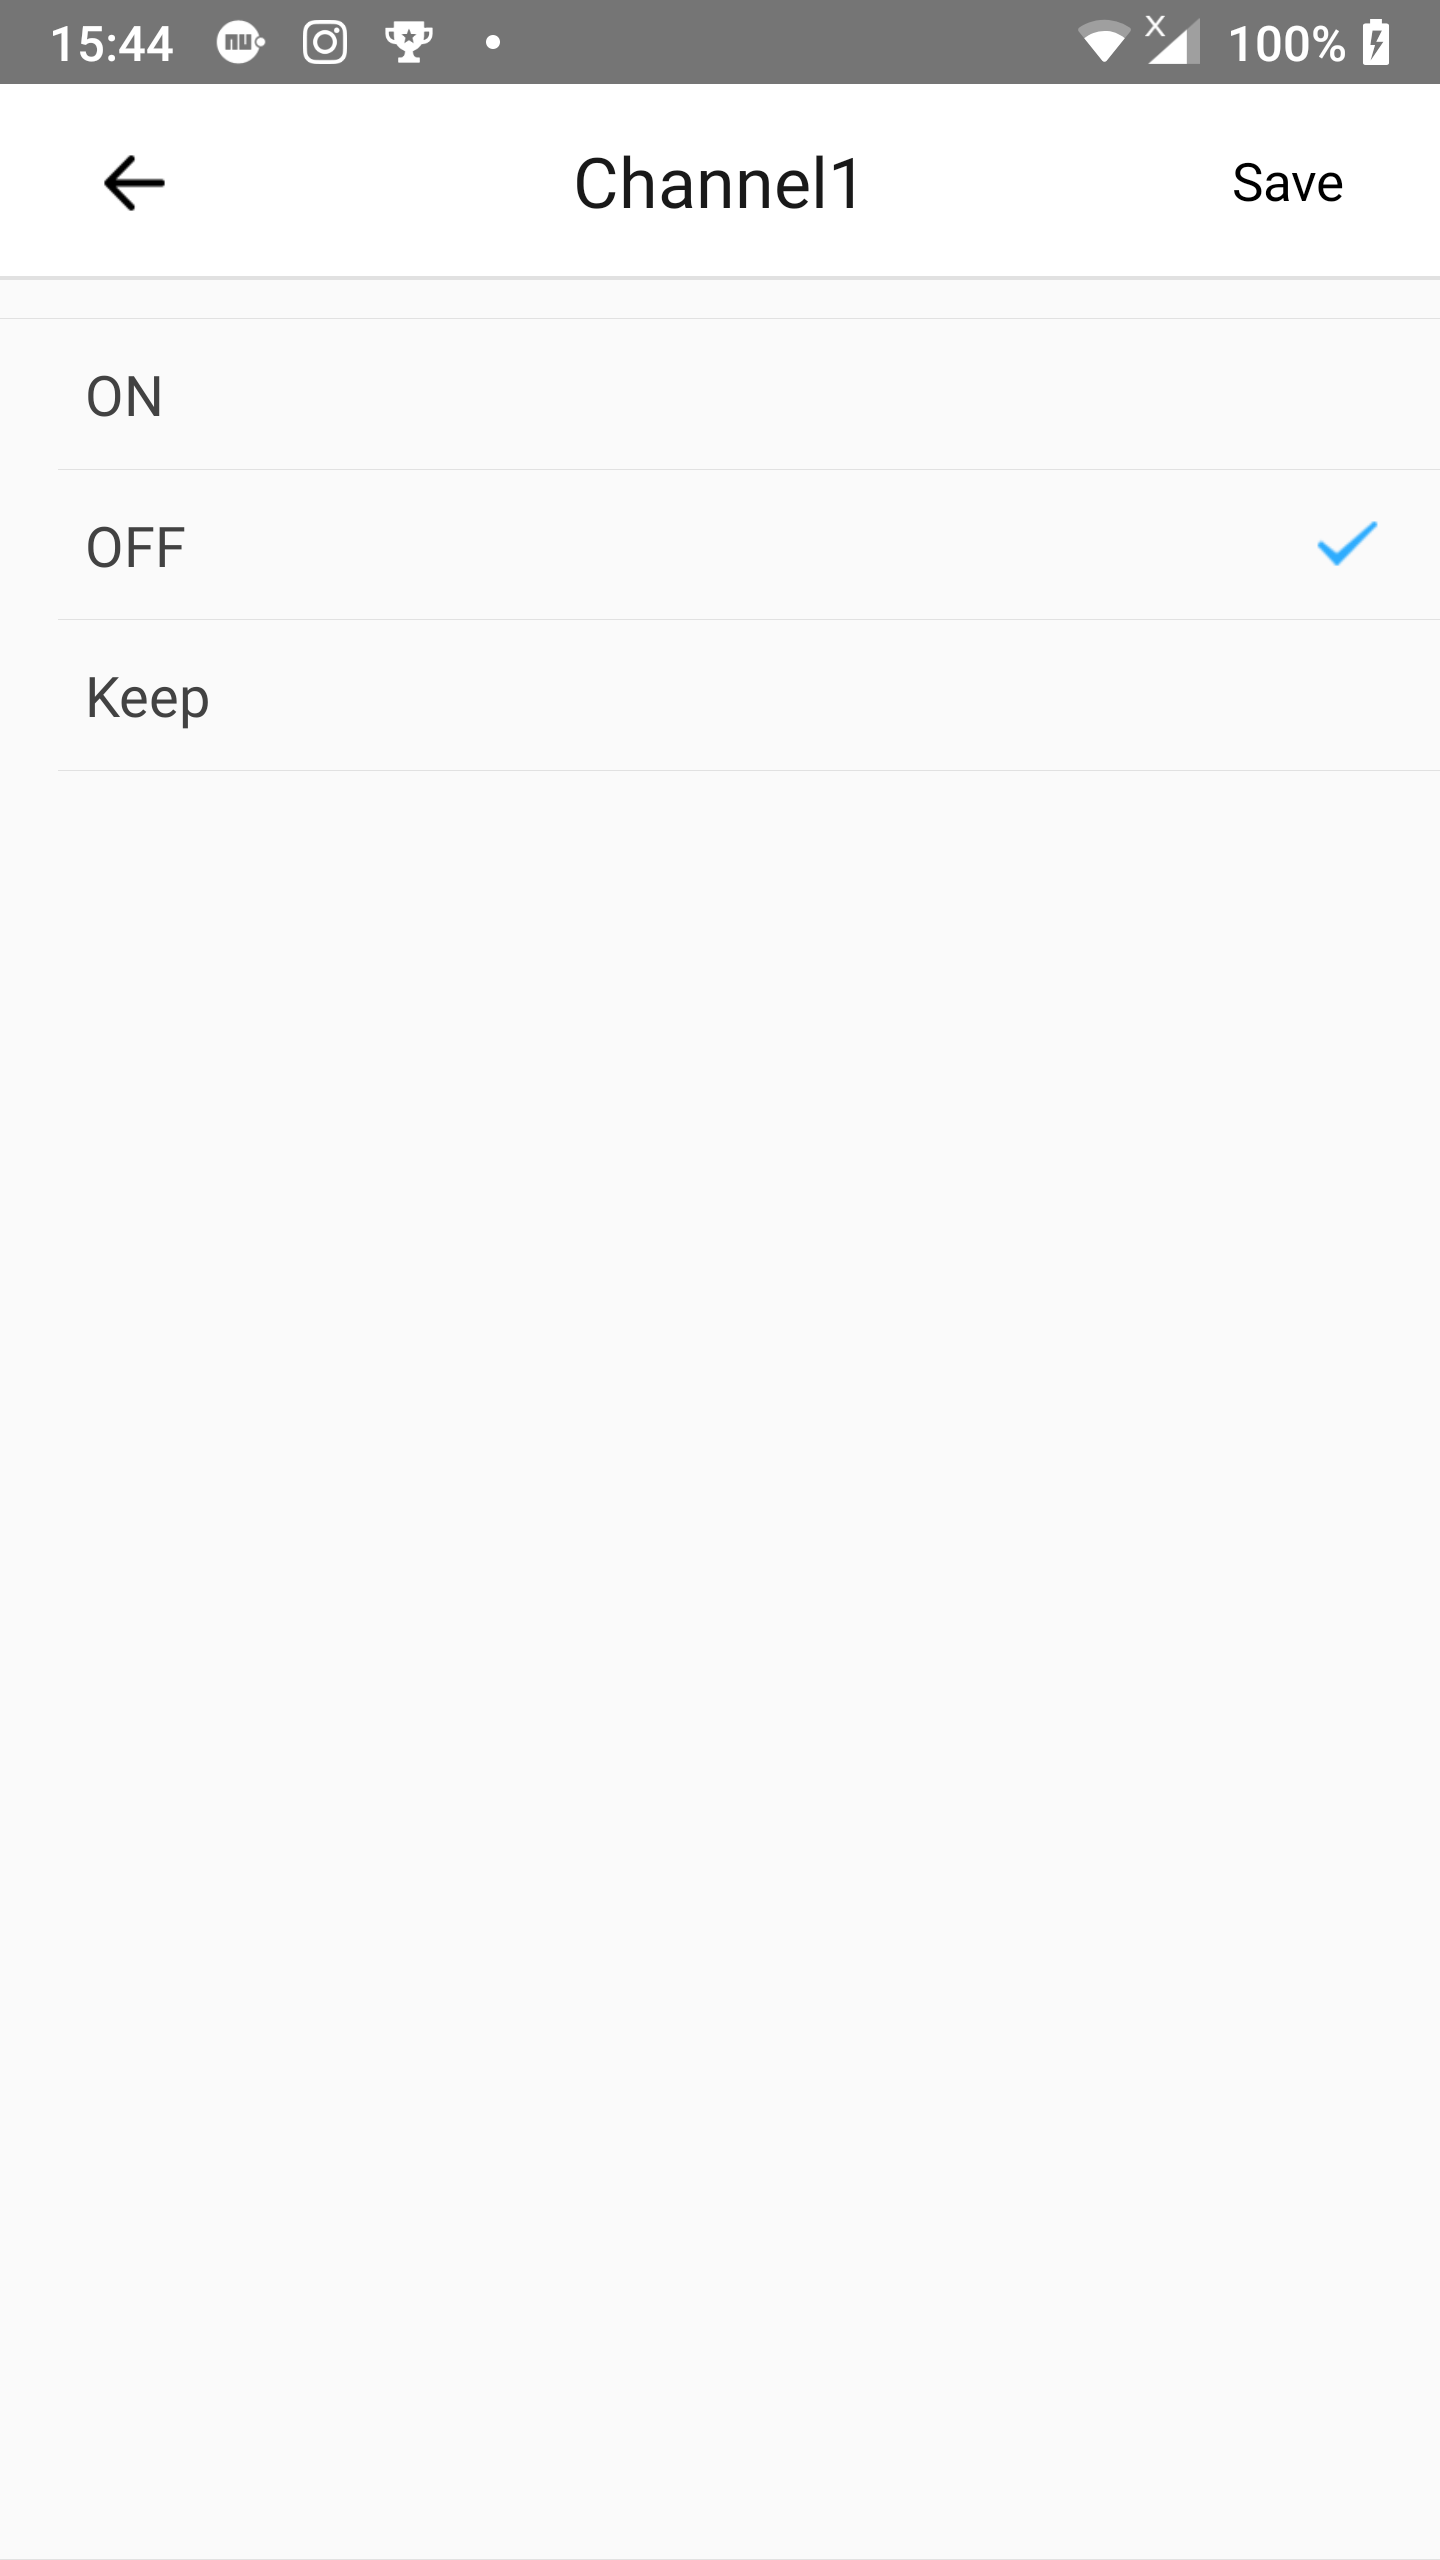
Step 8
- Choose the correct action of your device.
- In our example we need to choose the desired changes for each channel. Tap
Channel1orKeepafter that name.
- In our example we need to choose the desired changes for each channel. Tap
Step 9
- Choose the action
OFF. A checkmark will be shown at the end of the line. - Then press
Save.
Step 10
- Repeat step 8 and 9 for
Channel3. - Then proceed to step 11.
Step 11
- Repeat step 8 and 9 for
Channel2andChannel4, but now chooseONas action. - Then proceed to step 12.
Step 12
- Your 4-gang switch action overview should now look like our screenshot shown on the right (desktop) or below (mobile). You see the actions are alternating:
OFF,ON,OFF,ON. - Tap
Save.
Step 13
- Your scene
Addscreen should now look like our screenshot on the right (desktop) or below (mobile). - Tap
Save.

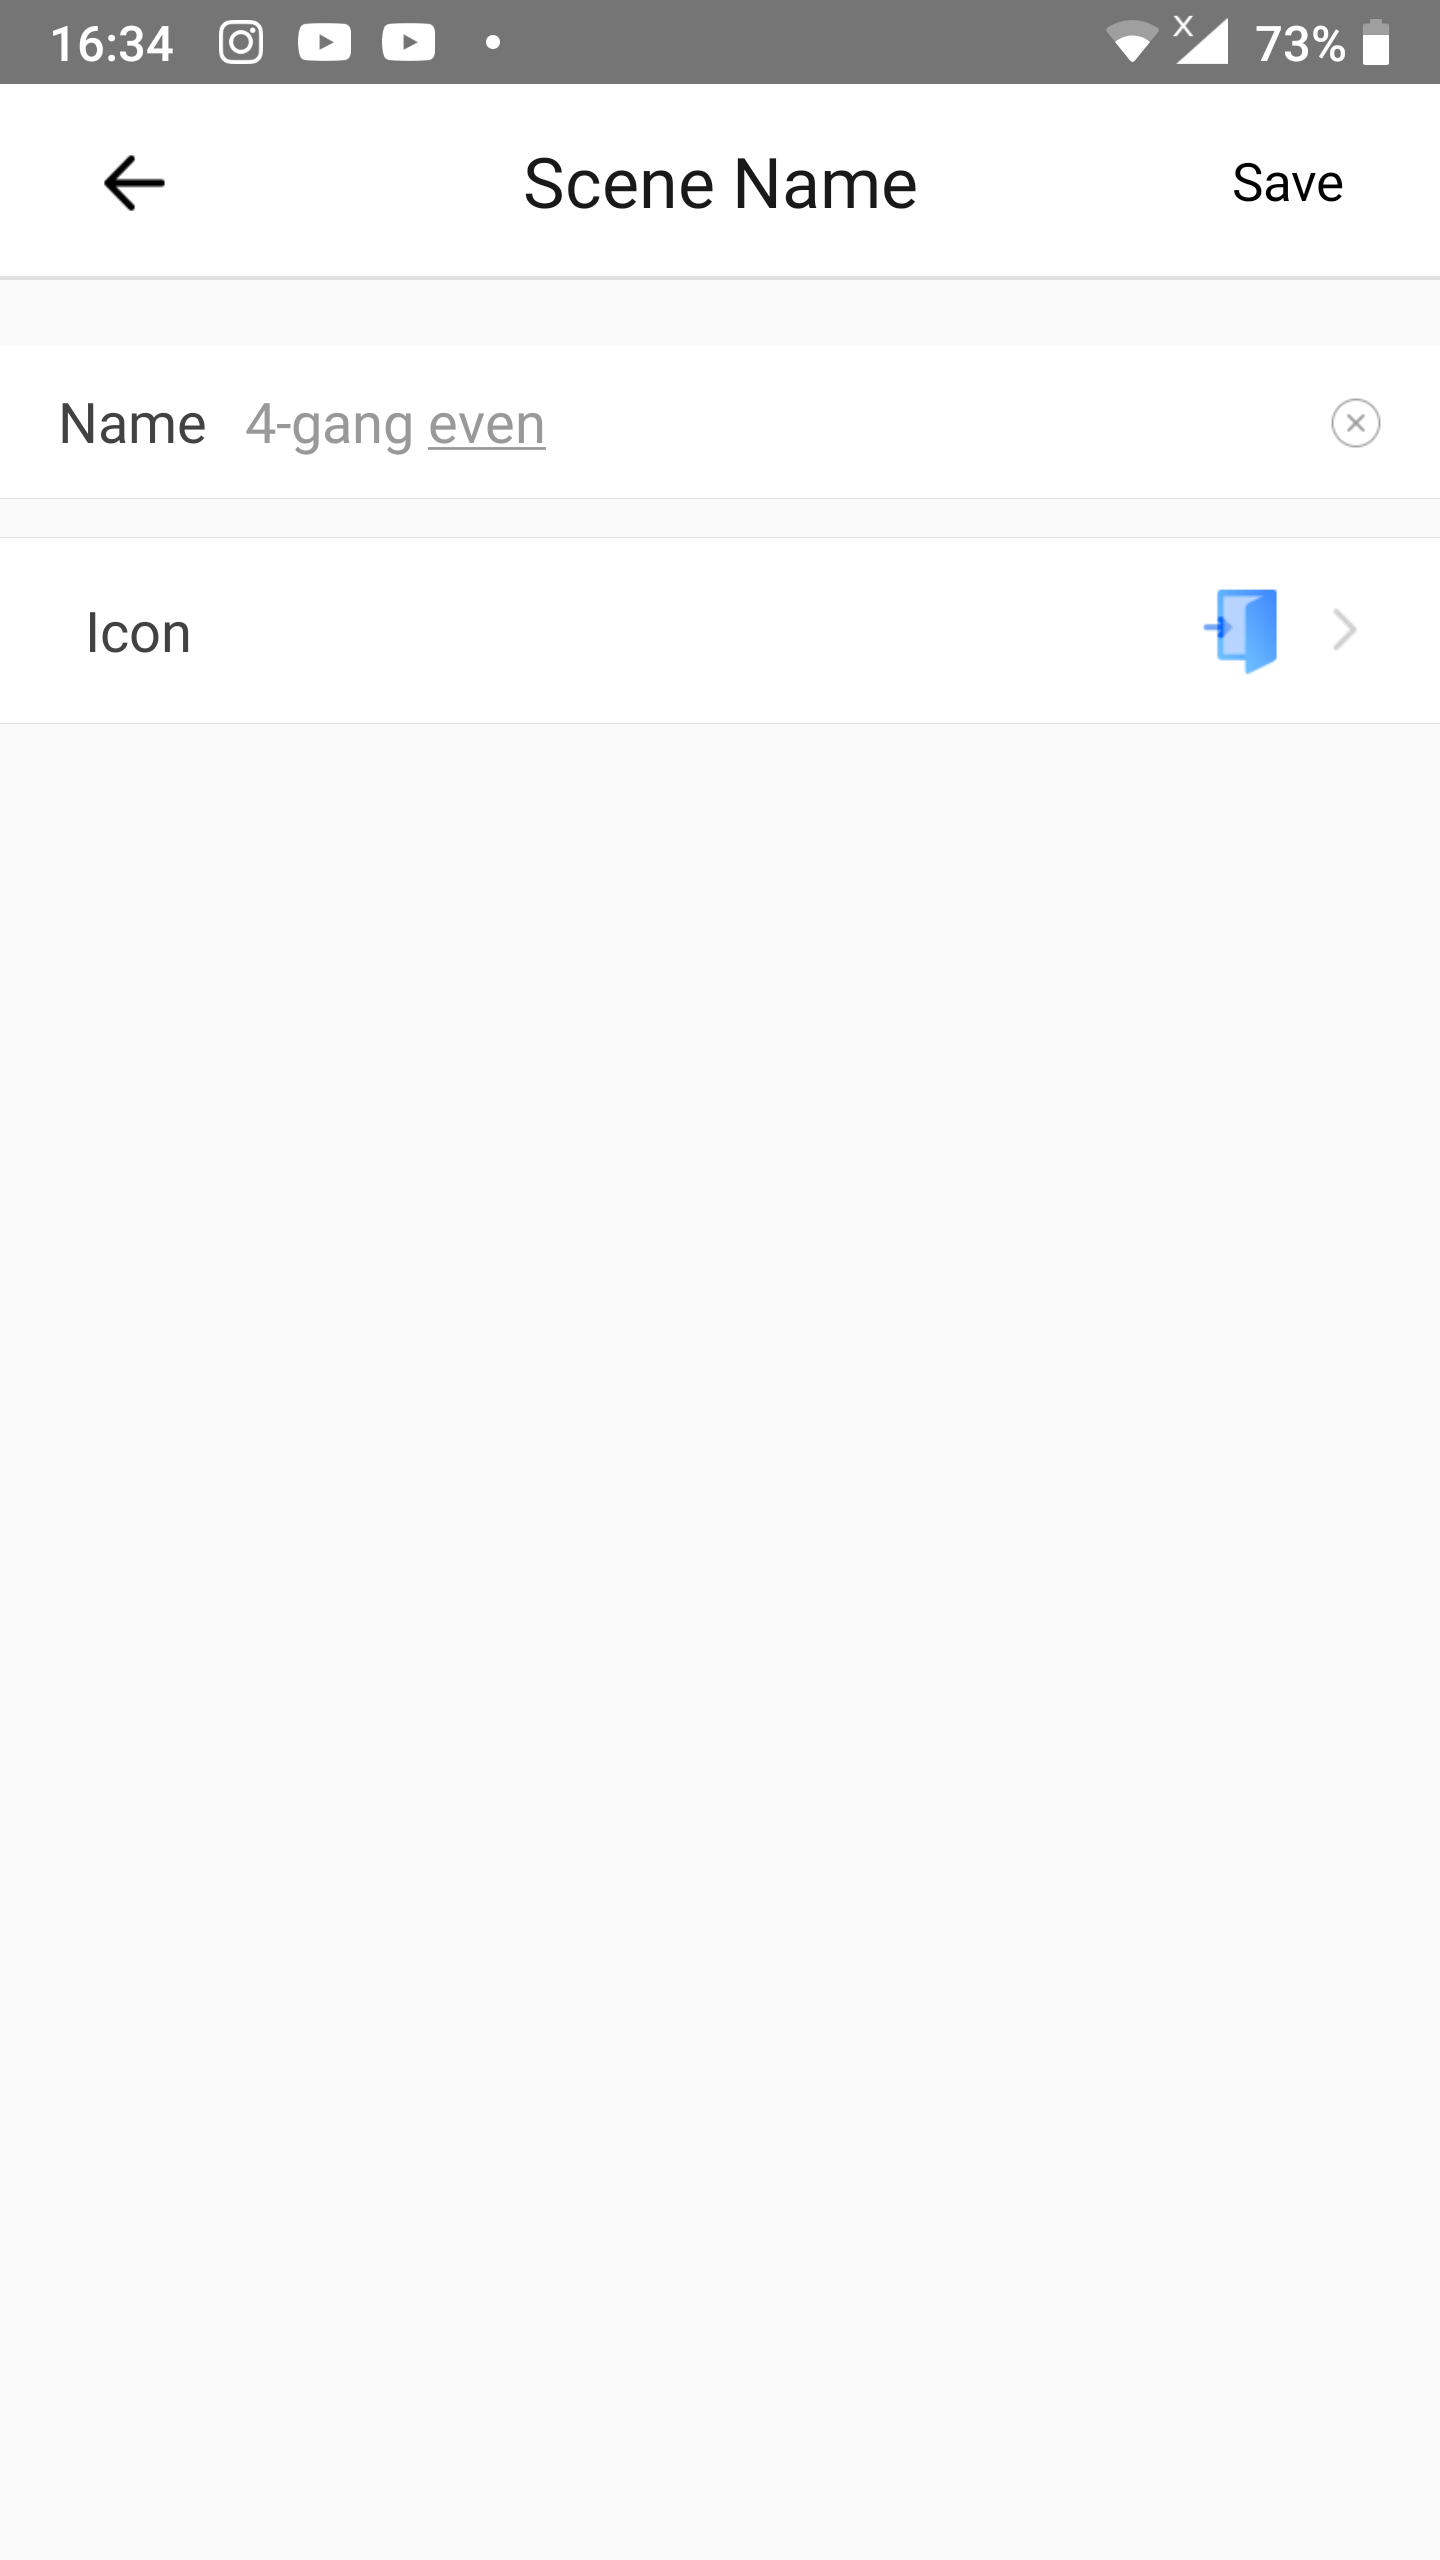
Step 14
- Fill in a name for the scene after
Name.- We named it
4-gang evenin our example.
- We named it
- Tap
Save.
Setting up the scene for even gangs is now complete.
Configuring eWeLink Keyboard application
Now that we have configured the 2 scenes we want to operate with keyboard shortcuts we can start configuring the eWeLink Keyboard application.
Step 1
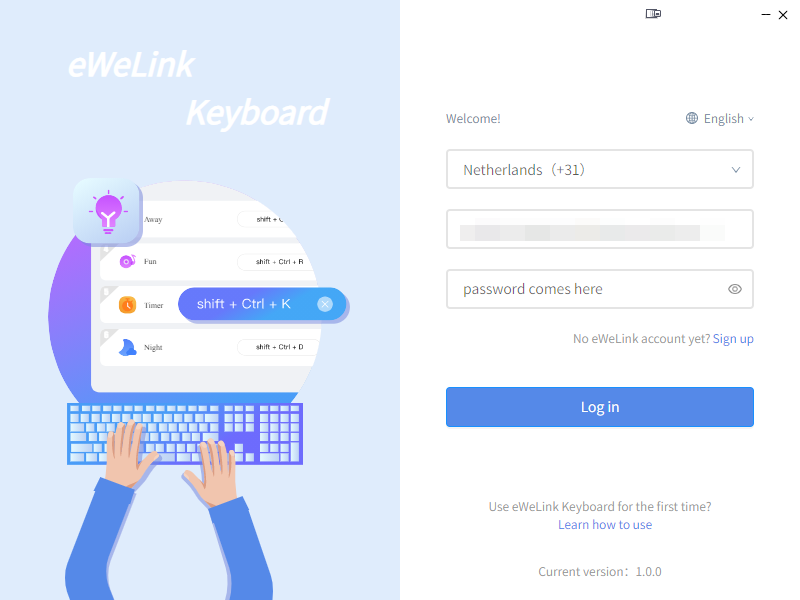
After you have installed eWeLink Keyboard you will be asked to login with your eWeLink account credentials. Use the same as the one you use for the eWeLink app on your smartphone.
- Choose the country you use at creating your eWeLink account.
- Fill in your eWeLink account username.
- Fill in your eWeLink account password.
- After filling in your credentials click
Log in.
Step 2
After you logged in on the eWeLink Keyboard application you can have 2 different looks of the application. It depends on what type of subscription you have on your account: a Free account or an (paid) Advanced subscription. Having a Free account affects this tutorial a little bit in a negative way because it limits you to only 1 shortcut. With an Advanced subscription you can use all 6 available slots.
In below substeps you can see how the eWeLink Keyboard application looks like with the different subscription types. At step 3 we assume you have an eWeLink Advanced subscription.
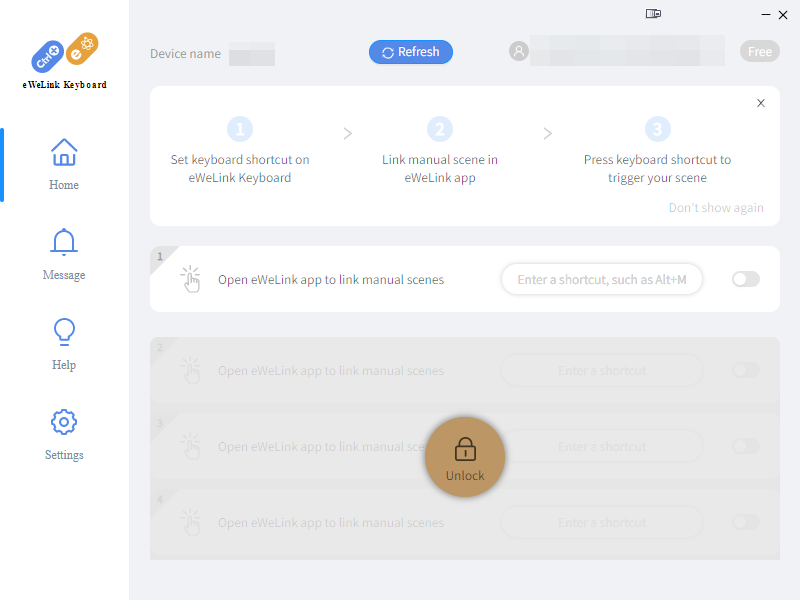
Step 2 – Free account (1/2)
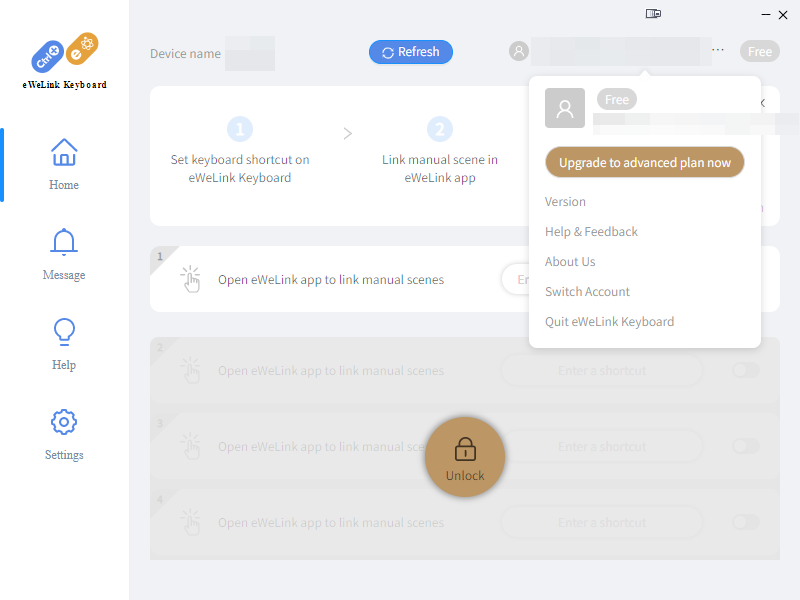
At the right (desktop) or below this text (mobile) you can see how the eWeLink Keyboard application looks like with a Free account subscription.
- Only 1 slot is available to create a Keyboard shortcut to a scene.
- You can click Unlock to go to the eWeLink VIP subscription payment page and buy your eWeLink Advanced subscription.
- Mouse over your account name to see the account menu.
Step 2 – Free account (2/2)
This is how the account menu looks like with an eWeLink Free account.
- Click
Upgrade to advanced plan nowto go to the eWeLink VIP payment page to buy your eWeLink Advanced subscription. - You can click
Switch accountto logout and login with a different eWeLink account. - You can click
Quit eWeLink Keyboardto completely close the application.
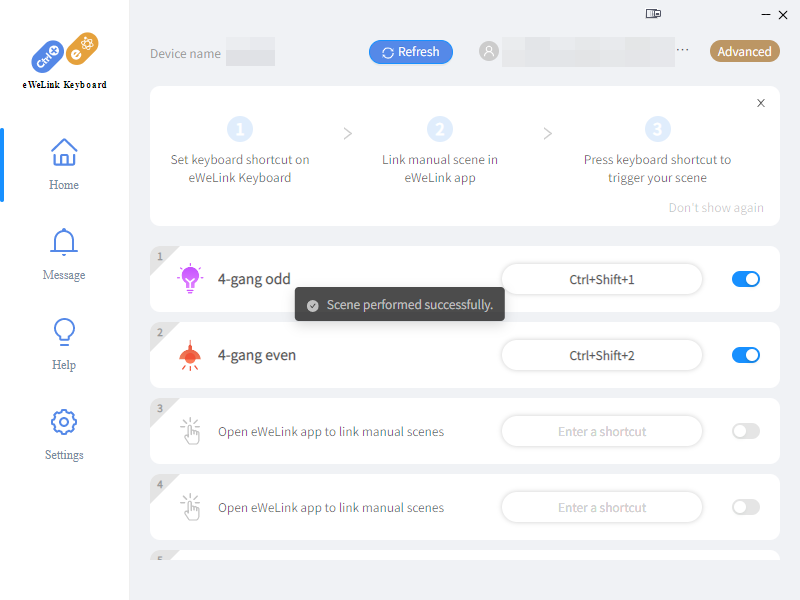
Step 2 – Advanced account (1/2)
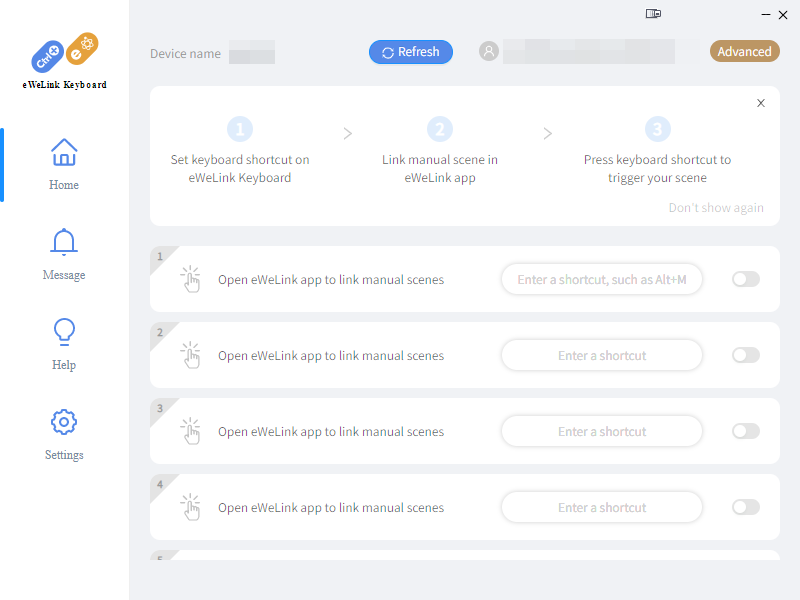
At the right (desktop) or below this text (mobile) you can see how the eWeLink Keyboard application looks like with a Advanced account subscription.
- All 6 slots are available to create Keyboard shortcuts to a scenes.
- Mouse over your account name to see the account menu.
Step 2 – Advanced account (2/2)
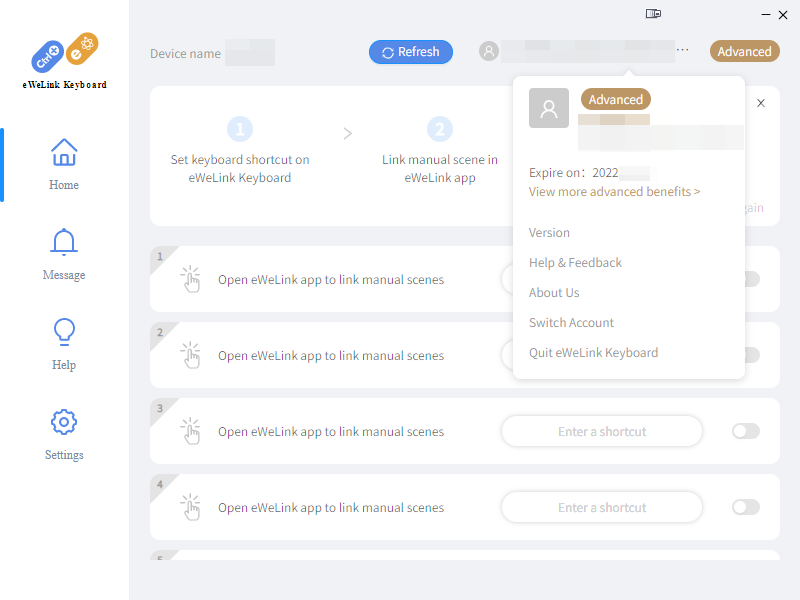
This is how the account menu looks like with an eWeLink Free account.
- The date after
Expire onis the date on which your current subscription will expire if you decided to not extend the subscription. - Click
View more advanced benefitsto go to the eWeLink VIP payment page to see all benefits of an eWeLink Advanced subscription and/or to extend your subscription. - You can click
Switch accountto logout and login with a different eWeLink account. - You can click
Quit eWeLink Keyboardto completely close the application.
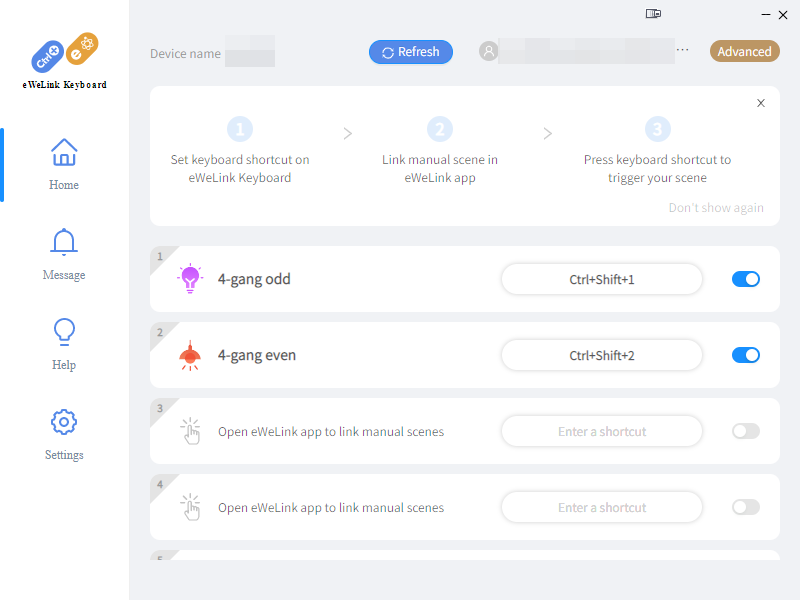
Step 3
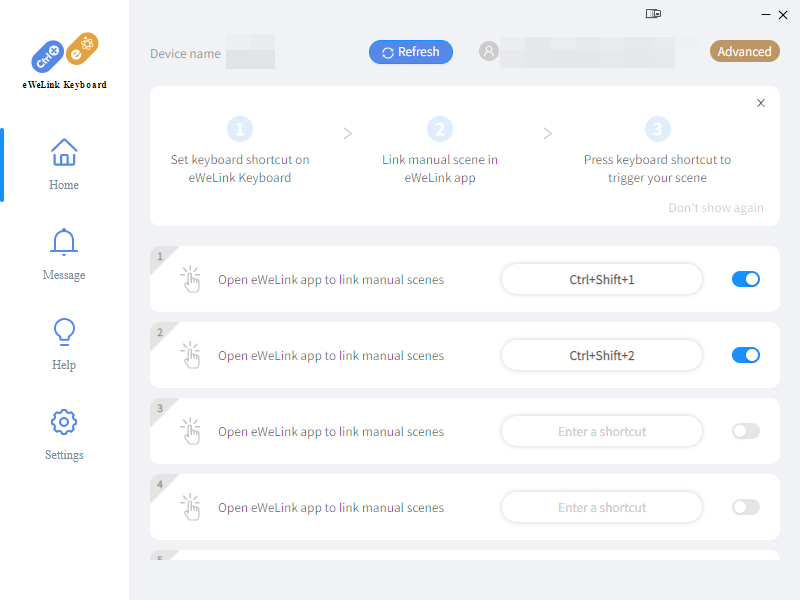
Now we start assigning shortcuts to 2 slots.
- In the box that has a black
1in a gray triangle in the upper left corner click the form field afterOpen eWeLink app to link manual scenes. Then press the keyboard combination you want to use for that slot.- In our example we pressed
CTRL+SHIFT+1. The combination will be displayed in the form field. and the enable button will switch to the on state.
- In our example we pressed
- Repeat above step at slot
2and now use another button combination.- We used
CTRL+SHIFT+2.
- We used
- Now press the button
Refreshto be sure that all changes will be saved to thecloud and will be visible in the eWeLink app. - You can close the application to the notification tray of your operating system with a click on the
Xicon.
Configuring the eWeLink Keyboard application is now complete.
You might want to return to the app later to have an overview of the assigned scenes to the slots and see status messages whether a shortcut has been executed succesfully.
Link scenes to shortcuts with eWeLink app
Now that we have setup the scenes and keyboard shortcuts we have to link them to each other. The linking ca be done at the eWeLink app.
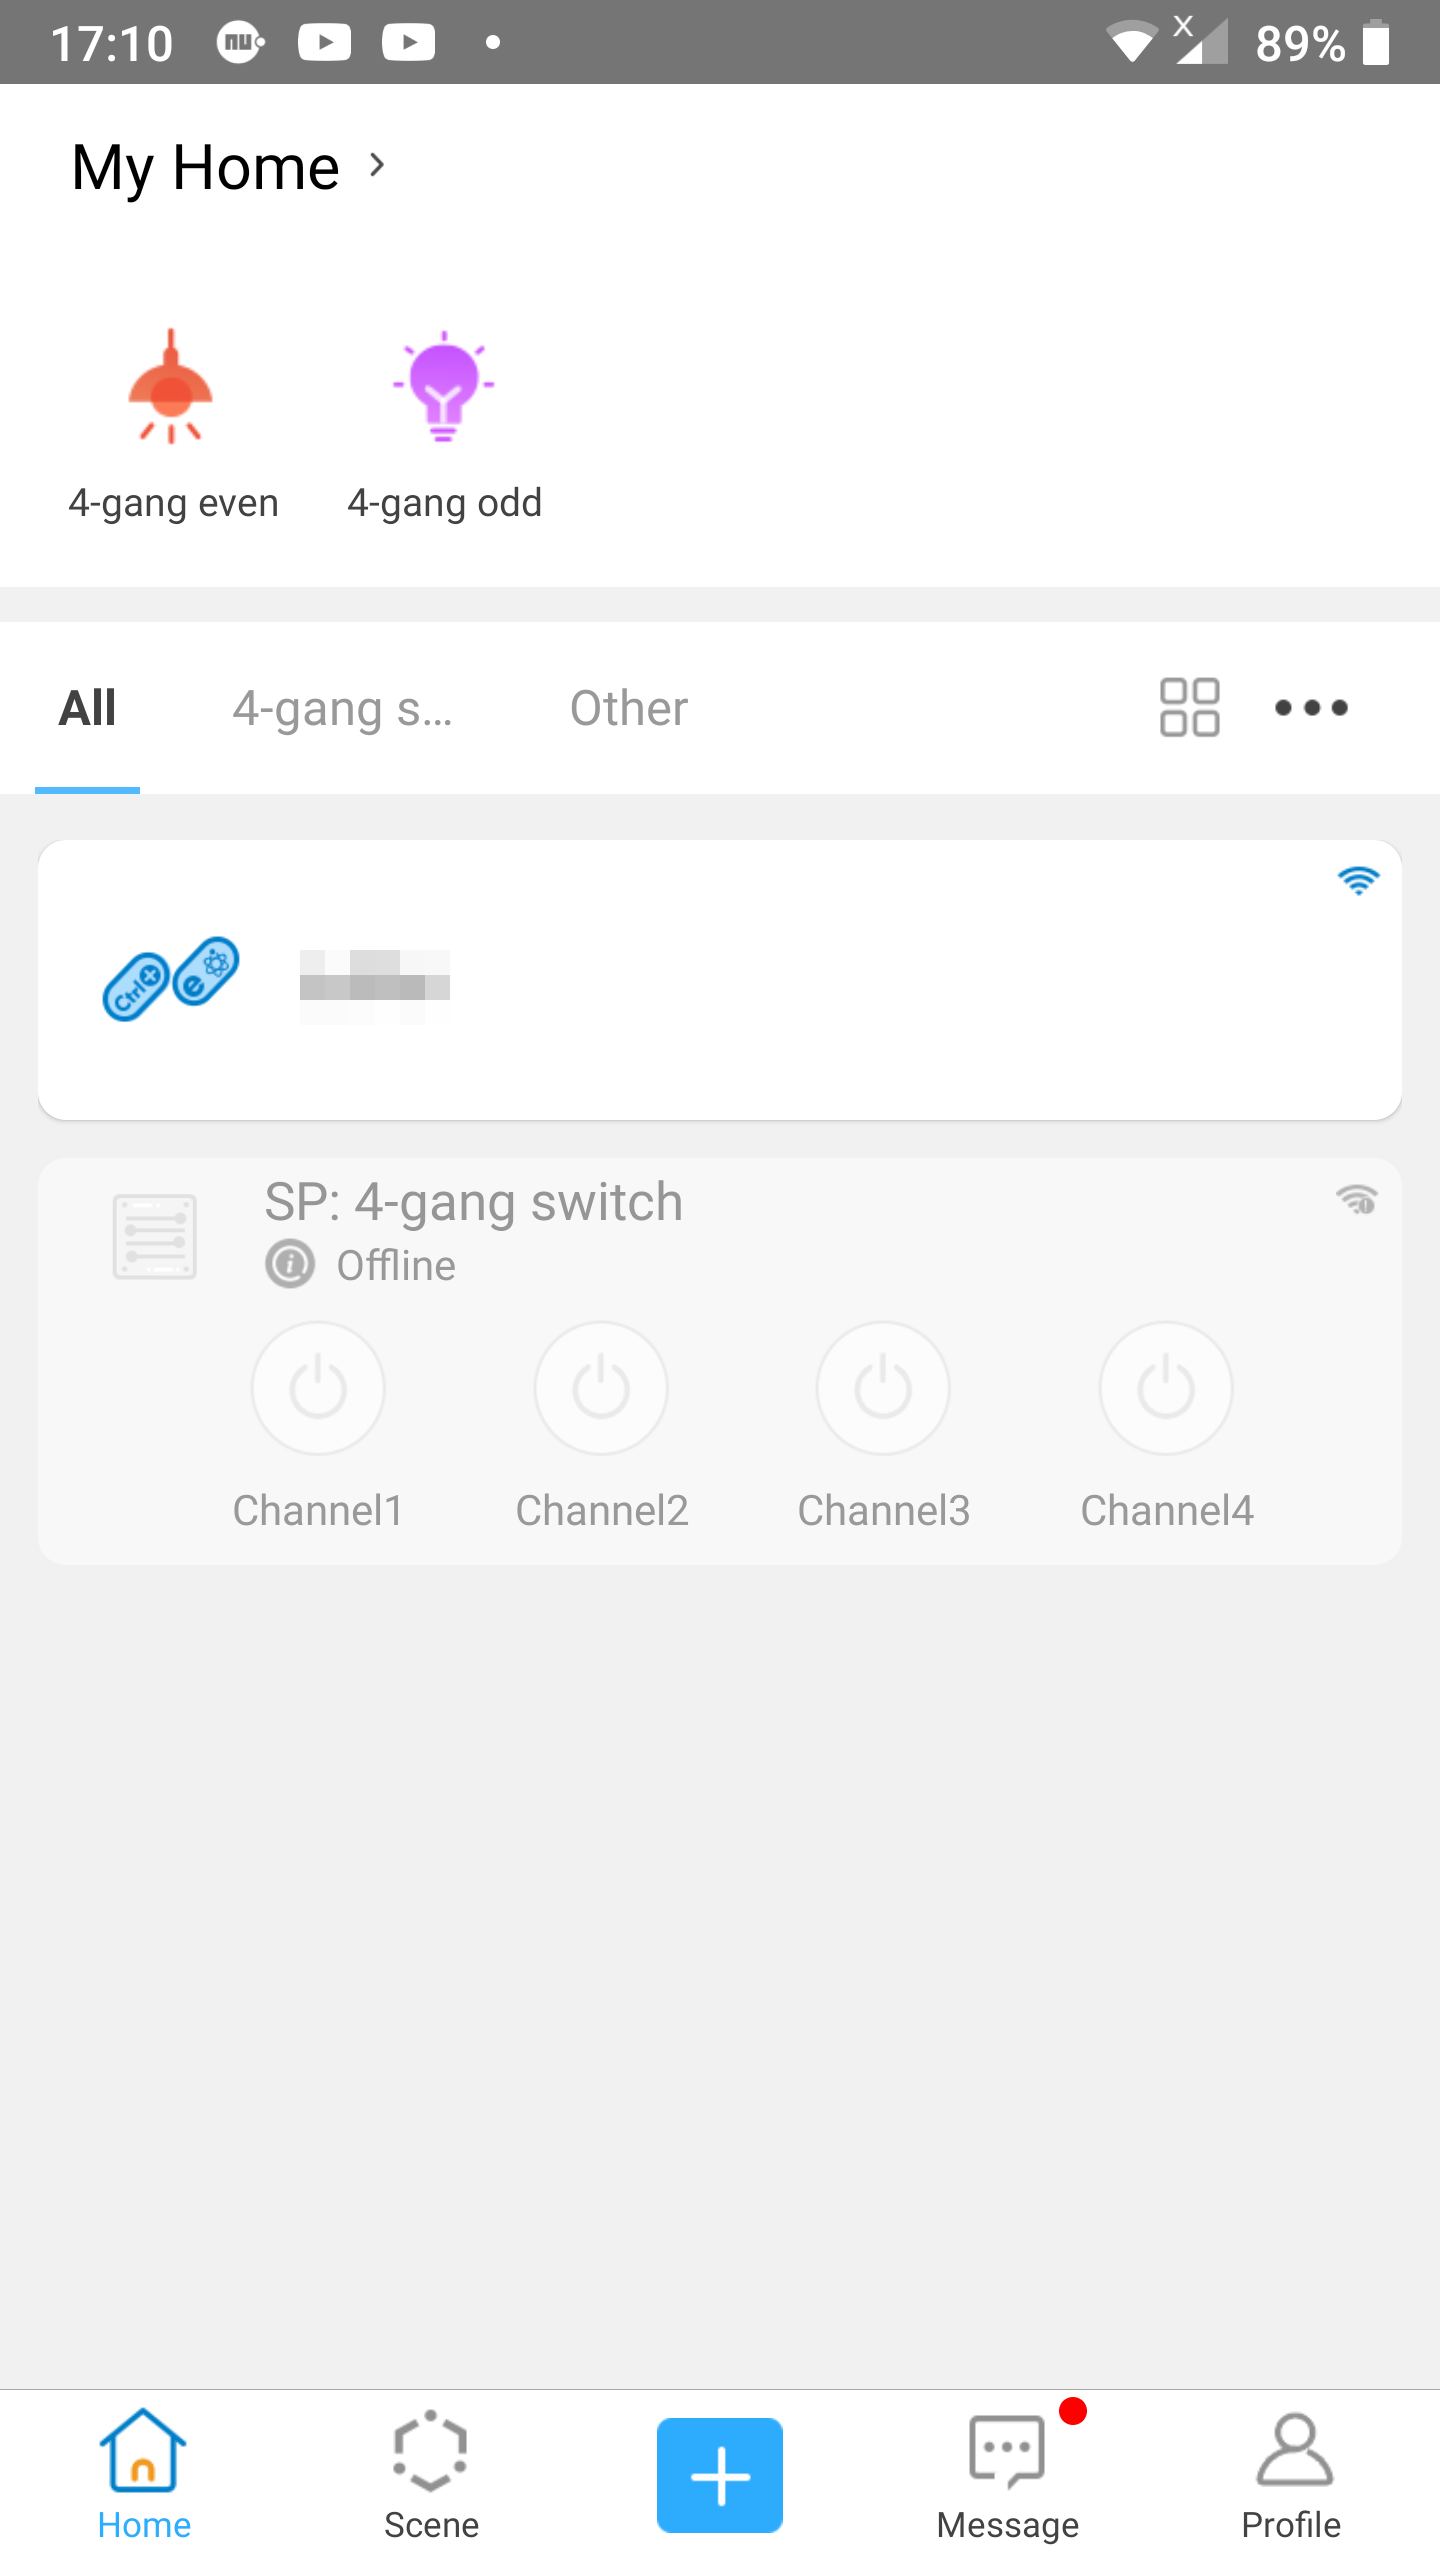
Step 1
- eWeLink Keyboard shows up with a little icon that looks like 2 slashes. Within the left slash you see
Ctrl+and within the right slash you see aneand a symbol of eWeLink. - It also shows the computername on which you have setup eWeLink Keyboard.
- Tap one of both to go to the linking screen.
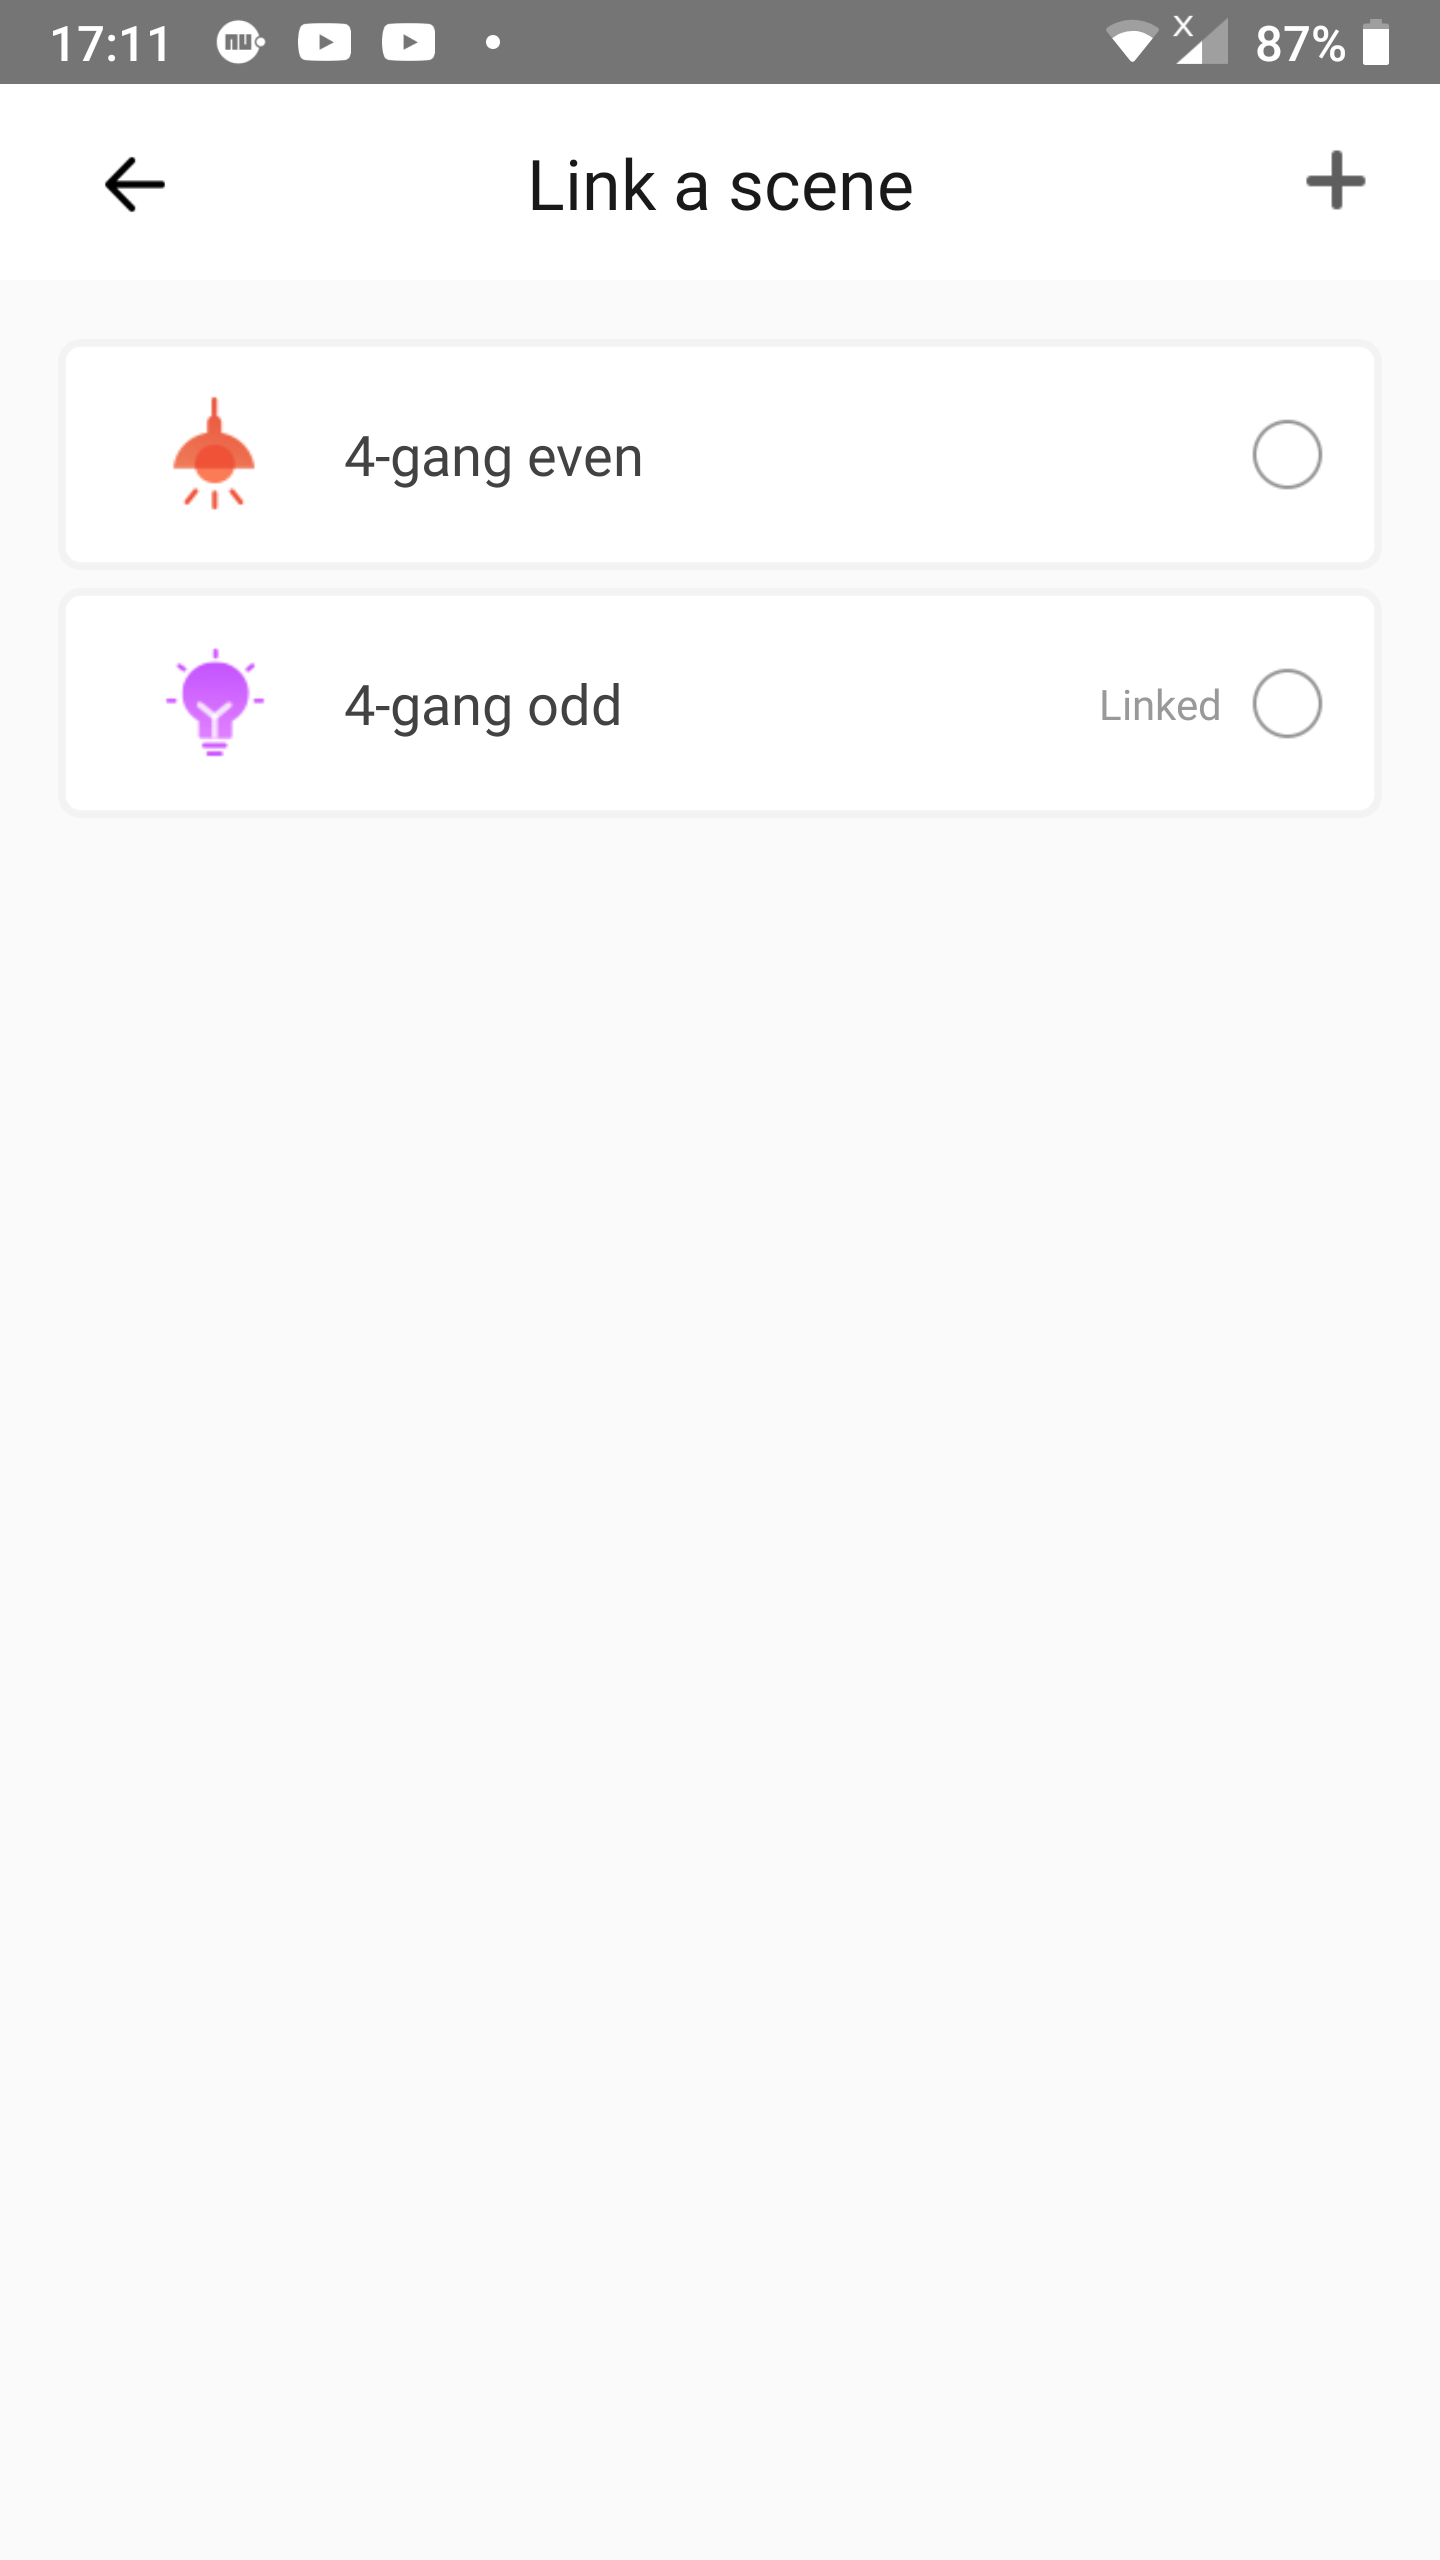
Step 2
- On the linking screen you can already see the keyboard shortcuts you have setup at the eWeLink Keyboard application. In this example
Ctrl+Shift+1at slot1andCtrl+Shift+2at slot2. - The name of the computer holding these keyboard shortcuts is shown at the top left.
- Now tap the bar of slot
1(the one withCtrl+Shift+1).

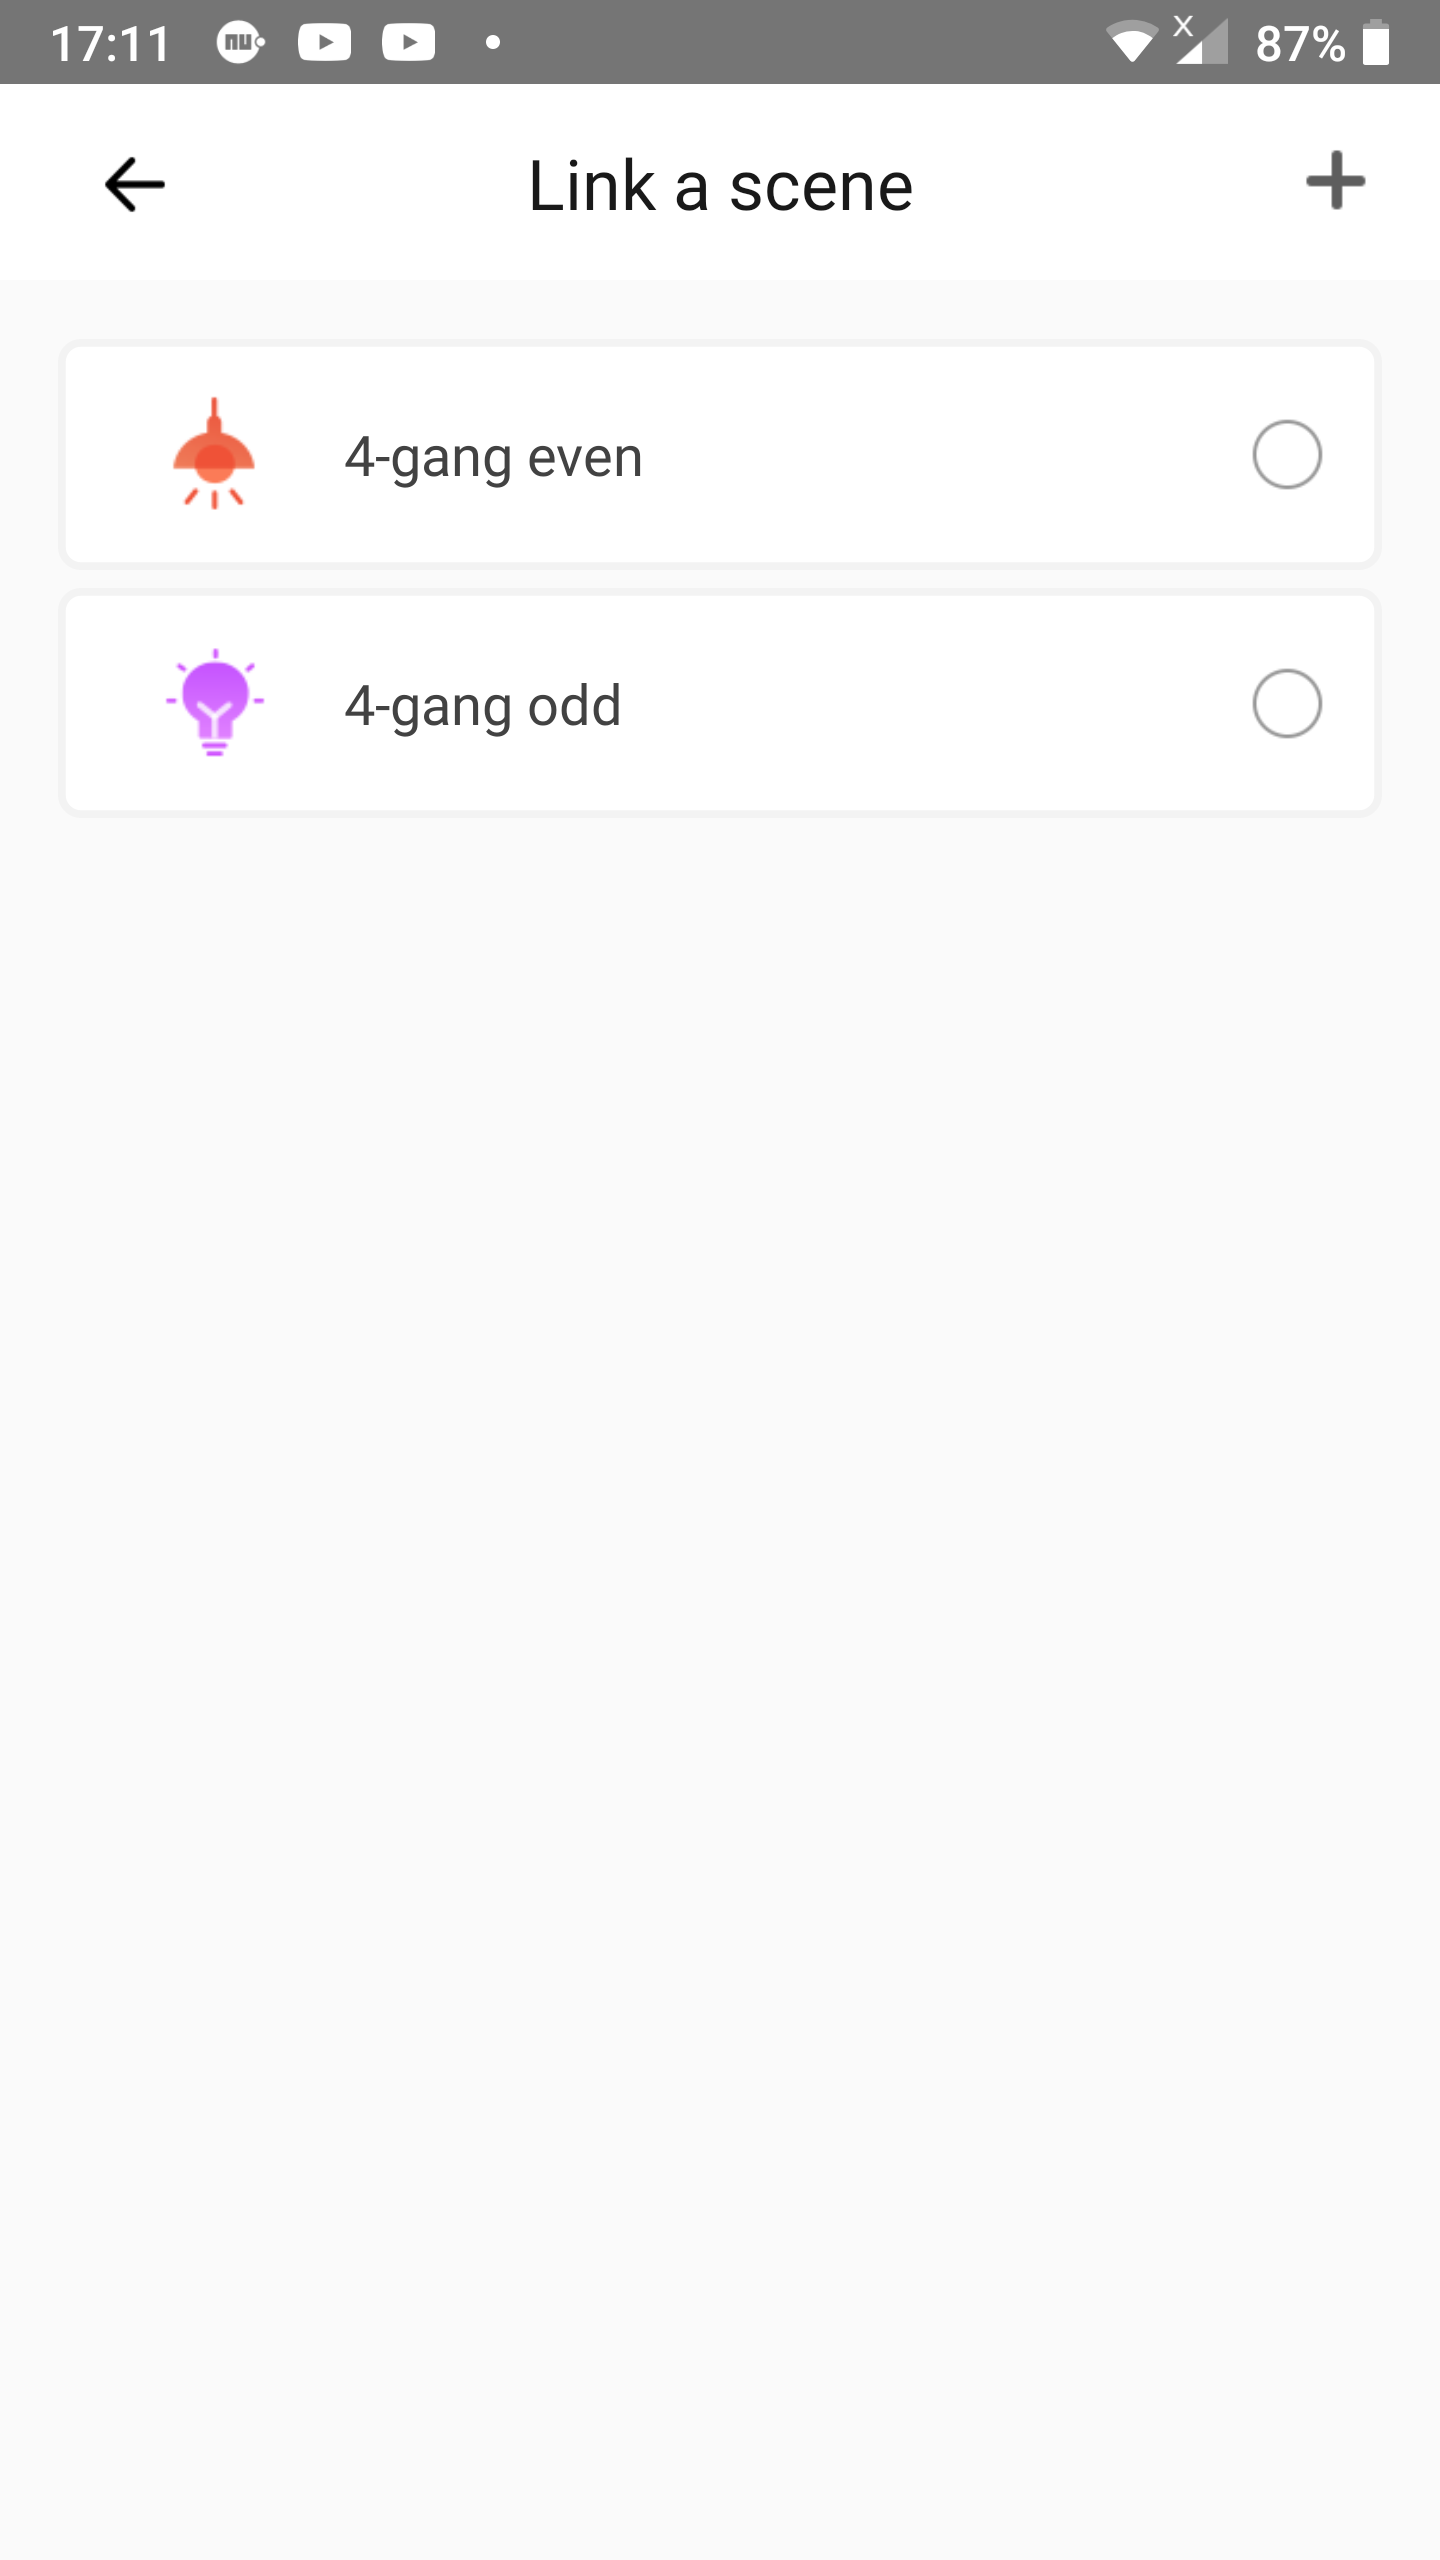
Step 3
- Tap the scene you want to link.
- In our example we now choose
4-gang odd.
- In our example we now choose
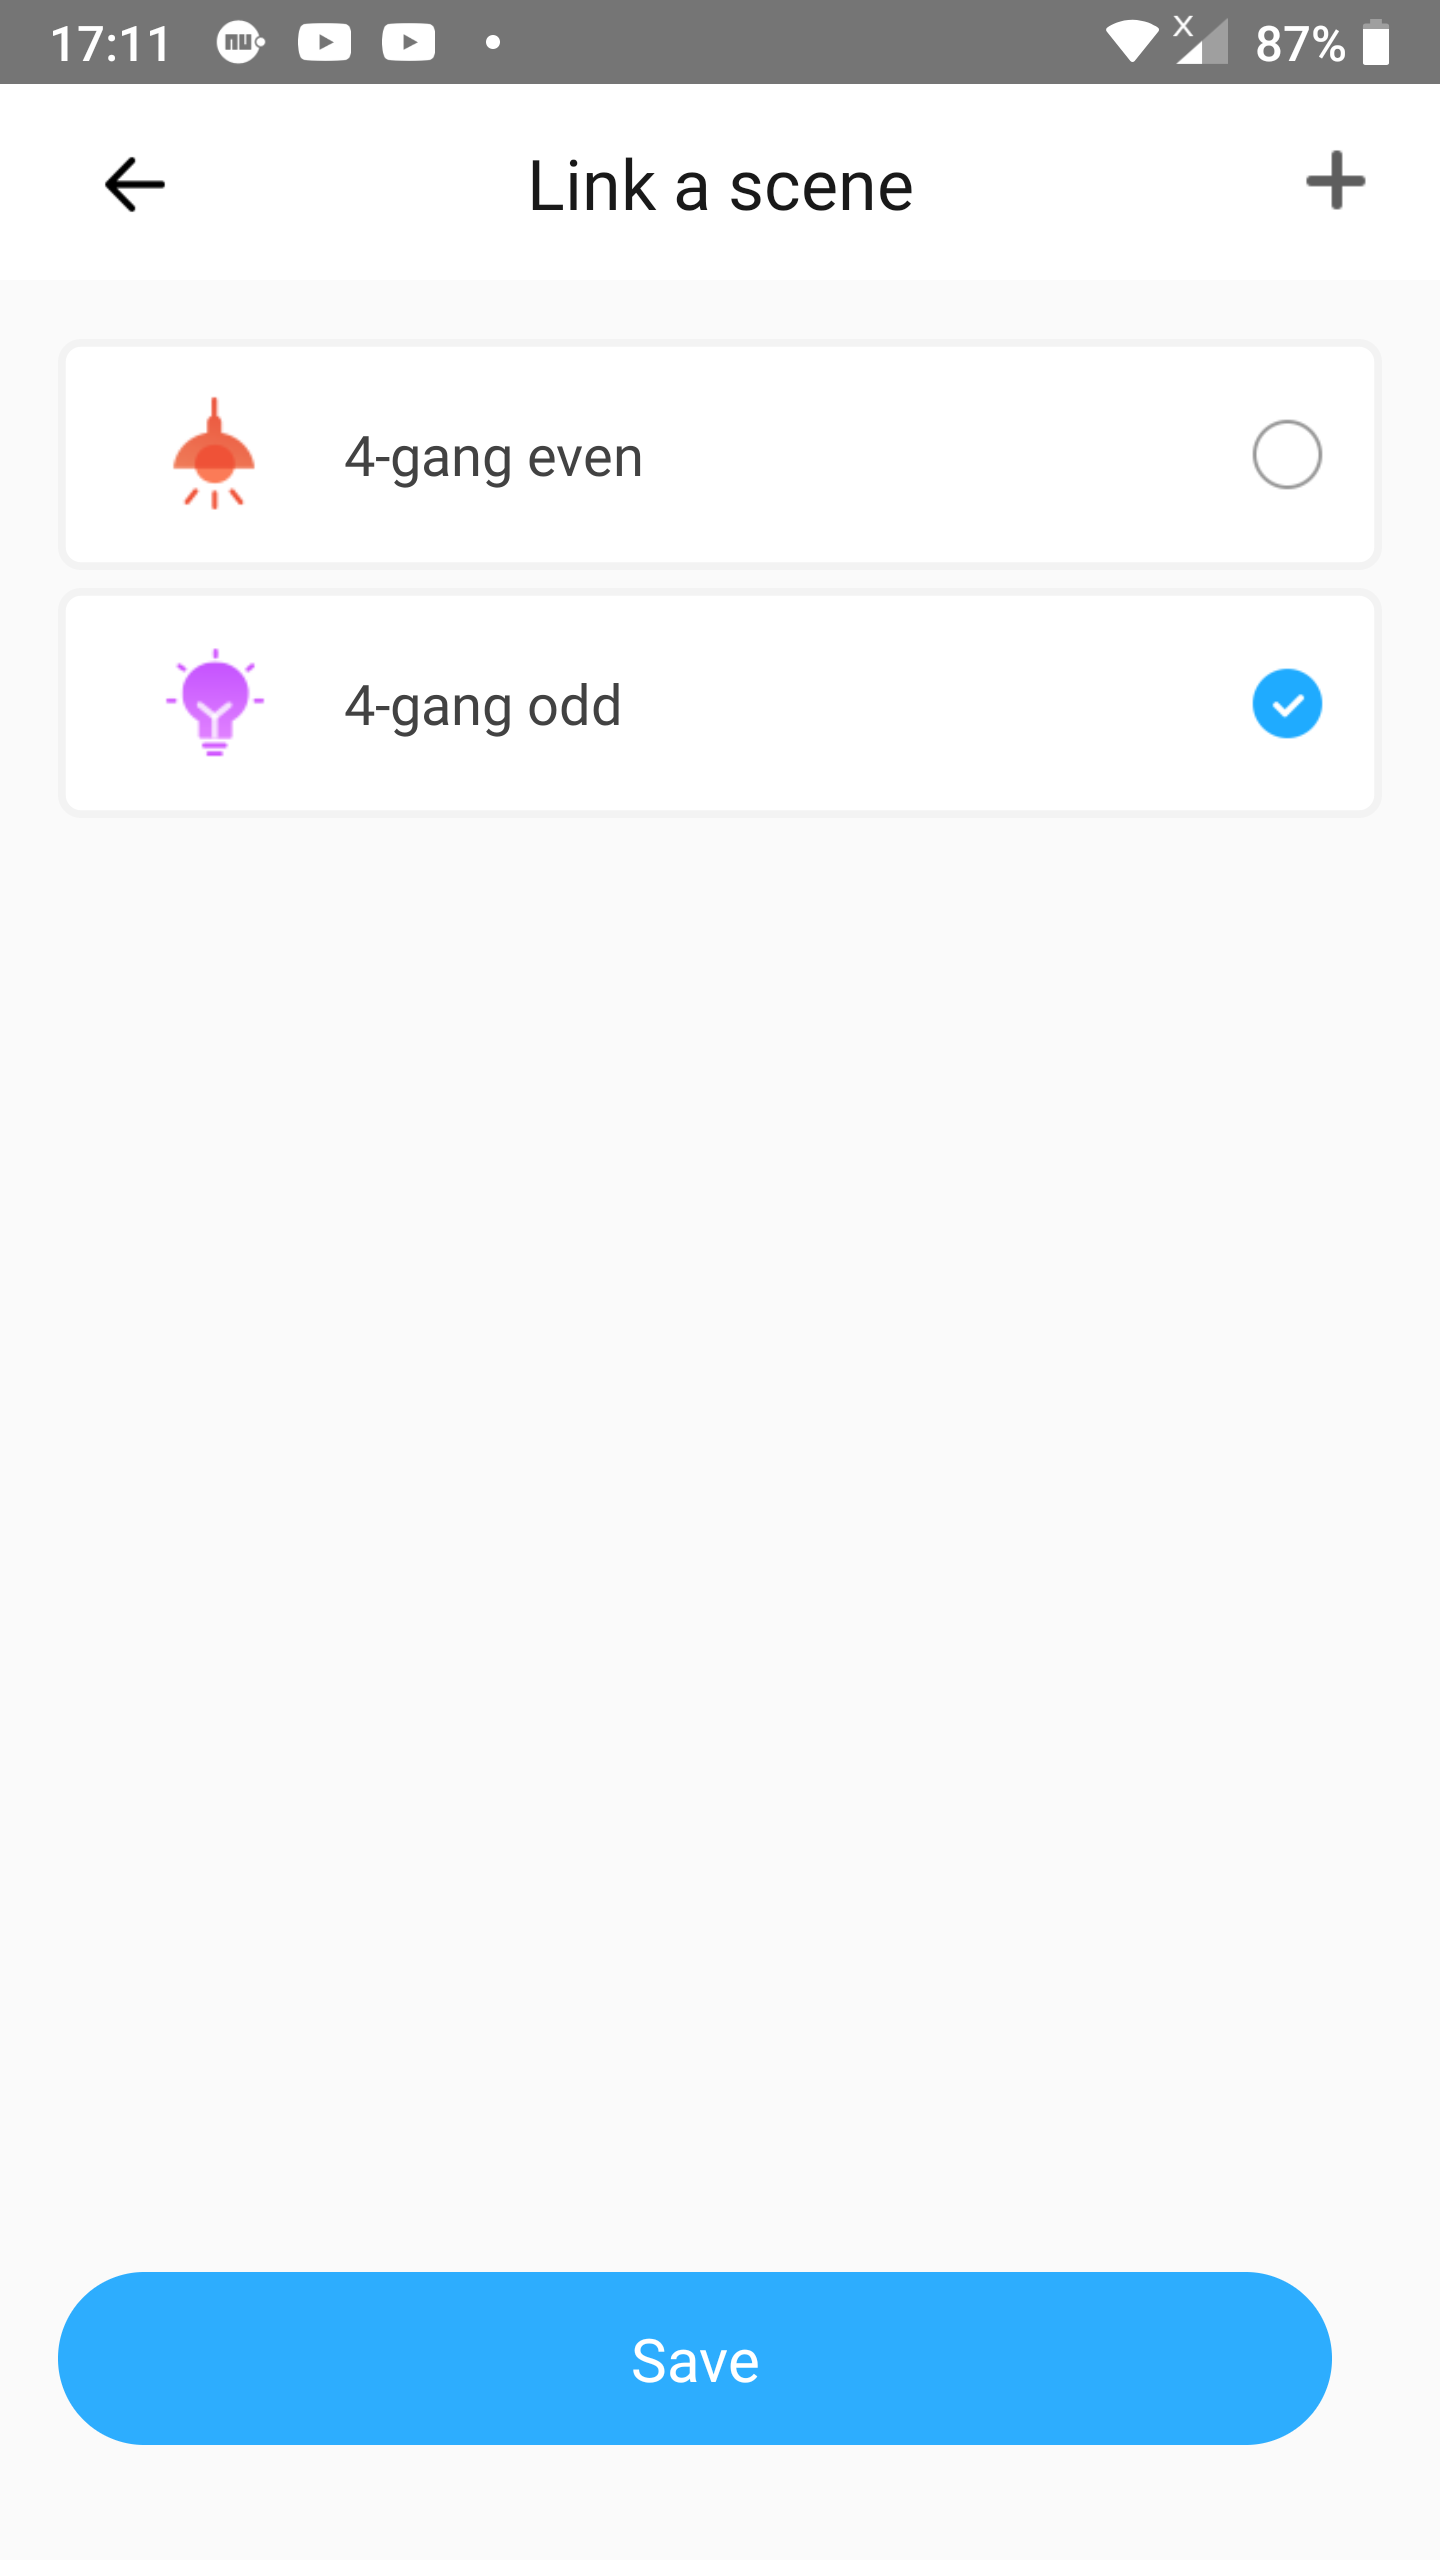
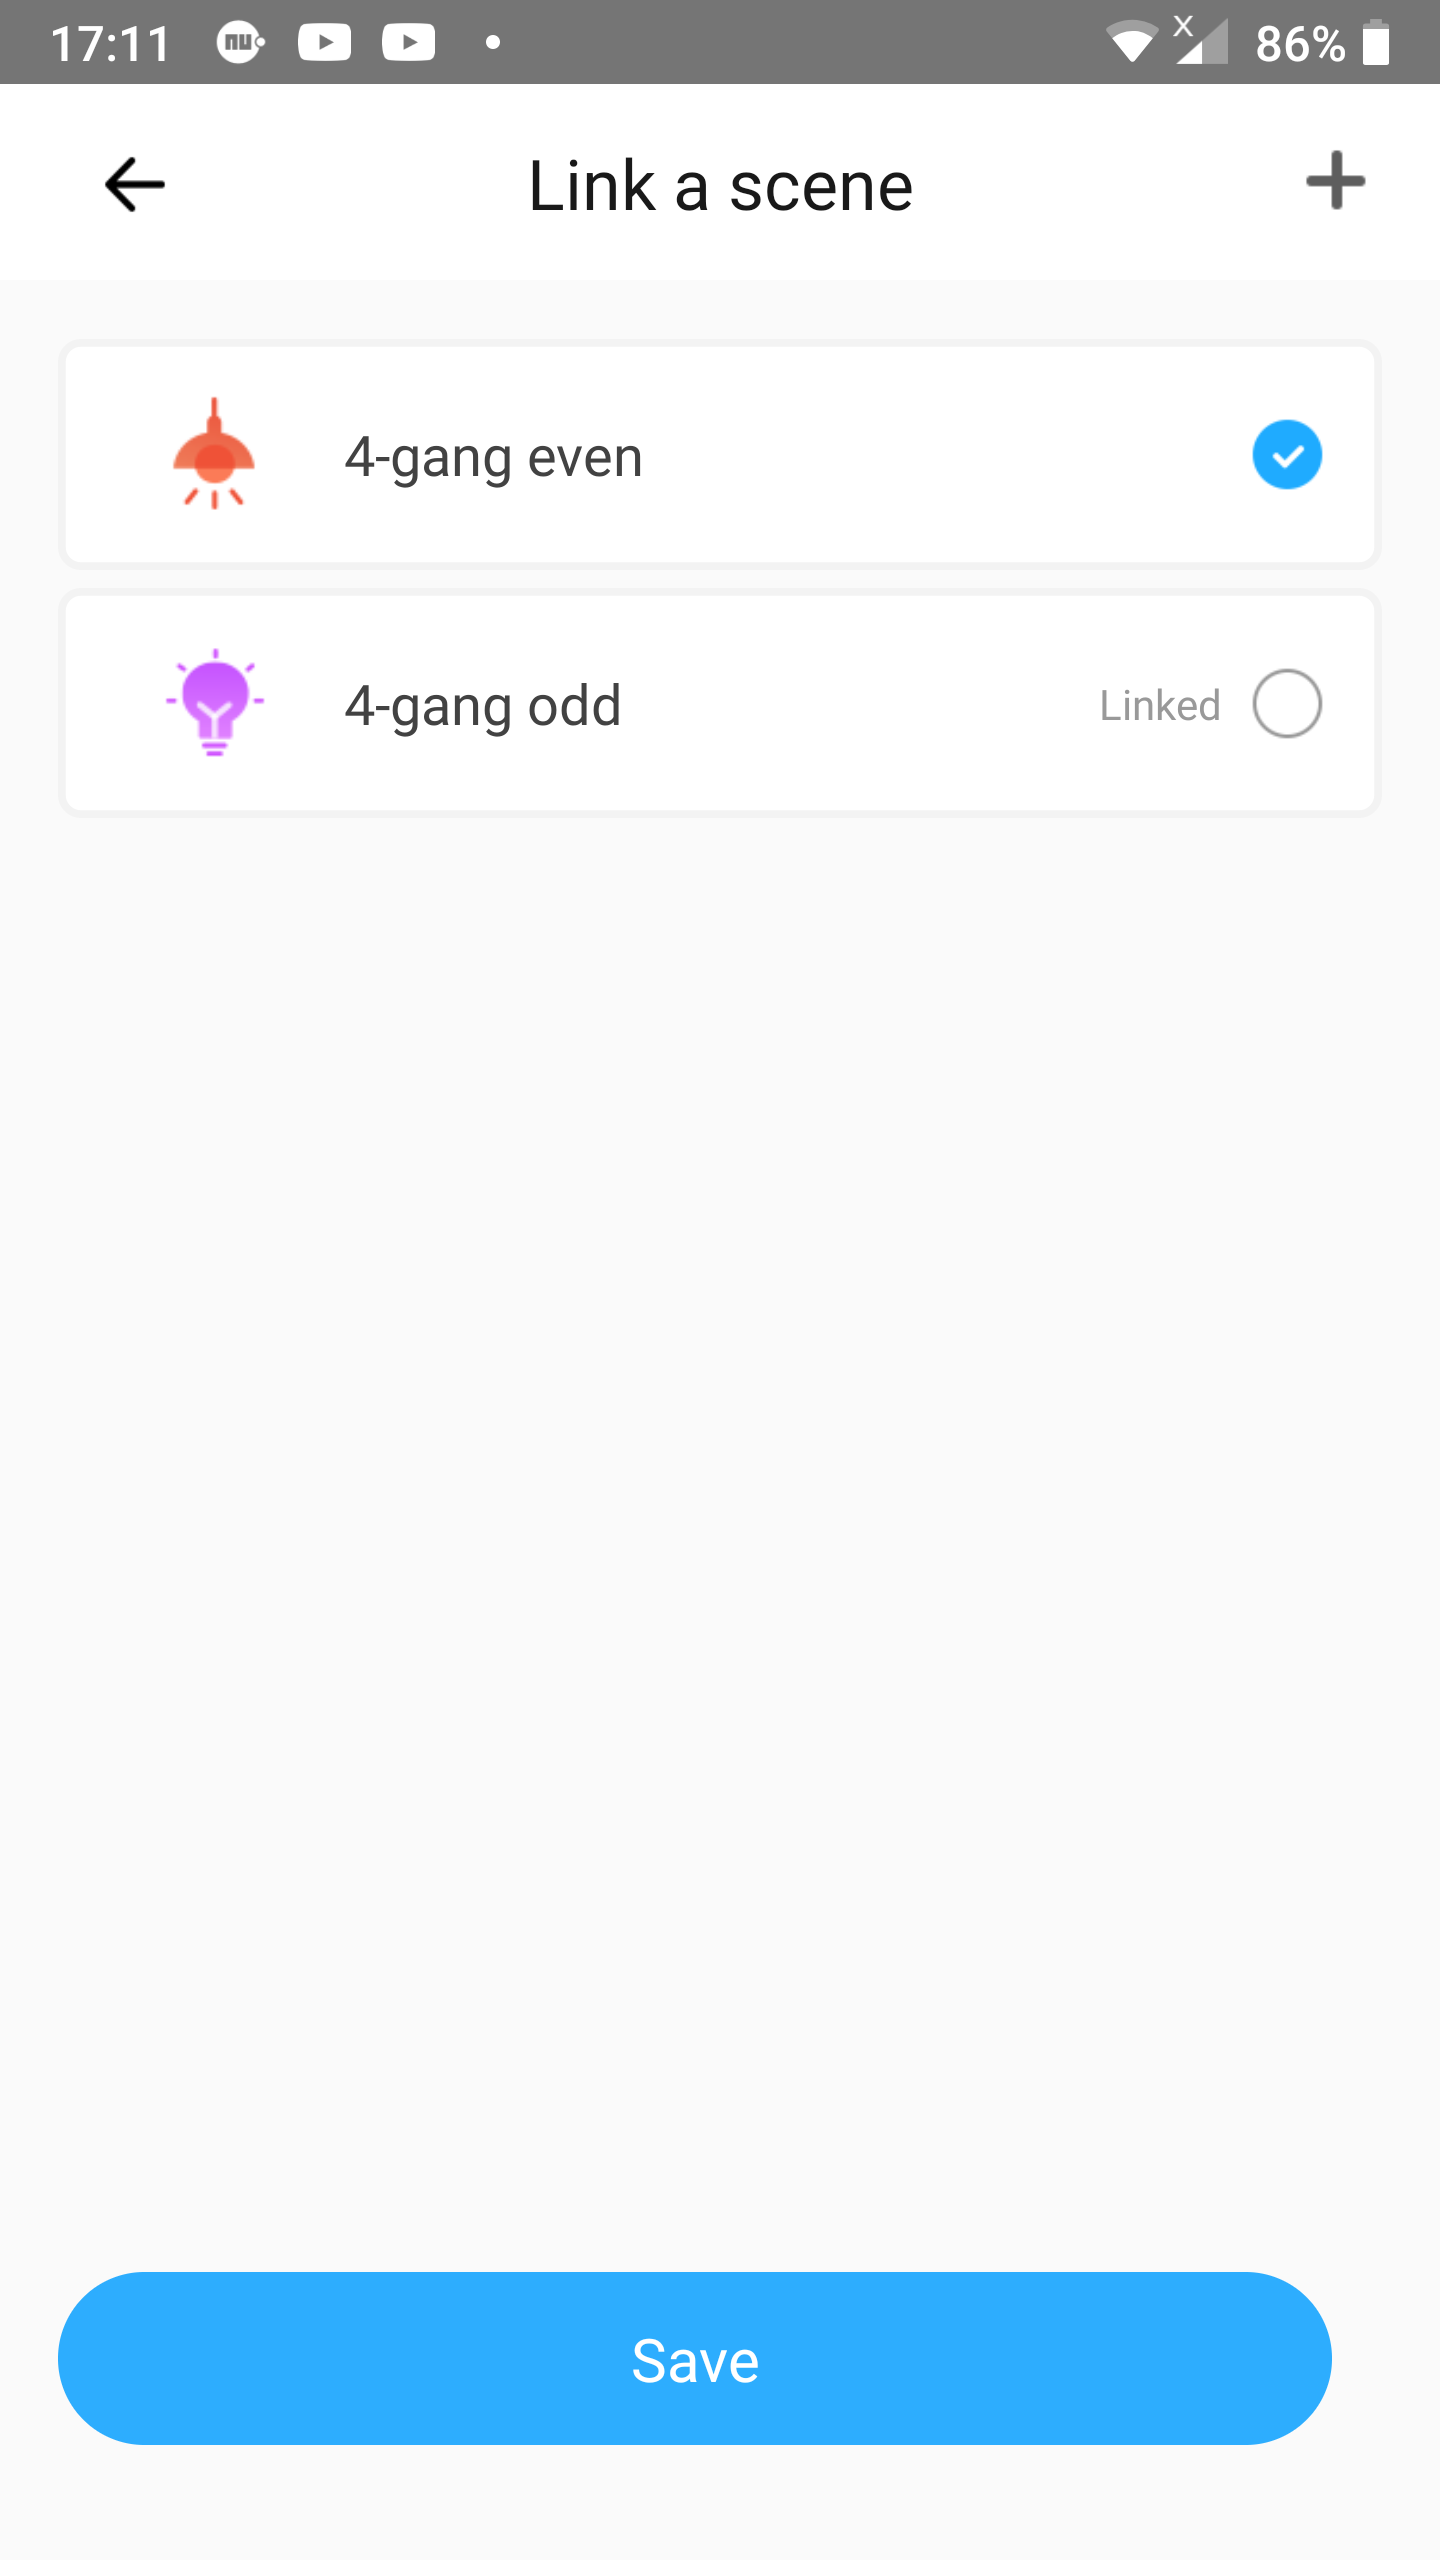
Step 4
- A checkmark will appear after the selected scene.
- Tap
Save.
Step 5
- The icon and name of the selected scene now will show up in the overview of linked scenes.
- Tap the bar of slot
2.
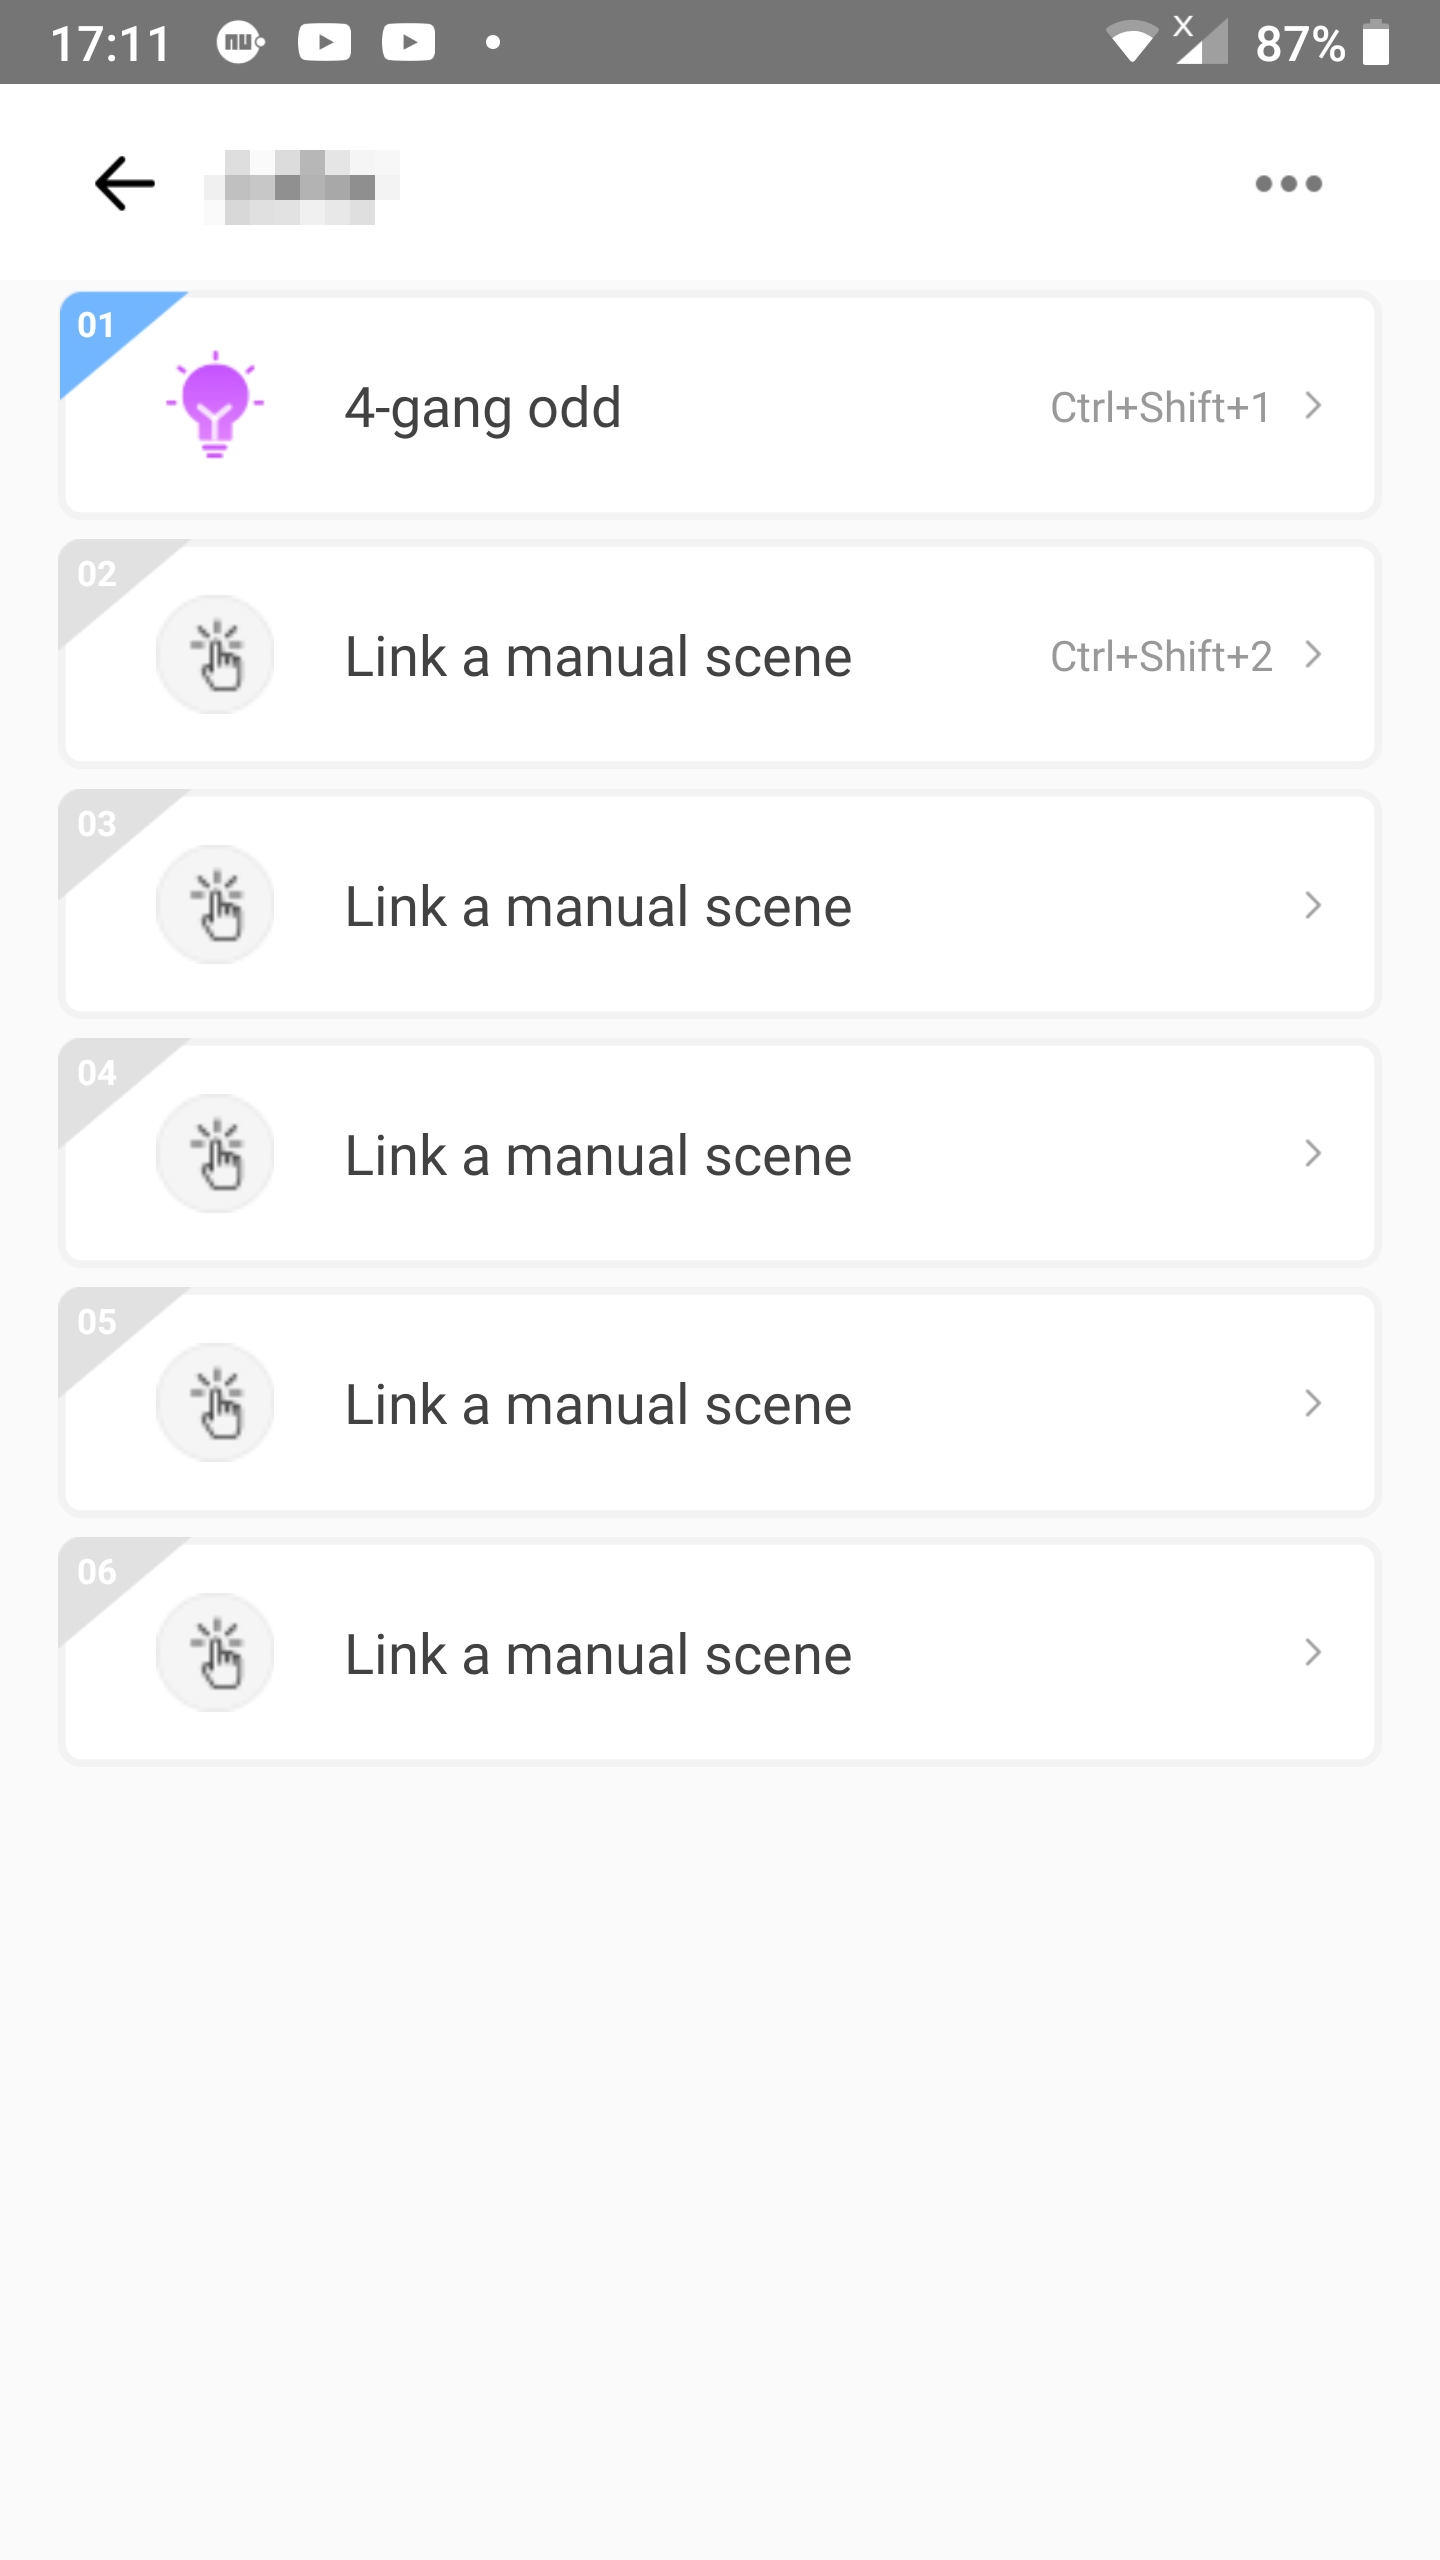
Step 6
- In the linking screen you can now see that the link we have setup before now has an
Linkedindication. This help you to identify which scenes are already linked. - Tap the second scene you want to link.
- In our example we choose
4-gang even.
- In our example we choose
Step 7
- A checkmark will appear after the selected scene.
- Tap
Save.
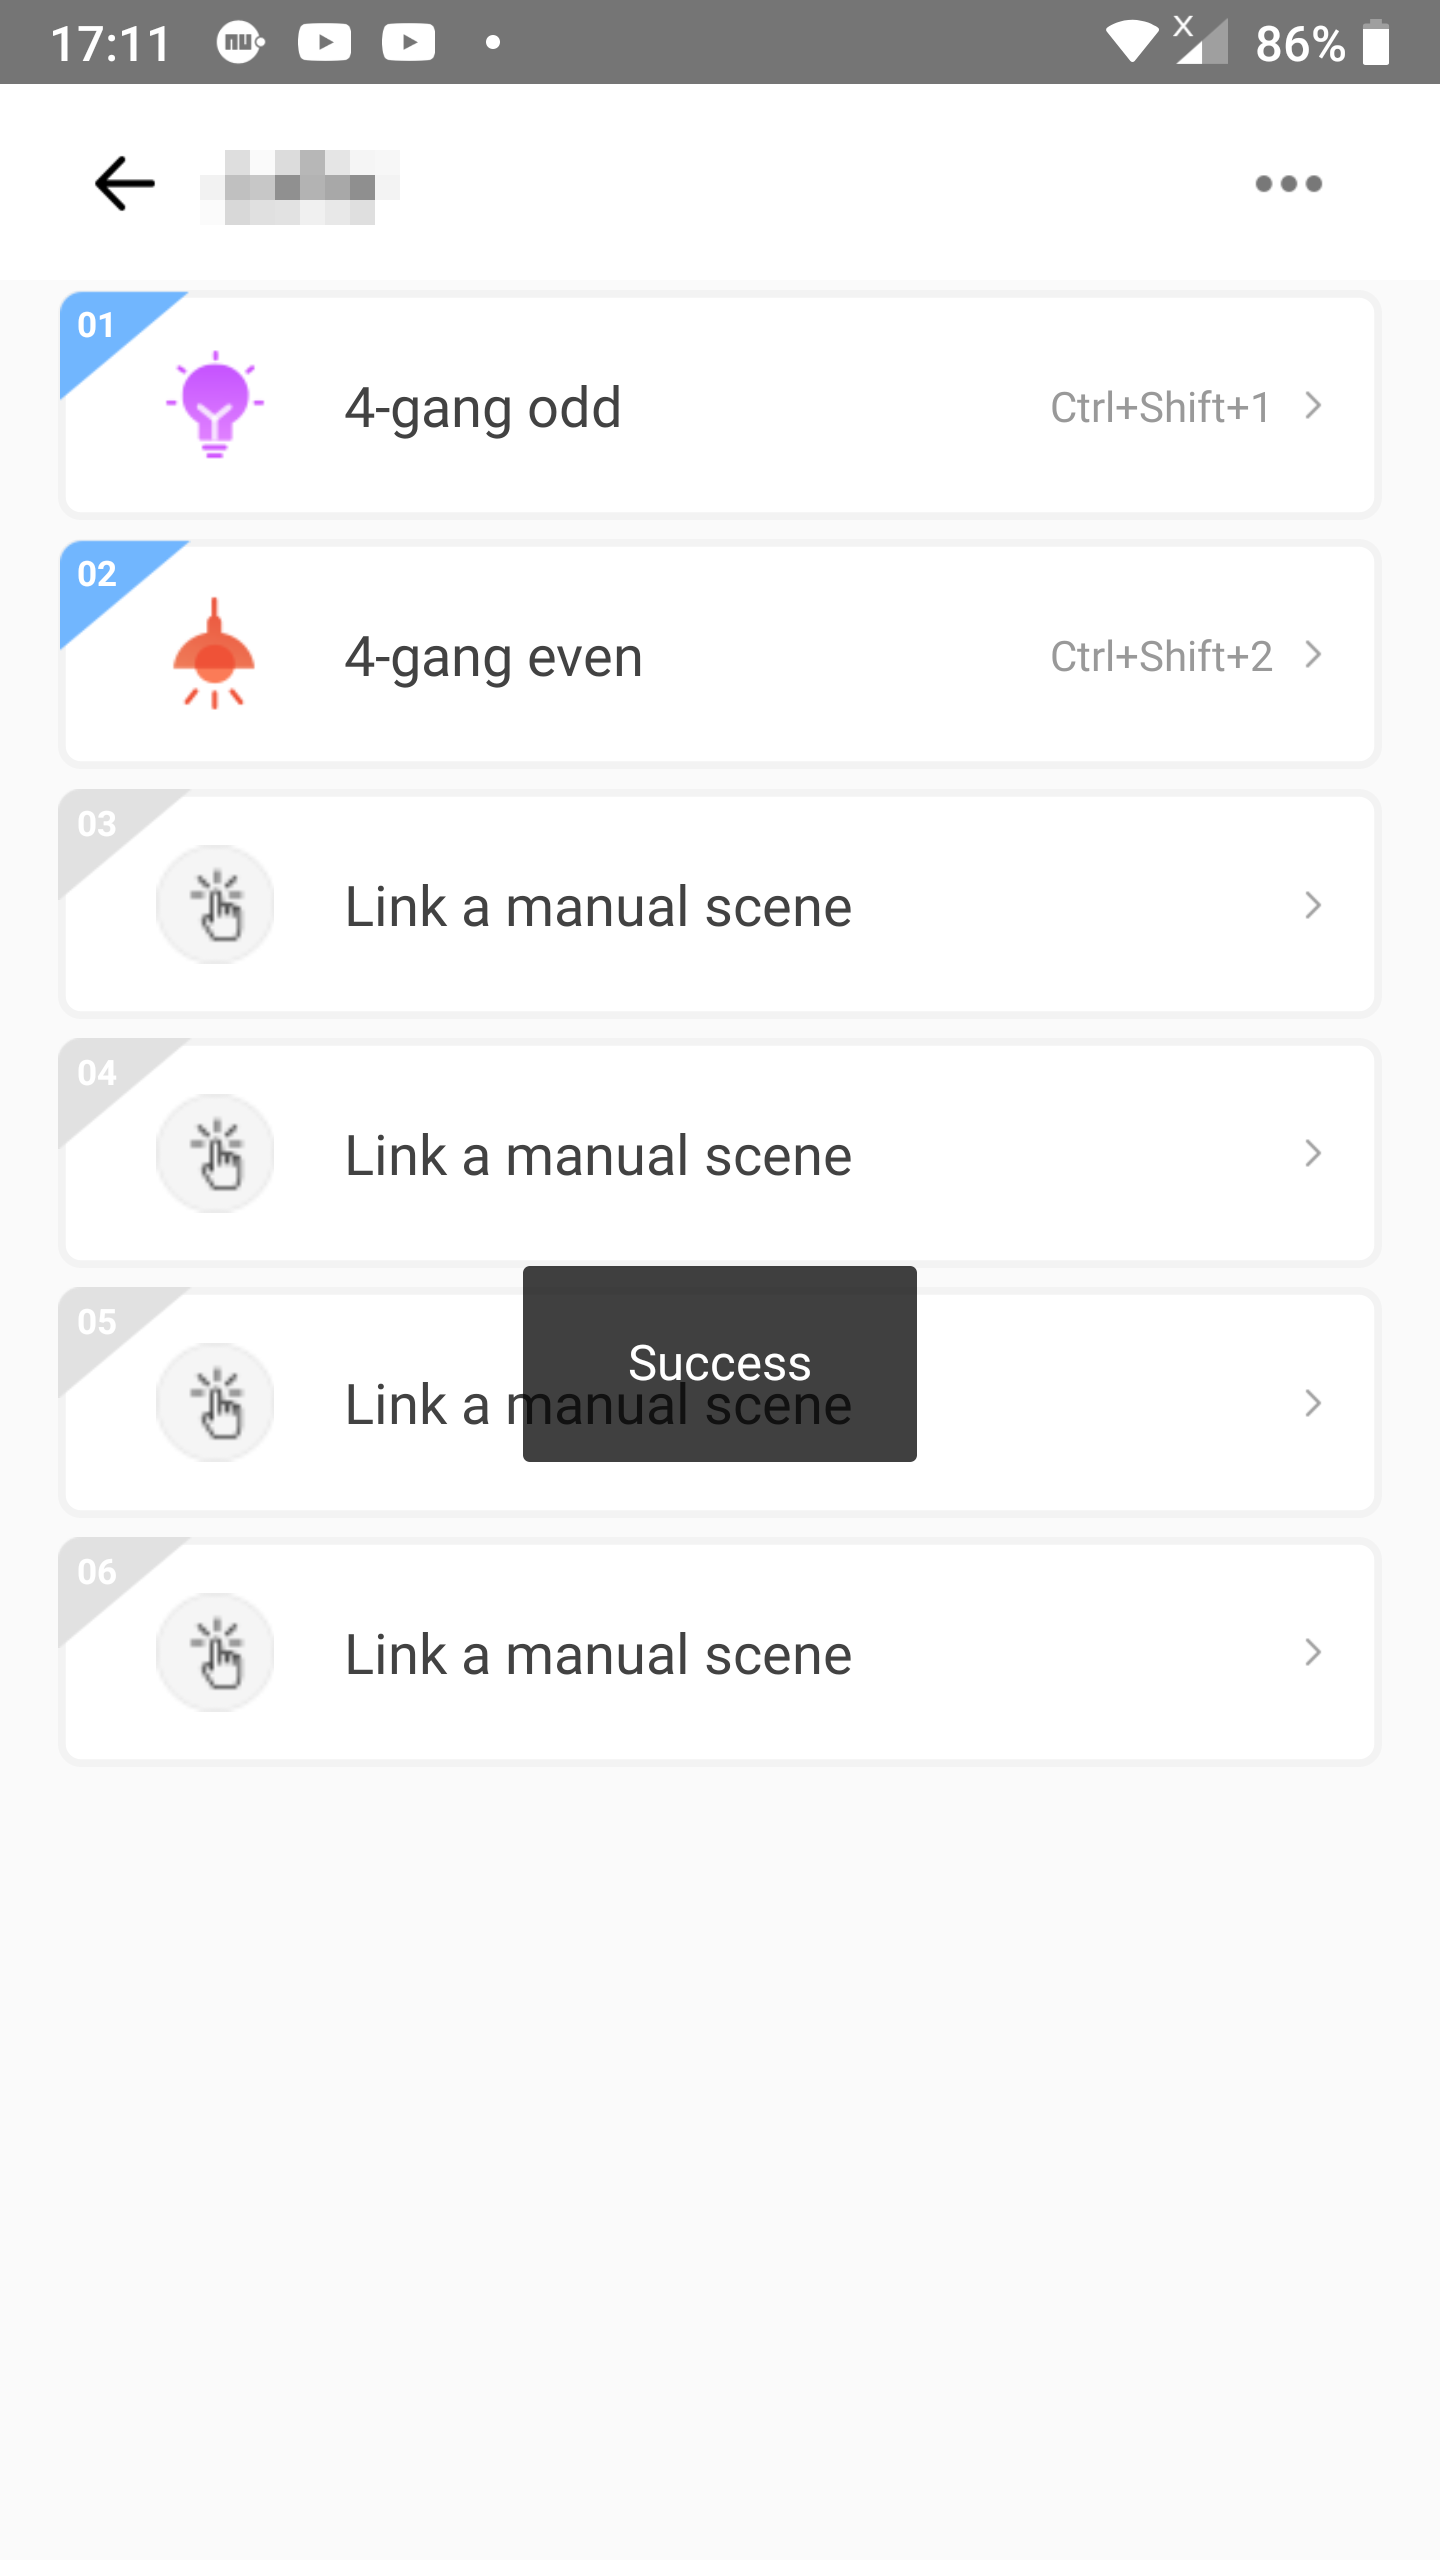
Step 8
- Now both scenes we created in this tutorial are linked.
- After saving a scene linkage a toad message with
Successis shown.
Linking the scenes from the eWeLink app to the shortcuts at the eWeLink Keyboard application is now complete.
Using eWeLink Keyboard
Now you are ready to use the keyboard shortcuts.
Step 1
- It doesn’t matter whether you leave the eWeLink Keyboard application opened or closed to the system tray: the keyboard shortcuts will keep on working as ling as you leave the application open in either the forground or background. To minimize to the system tray you can click the
Xicon in the upper right corner. The advantage of leaving the application open is that you can see status messages (see step 3). - If the linked scenes do not show up you might need to click the
Refreshbutton at the top of the application. - Now press the buttons
CTRL+SHIFT+1on your keyboard all together.
Step 2
- You will see that the odd lights (
1and3) connected to the 4-gang switch will light up.
Step 3
- Now press
CTRL+SHIFT+2all together on your keyboard. - If the scene gets executed succesfully and you left the eWeLink Keyboard application open you will see a toad message saying
Scene performed succesfully..
Step 4
- You now will see that the odd lights (
1and3) went off. - You will also see the even lights (
2and4) went on.
You now know how to operate your eWeLink supported devices with your computer keyboard.
All steps completed
Congratulations!
You can create 4 more shortcuts with an eWeLink VIP subscription.
You must be logged in to post a comment.