Usability: device
Quick jump to: Homescreen, Swiping to go to other screens, Screen settings, Thermostat interface, Widgets, Other thoughts
The operation on the Sonoff NSPanel itself works quite nice. As written before in this review the screen is a touchscreen which makes operating the device quite easy. But not every operation on the touchscreen is intuitive. Also the interface can not be localized: it is in English only.
The buttons feel sturdy but due the little feedback it feels you need to press a little bit hard.
Homescreen
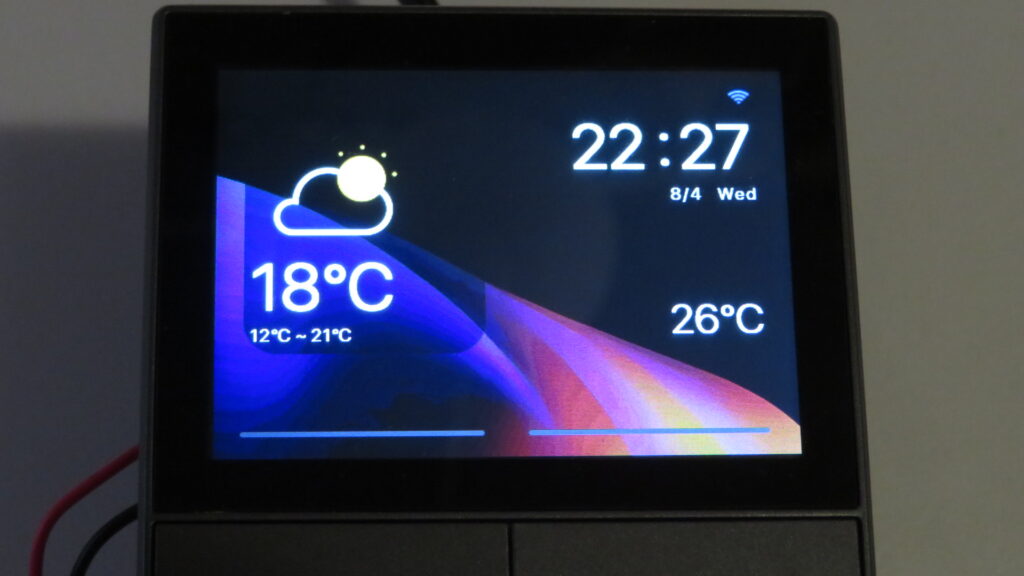
The homescreen shows you the current weather (powered by AccuWeather), WiFi signal strength, time, date, current measured temperature, channel 1 indicator and channel 2 indicator.
At the homescreen you would expect you can press each element to view more information about it or to execute a command. The fact is tapping on any element of the homescreen does nothing at all. I suggested the following features to ITEAD for the homescreen:
- Tap the weather icon to go to a screen with a weather forecast for 3 to 5 days.
- Show a calendar when tapping the time or date.
- Show the thermostat interface when tapping on the measured temperature in the lower right corner.
The background image of the homescreen can not be changed. It would be a great feature if people can change the background to personalize the NSPanel. I suggested this to ITEAD but so far they don’t want to change this.
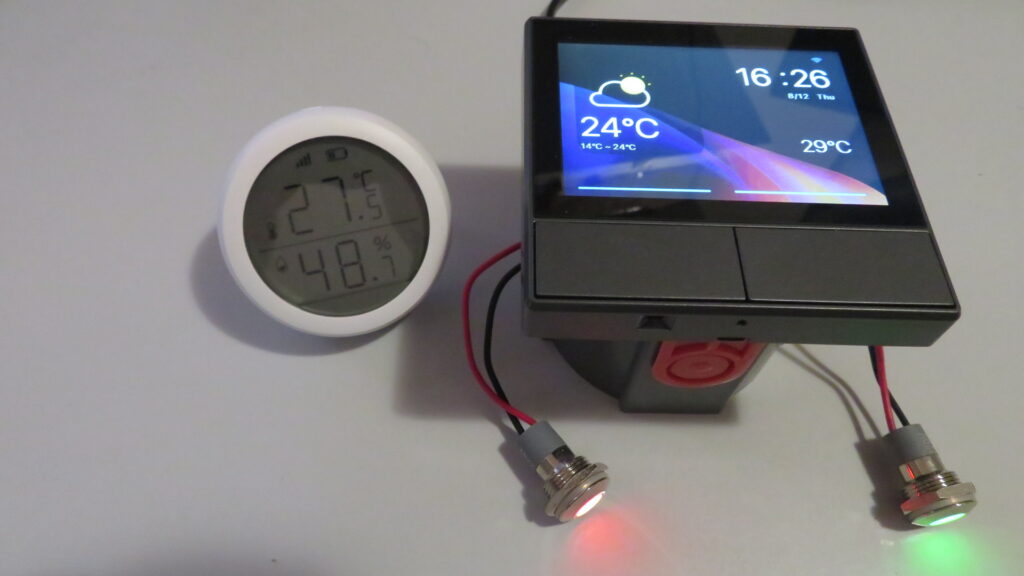
The temperature sensor seems to measure the temperature incorrectly. It shows a temperature that varies between 0.5 to 2.5 degrees Celsius higher than my Zigbee temperature sensor measures. I have the feeling it is measuring its own produced heat although the panel doesn’t feel warm.
Another thing to mention is the gray or blue bars at the bottom on the screen. At first sight you would expect you can press these bars to turn the respective channel on or off, but that doesn’t happen. Each channel can only be operated with the hardware buttons below the bars or the eWeLink app. The bar only indicates the state of each channel. I suggested to ITEAD to make it possible to tap the bars to toggle the state of each channel. ITEAD answered that they only intended to show the status of both channels in this way.
At last the shown time was incorrect. At the moment the photo is taken it actually was 11:33 AM. The clock differed 1 hour into the future. Currently at my country daylight savings is in effect and without daylight savings I would expect the time will differ even 2 hours. There is no way to setup the time and date manually: both the Sonoff NSPanel and the eWeLink app do not offer a feature for this. I have reported the issue to ITEAD and at least for my Sonoff NSPanel this issue is solved now.
If ITEAD would further improve the homescreen with completely new features it would be great if they allow you to place some mini indicators on the homescreen which can show data from other devices (e.g. temperature, humidity, power consumption from the Sonoff TH10, Sonoff TH16, Sonoff SNZB-02, Sonoff POWR3, Sonoff DUALR3, etc.), show whether a (group of) light(s) is switched on or off (yellow or grey lightbulb), etc.
Swiping to go to other screens
To open other screens with other features you can swipe on the screen. The manual describes the following official swipe actions:
- Swipe from top to bottom: open screen brightness settings and sleep timeout
- Swipe from left to right: open thermostat interface
- Swipe from right to left: open widgets
There is no action linked to a swipe from bottom to top.
Swiping doesn’t have animations. If it had it would be more clear wether you succesfully swiped, because on rare moments it didn’t catch the swipe. Luckily that doesn’t happen that often that it would frustrate you. Just swipe again on such moments and it will track your swipe action correctly.
Screen settings
Swiping from top to bottom opens up the screen settings with 2 bars: a slider for the brightness and a button to go to a settings page to define the sleep timeout to let the screen automatically go from bright to dimmed.
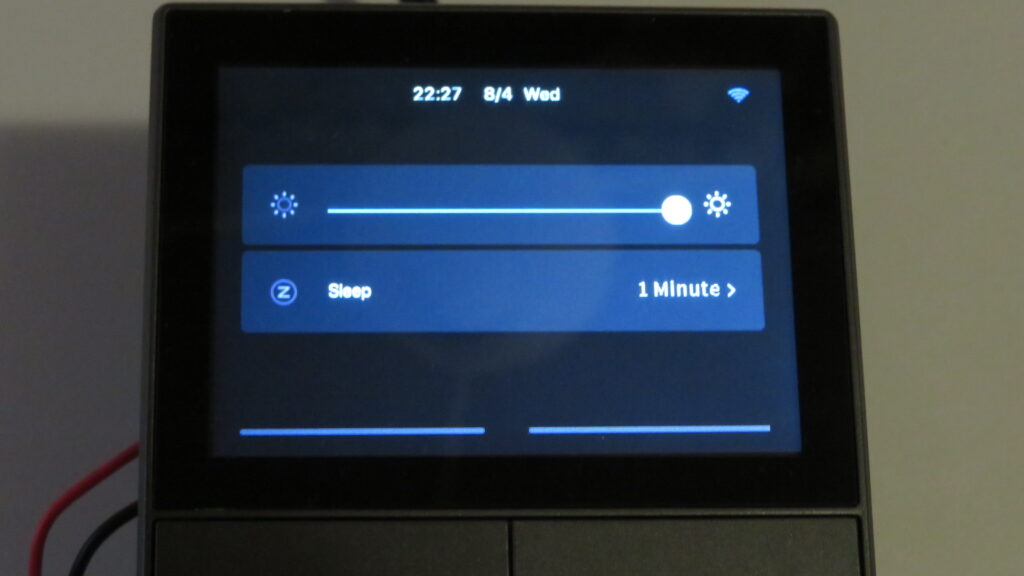
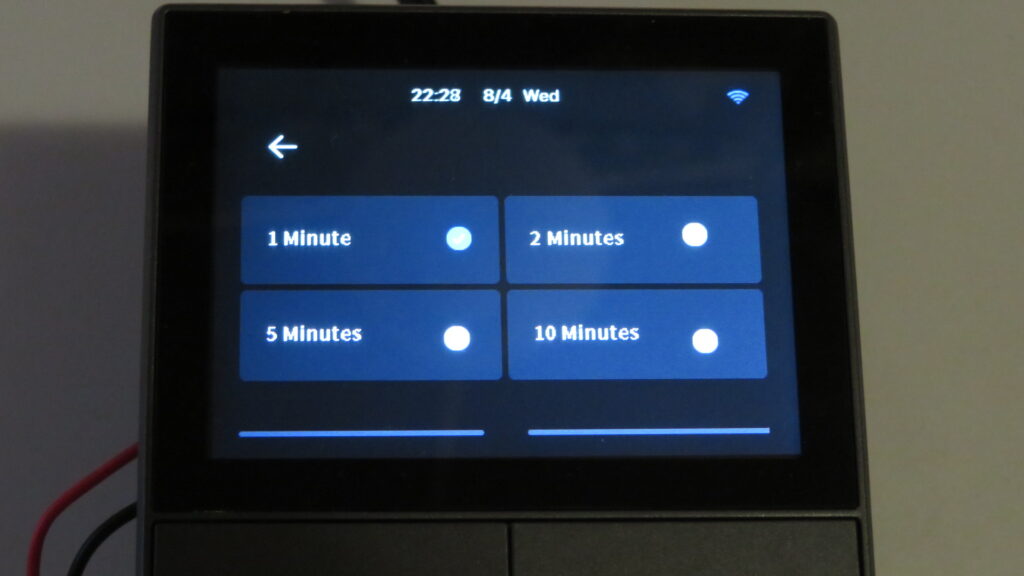
The dimming timeout can be set to 1 Minute, 2 Minutes, 5 Minutes and 10 Minutes. It can not be set to “Always on” which would have been a nice feature. Although the opposite is possible (completely turn off display) by enabling Enery-saving mode at the Device Settings within the eWeLink app.
When the screen goes off during Energy-saving mode the screen only goes back on when tapping on the screen or disabling the Energy-saving mode. Pressing the hardware buttons will not turn the screen on during Energy-saving mode. This can be nice if you install the NSPanel at a bedroom where you want to keep a black screen on the NSPanel.
Thermostat interface
Swiping from left to right brings up the thermostat interface. The Sonoff NSPanel is not an exact thermostat but you can almost let it act as a 110V – 240V wet contact relais thermostat.
In my opinion it would be better if at least the temperature that has been set is also shown on the homescreen and even best if you can operate the thermostat with - and + buttons on the homescreen.
At the eWeLink app you define which eWeLink compatible device should be driven by the NSPanel thermostat. This can be any device that can be switched on or off. So even the channel connections on the NSPanel itself can be used for this. You also define whether the chosen device is a heater or a cooler. You can’t remove the last chosen device but you can decide to turn off the thermostat feature.
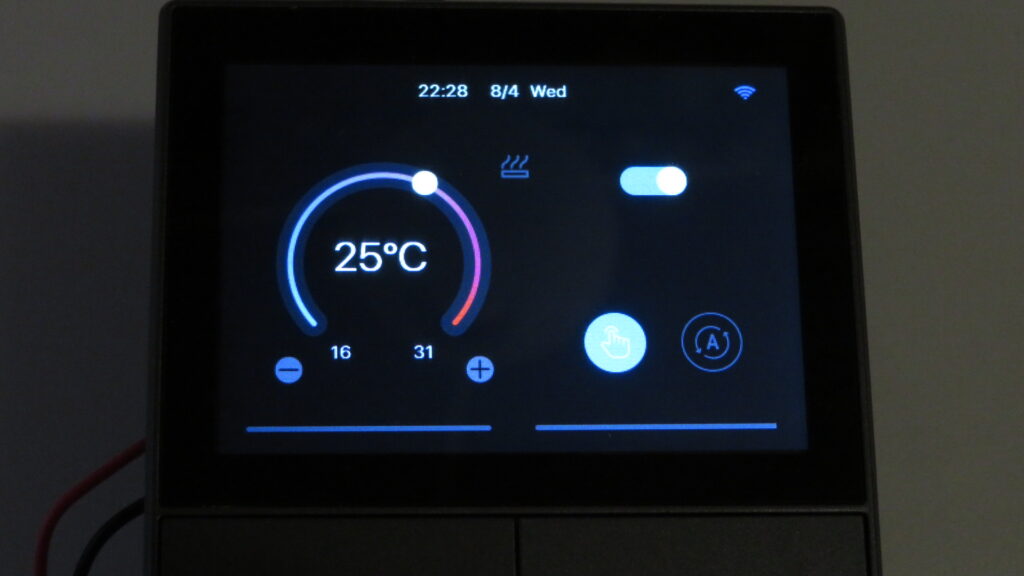
At the photo you can see the left part of the thermostat interface allows you to set the temperature. You can either tap and move on the circle or press the - or + buttons.
In the middle a heating or cooling icon indicates whether the device, that has been choosen as heater or cooler, has been activated.
At the right you see 3 buttons. The top one can be used to turn on or off the thermostat feature. The device driven by the thermostats keeps on the latest state and won’t be affected by the thermostat anymore when you choose to turn off the thermostat feature. The hand button enables you to set the thermostat to manual mode and the A button (with the arrows around it) enables you to set the thermostat mode to automatic. The latter one is actually a schedule feature. You configure the thermostat schedule at the eWeLink app.
The thermostat feature works quite well. Although at one moment the selected heating device didn’t get switched on when asking to heat. After choosing another device at the eWeLink app and then set it back to the first chosen device it worked like how it should work.
Widgets
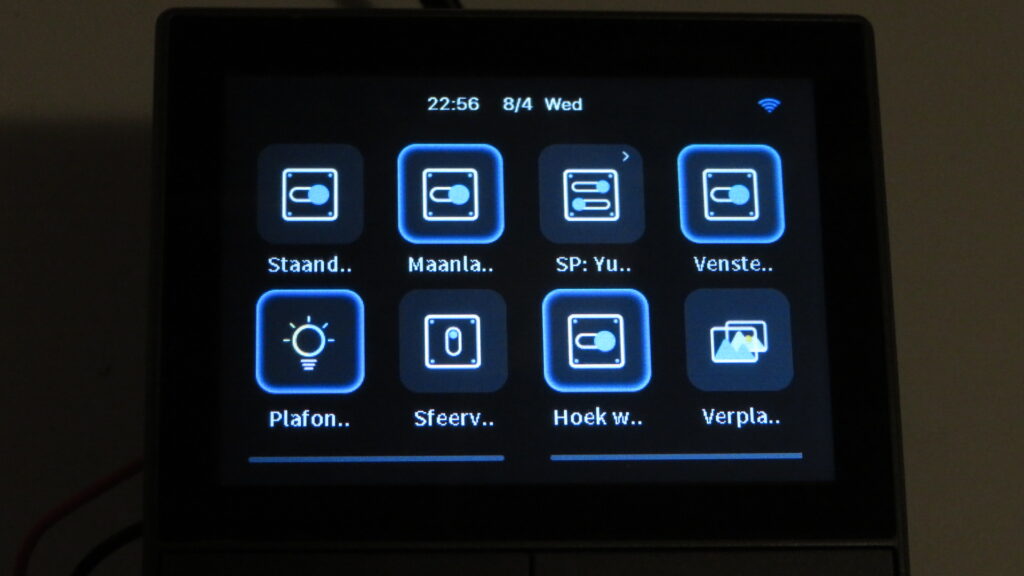
One of the nice features of the Sonoff NSPanel is the widgets feature. This screen can be called by swiping from right to left on the homescreen.
With the widgets feature you can control devices and initiate tap-to-perform scenes (manual scenes). Regarding devices mainly on/off devices and lights are supported. Also a lot (but not all) multichannel devices are supported. I experienced the Sonoff DUALR3 (which is also a 2-gang device) is not supported to show as device at the widgets screen.
Then I’ve tried to add the Sonoff TH10 as a widget but the Sonoff NSPanel only allowed me to switch on or off the connected peripheral. I advised to ITEAD to support the display of measurement values of such devices. Their answer was that they will evaluate my need for this.
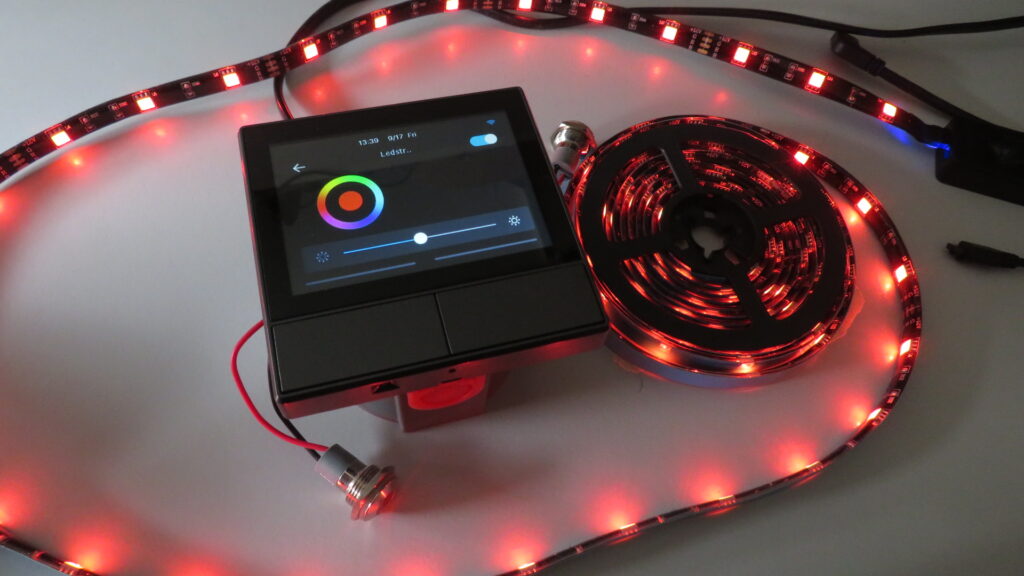
I also tested the Sonoff L1 RGB ledstrip which worked fine. Although operation is only about the color, not color scenes.
At last I’ve tried to add a Centechia Zigbee temperature & humidity sensor (with display) as well as a Sonoff S26R2ZB to the widgets but both do not show up in the selection list.
The widgets screen provides room for 8 shortcuts. It would be great if ITEAD and eWeLink are working at the option to use more widgets screens and increase the amount of slots available. I have suggested ITEAD to increase the amount of widget slots. ITEAD replied that they will implement more widget slots if there is enough demand for it.
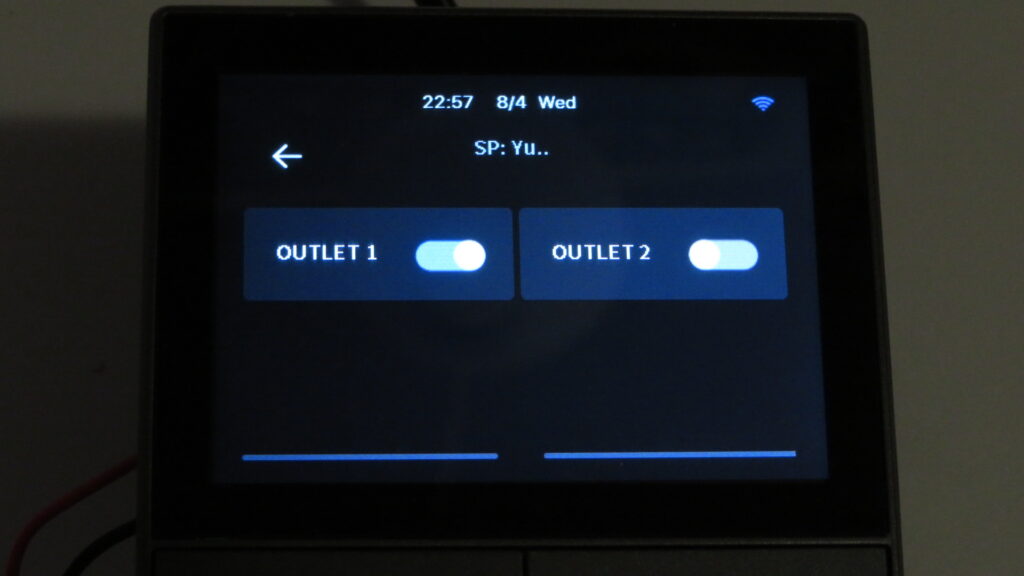
Most multichannel devices are supported. At the image on the right you see the interface for a 2-gang switch. In this case we used our eWeLink sample device: the YueLSmart 2Ch 433 Mhz. As said: I tried to add my Sonoff DUALR3 but is not showed at the list of devices that can be added to the widgets screen.
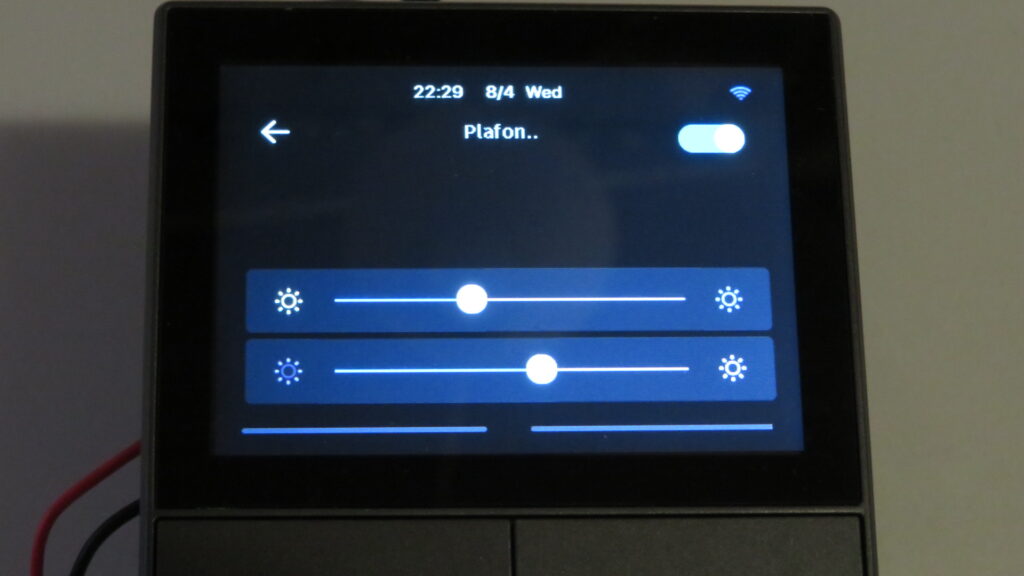
I also tried my eWeLink sample light bulb (brandless, but in the eWeLink app identified as FortuneShip FS-1) at the widgets screen and that works fine. It allows me to set the color temperature (top bar) and intensitiy (lower bar). The button at the top right turns the light bulb on and off.
My Sonoff L1 ledstrip works great too with the Sonof NSpanel. You can not set the color scenes but it does allow you to change the color and light intensity.
Other thoughts
Something I miss at the Sonoff NSPanel is a settings menu where also technical information is shown. That screen could show things like the connected WiFi network (SSID), the gained IP address,the MAC address of the Sonoff NSPanel, device ID of the Sonoff NSPanel, WiFi signal strength in dBm (with perhaps a colored indicator to tell whether the value is good or bad to have a nice troubleshooter feature), firmware version number, update feature, etc. The screen could then be called with a swipe from bottom to top (this swipe hasn’t been assigned to a screen or action yet). ITEAD isn’t convinced of the need for such a screen.